Инструкция для Sony MVC-FD7
 1
1 2
2 3
3 4
4 5
5 6
6 7
7 8
8 9
9 10
10 11
11 12
12 13
13 14
14 15
15 16
16 17
17 18
18 19
19 20
20 21
21 22
22 23
23 24
24 25
25 26
26 27
27 28
28 29
29 30
30 31
31 32
32 33
33 34
34 35
35 36
36 37
37 38
38 39
39 40
40 41
41 42
42 43
43 44
44 45
45 46
46 47
47 48
48 49
49 50
50 51
51 52
52 53
53 54
54 55
55 56
56 57
57 58
58 59
59 60
60 61
61 62
62 63
63 64
64 65
65 66
66 67
67 68
68 69
69 70
70 71
71 72
72 73
73 74
74 75
75 76
76 77
77 78
78 79
79 80
80 81
81 82
82 83
83 84
84 85
85 86
86 87
87 88
88 89
89 90
90 91
91 92
92 93
93 94
94 95
95 96
96 97
97 98
98 99
99 100
100 101
101 102
102 103
103 104
104 105
105 106
106 107
107 108
108 109
109 110
110 111
111 112
112 113
113 114
114 115
115 116
116 117
117 118
118 119
119 120
120 121
121 122
122 123
123 124
124 125
125 126
126 127
127 128
128 129
129 130
130 131
131 132
132 133
133 134
134 135
135 136
136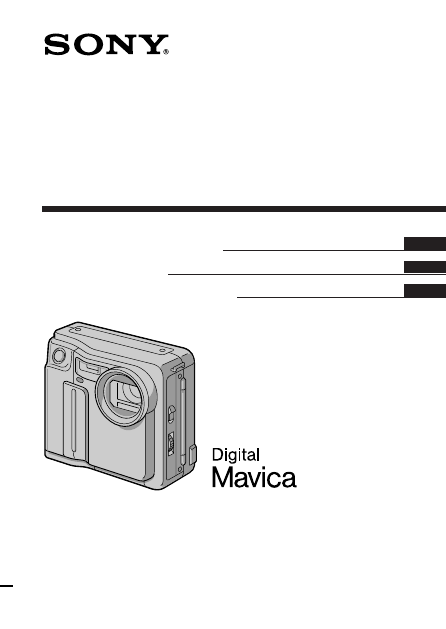
Оглавление инструкции
- Страница 1 из 137
3-860-624-15 (1) Digital Still Camera Operating Instructions Mode d'emploi Manual de instrucciones MVC-FD7 MVC-FD5 MVC-FD7 ©1997 by Sony Corporation EN F ES
- Страница 2 из 137
English Operating instructions Before operating the unit, please read this manual thoroughly, and retain it for future reference. WARNING To prevent fire or shock hazard, do not expose the unit to rain or moisture. This symbol is intended to alert the user to the presence of uninsulated “dangerous
- Страница 3 из 137
CAUTION Never expose the battery pack to temperatures above 140°F (60°C), such as in a car parked in the sun or under direct sunlight. TO PREVENT ELECTRIC SHOCK, DO NOT USE THIS POLARIZED AC PLUG WITH AN EXTENSION CORD, RECEPTACLE OR OTHER OUTLET UNLESS THE BLADES CAN BE FULLY INSERTED TO PREVENT
- Страница 4 из 137
NOTICE FOR THE CUSTOMERS IN THE UNITED KINGDOM A moulded plug complying with BS 1363 is fitted to this equipment for your safety and convenience. Should the fuse in the plug supplied need to be replaced, a 5 AMP fuse approved by ASTA or BSI to BS 1362, (i.e., marked with 2 or @ mark) must be used.
- Страница 5 из 137
Table of contents Be sure to read before using your camera Before using your camera 7 6 Getting started Preparation 9 Step 1: Charging the battery pack 10 Step 2: Installing the battery pack 11 Step 3: Setting the date and time 13 Basic operations Recording images 16 The indicators during recording
- Страница 6 из 137
Be sure to read before using your camera Checking supplied accessories (see page 9) Digital still camera (1) Power cord (1 set) Shoulder strap (1) Battery charger (1) NP-F530 battery pack (1) Lens cap (1) (MVC-FD7 only) Image recording format on this camera The image data recorded with this camera
- Страница 7 из 137
Before using your camera This digital still camera uses a floppy disk as media. Use the following floppy disk type. • Size: 3.5 inch • Type: 2HD • Capacity: 1.44 MB • Format: MS-DOS format (512 bytes × 18 sector) When using 3.5 inch, 2HD floppy disk other than described above, format it using the
- Страница 8 из 137
÷ Before using your camera •The instructions in this manual are for the two models listed below. Before you start reading this manual and operating the unit, check your model number by looking at the bottom of your camera. •The MVC-FD7 is the model used for illustration purposes. Otherwise, the
- Страница 9 из 137
Preparation What you need Digital Still Camera Battery pack (NP-F530) Battery charger (BC-V615) (MVC-FD7) Floppy disk (not supplied) 3.5 inch, 2HD (1.44 MB) Power cord Shoulder strap Lens cap (MVC-FD7 only) Preparation outlines The clock is not set at the factory. Be sure to set the clock before
- Страница 10 из 137
Step 1: Charging the battery pack To charge the battery pack, use the battery charger. For details, refer to the instruction manual of the battery charger. to wall outlet 1 Battery pack 2 CHARGE lamp (orange) Battery charger 1 Connect the power cord to a wall outlet. 2 Insert the battery pack in
- Страница 11 из 137
Step 2: Installing the battery pack 1 2 (base) 3 2 1 1 While sliding OPEN (BATT) in the direction of the arrow, open the battery cover. 2 Insert the battery pack with the $ mark facing toward the battery compartment. 3 Close the cover until it clicks. To remove the battery pack Open the battery
- Страница 12 из 137
÷ Step 2: Installing the battery pack Battery life/No. of images that can be recorded/ played back MVC-FD5 Continuous recording Unusing the flash* Using the flash** Continuous playing*** Battery life (min.) No. of images (record/playback) 95 (80) 85 (75) 125 (110) 540 (450) 320 (280) 750 (650)
- Страница 13 из 137
Step 3: Setting the date and time Function of the control button You can select an item in the menu which appears on the LCD screen by pressing the upper, lower, left or right side of the control button. When an item is selected, the color of the item changes from blue to yellow. To enter your
- Страница 14 из 137
÷ Step 3: Setting the date and time 2 Select “MENU” with the control button, then press it. The menu appears on the LCD screen. To cancel menu screen, select “ RETURN” with the control button, then press it. –EV MENU +EV 3 Select “CLOCK SET” with the control button, then press it. CLOCK SET BEEP
- Страница 15 из 137
5 Select the date and time with the control button, then press it. The item to be changed is indicated with 4/$. Select number by pressing the upper side or lower side of the control button, then press it to enter the number. After entering the number, 4/$ moves to the next item. When “D/M/Y” is
- Страница 16 из 137
Recording images 3.5 inch, 2 HD (1.44 MB), MS-DOS format floppy disk is necessary for recording. 7,8 1 ACCESS lamp BRIGHT (brightness of the LCD screen) +/– button 5,6 Macro switch (MVC-FD5 only) 4 (MVC-FD5) 3 2 DISPLAY button 1 Remove the lens cap. (MVC-FD7 only) 2 Slide POWER down to turn on the
- Страница 17 из 137
5 Insert the floppy disk until it clicks. Before inserting, check that the write protect tab set to the recordable position. 6 Close the cover. The image appears on the LCD screen. W –EV MENU 7 T STD 11 +EV 120min Image quality indicator Remaining disk capacity indicator No. of recorded images AE
- Страница 18 из 137
÷ Recording images The number of images you can record on a floppy disk The number of images you can record is different depending on which image quality mode you select and subject complexity. STANDARD FINE about 30 – 40 images about 15 – 20 images Change the disk when the remaining disk capacity
- Страница 19 из 137
The indicators during recording The indicators on the LCD screen are not recorded. Flash indicator Manual focusing (MVC-FD7 only) Program AE indicator (MVC-FD7 only)/Macro shooting indicator (MVC-FD5 only) Exposure/Zoom indicator* (MVC-FD7 f W T only) SEPIA Picture effect indicator (MVC-FD7 only)
- Страница 20 из 137
÷ Recording images Adjusting the brightness of the LCD screen Use the BRIGHT +/– button. Flash/Zoom/Self-timer Zoom (MVC-FD7) “T” side: for telephoto (subject appears closer) “W” side: for wide-angle (subject appears farther away) FLASH CHARGE lamp Flash Press FLASH. When the blinking FLASH CHARGE
- Страница 21 из 137
Adjusting the exposure Select “+EV” or “–EV” with the control button, then press it to select the desired value. To raise the exposure value (brighten the picture): +EV To lower the exposure value (darken the picture): –EV Selected value +1.5EV –EV MENU +EV • The EV (exposure value) can be adjusted
- Страница 22 из 137
Watching images on the LCD screen ACCESS lamp 3 2 4 1 1 Slide POWER down to turn on the power. 2 Slide OPEN in the direction of the arrow and open the floppy disk cover. 3 Insert the floppy disk until it clicks, then close the cover. 4 Set PLAY/CAMERA to PLAY. The last recorded image appears on the
- Страница 23 из 137
Note When the ACCESS lamp is flashing, never shake or strike the unit. As well do not open the floppy disk cover, turn the power off or remove the battery pack. The indicators during playback Image number Image quality indicator STD 11/11 MVC-011S MENU INDEX 1997 7 4 12:30PM 120min Remaining disk
- Страница 24 из 137
÷ Watching images on the LCD screen Playing back 6 recorded images at a time (INDEX screen) Select “INDEX” with the control button, then press it. The ” mark appears on the image that is displayed before changing to INDEX screen mode. STD 11/11 ÷ MVC-011S MENU INDEX 1997 7 4 12:30PM 120min 7 8 10
- Страница 25 из 137
Protecting images To prevent accidental erasure, you can protect the image. In SINGLE screen mode 1 2 Display the image you want to protect. Select “MENU” with the control button, then press it. The menu appears on the LCD screen. To cancel menu screen, select “ RETURN” with the control button,
- Страница 26 из 137
÷ Watching images on the LCD screen To cancel protection of the image Select “OFF” in step 4 with the control button, then press it. Note When you format the disk, the contents of the whole disk, including the protected image data, are erased. In INDEX screen mode—Protecting all or selected images
- Страница 27 из 137
4 Protecting all the images 1 Select “ALL” with the control button, then press it. 2 Select “OK” with the control button, then press it. PROTECT ALL ? OK CANCEL The screen returns to the index screen. When you cancel the menu screen, H appears on the upper left side of all the images. Protecting
- Страница 28 из 137
÷ Watching images on the LCD screen To cancel protection of the image in INDEX screen mode Follow the procedures of “Protecting selected images”. In step 2, select the images you want to cancel protection with the control button, then press it. The “H” indicator at the upper left side of the image
- Страница 29 из 137
3 Select “DELETE” with the control button, then press it. CLOCK SET BEEP FORMAT DISK DELETE PROTECT RETURN 4 ÷ DELETE ? OK CANCEL Select “OK” with the control button, then press it. To cancel deleting image Select “CANCEL” in step 4 with the control button, then press it. Notes • You cannot delete
- Страница 30 из 137
÷ Watching images on the LCD screen In INDEX screen mode—Deleting all or selected images 1 Select “INDEX” with the control button, then press it to enter INDEX screen mode. 7 8 10 11 MVC-011S MENU 1997 7 4 12:30PM 11/11 120min 2 Select “MENU” with the control button, then press it. The menu appears
- Страница 31 из 137
Deleting selected images 1 Select “SELECT” with the control button, then press it. “DELETE” appears on the LCD screen. 7 8 10 11 9 DELETE ENTER CANCEL 7-11 2 Use the control button to display the red ” mark at the image you want to delete. The selected image number reverses color. To cancel
- Страница 32 из 137
Viewing images using a personal computer The image data recorded with this camera is compressed in JPEG format. This data can be viewed using a personal computer which has JPEG view ability application installed such as Microsoft Internet Explorer. For detailed procedures using image data with a
- Страница 33 из 137
Changing the mode settings 1 Select “MENU” with the control button, then press it. The menu appears on the LCD screen. CAMERA mode CLOCK SET BEEP FIELD/FRAME QUALITY RETURN 2 PLAY mode CLOCK SET BEEP FORMAT DISK DELETE PROTECT RETURN Select desired item with the control button, then press it. When
- Страница 34 из 137
÷ Changing the mode settings Setting the mode of each item Items in CAMERA mode QUALITY < STANDARD*/ FINE > •Select STANDARD as a standard image quality. (about 30 - 40 images can be recorded on 1 floppy disk) •Select FINE when giving priority to image quality. (about 15 - 20 images can be recorded
- Страница 35 из 137
Items for both CAMERA and PLAY modes BEEP <ON*/OFF> Normally select ON. Select OFF to turn the beep sound off. CLOCK SET Select this item to set the date and time. See page 13. * is set at the factory. ** is setting of the FIELD/FRAME at the factory. MVC-FD5: FRAME MVC-FD7: FIELD 35-EN
- Страница 36 из 137
Using various functions for recording (MVC-FD7 only) FOCUS AUTO/ MANUAL PROGRAM AE PICTURE EFFECT FOCUS NEAR/ FAR Focusing manually 1 Set AUTO/MANUAL to MANUAL. f appears on the LCD screen. 2 Turn the NEAR/FAR dial to achieve a sharp focus. To reactivate auto focusing Set AUTO/MANUAL to AUTO.
- Страница 37 из 137
Using the PROGRAM AE function You can select one of five PROGRAM AE (Auto Exposure) modes to suit your shooting situation, referring to the following. Press PROGRAM AE repeatedly to select the desired PROGRAM AE mode. a Soft Portrait mode Creates a soft background for subjects such as people or
- Страница 38 из 137
Changing the lithium battery in the camera When the lithium battery becomes weak or dead, the “I” indicator flashes on the LCD screen. In this case, replace the battery with a Sony CR2025 or Duracell DL-2025 lithium battery. Use of any other battery may present a risk of fire or explosion. When
- Страница 39 из 137
Precautions On cleaning Cleaning the LCD screen Wipe the screen surface with a LCD cleaning kit (not supplied) to remove fingerprints, dust, etc. Cleaning the camera surface Clean the camera surface with a soft cloth slightly moistened with water. Do not use any type of solvent such as alcohol or
- Страница 40 из 137
÷ Precautions Operational temperature recommendations This camera’s operational temperature is between 32°F to +104°F (0°C to +40°C). Do not use this camera in extreme climates such as that of a hot beach or a skiing resort. Moisture condensation If the camera is brought directly from a cold to a
- Страница 41 из 137
Troubleshooting Should any problem persist after you have made those checks, consult your nearest Sony dealer. If “C: ππ: ππ” appears on the LCD screen, the self-diagnosis function has worked. See page 43. Symptom Cause and/or Solution The camera does not work. • The battery is dead. n Use a
- Страница 42 из 137
÷ Troubleshooting Symptom Cause and/or Solution The picture is too dark. • You are shooting a subject with the light source behind the subject or light is insufficient. n Adjust brightness of the image. (p.21) • The LCD screen is adjusted too dark. n Adjust brightness. (p.20, 23) Incorrect date and
- Страница 43 из 137
Self-diagnosis display The camera has a self-diagnosis display. This function displays the camera condition with fivedigits (a combination of a letter and figures) on the LCD screen. If this occurs check the following code chart. The fivedigit display informs you of the camera current condition.
- Страница 44 из 137
Specifications System Image device Lens MVC-FD5 MVC-FD7 Exposure control White balance Data compression Image capacity Image size Memory Flash 1/4-inch CCD f=4.8 mm (47 mm, when converted into a 35 mm still camera) F2.0 f=4.2 – 42 mm (40 - 400 mm, when converted into a 35 mm still camera) F1.8 –
- Страница 45 из 137
Parts identification See pages in ( ) for more details. Shutter button (16) Lens Flash emitter (20) Hook for strap Self-timer lamp (20) FOCUS AUTO/ MANUAL switch (MVC-FD7 only) (36) FOCUS NEAR/FAR dial (MVC-FD7 only) (36) Macro switch (MVC-FD5 only) (21) ACCESS lamp (17) BRIGHT +/– button (20, 23)
- Страница 46 из 137
÷ Parts identification Attaching the shoulder strap Attach the supplied shoulder strap to the hooks for strap. ÷ ÷ Warning messages Various messages appear on the LCD screen. Check them with the following list. Message Meaning DRIVE ERROR Trouble is with the disk drive. NO DISK No disk has been
- Страница 47 из 137
Index A Adjusting brightness LCD screen ...................... 20, 23 Image ...................................... 16 Adjusting the exposure .......... 21 AE (auto exposure) ................. 17 Auto power-off function ........ 12 B, C, D Battery pack ........................... 6, 9 Battery
- Страница 48 из 137
Français Mode d’emploi Avant la mise en service de cet appareil, prière de lire attentivement le mode d’emploi et de le conserver pour toute référence future. AVERTISSEMENT Pour éviter tout risque d’incendie ou de décharge électrique, ne pas exposer cet appareil à la pluie ou à l’humidité. Pour
- Страница 49 из 137
Table des matières Lisez soigneusement avant d’utiliser votre appareil Avant d’utiliser votre appareil 5 4 Préparatifs Avant de commencer 7 Etape 1: Recharge de la batterie 8 Etape 2: Mise en place de la batterie 9 Etape 3: Réglage de la date et de l’heure 11 Opérations de base Enregistrement
- Страница 50 из 137
Lisez soigneusement avant d’utiliser votre appareil Vérification des accessoires fournis (voir page 7) Appareil photo numérique (1) Cordon d’alimentation (1) Bandoulière (1) Chargeur de batterie (1) Batterie rechargeable NP-F530 (1) Capuchon d’objectif (1) (MVC-FD7 seulement) Format
- Страница 51 из 137
Avant d’utiliser votre appareil Cet appareil photo numérique utilise une disquette pour le stockage des images. Utilisez le type de disquette suivant. • Taille: 3,5 pouces • Type: 2HD • Capacité: 1,44 Mo • Format: MS-DOS (512 octets x 18 secteurs) Si vous souhaitez utiliser une disquette 2HD de 3,5
- Страница 52 из 137
÷ Avant d’utiliser votre appareil •Les instructions de ce mode d’emploi sont destinées aux deux modèles indiqués ci-dessous. Avant de lire ce mode d’emploi et d’utiliser l’appareil, contrôlez le numéro de modèle sous l’appareil. •Les illustrations du mode d’emploi représentent le MVC-FD7, sauf
- Страница 53 из 137
Avant de commencer Matériel nécessaire Appareil photo numérique Batterie rechargeable (NP-F530) Chargeur de batterie (BC-V615) (MVC-FD7) Disquette (non fournie) 3,5 pouces, 2HD (1,44 Mo) Cordon d’alimentation Bandoulière Capuchon d’objectif (MVC-FD7 seulement) Aperçu des préparatifs L’horloge n’est
- Страница 54 из 137
Etape 1: Recharge de la batterie Pour charger la batterie, utilisez le chargeur de batterie. Pour les détails, reportez-vous au mode d’emploi du chargeur de batterie. à une prise murale 1 Batterie rechargeable 2 Témoin CHARGE (orange) Chargeur de batterie 1 Raccordez le cordon d’alimentation à une
- Страница 55 из 137
Etape 2: Mise en place de la batterie 1 2 (base) 3 2 1 1 Tout en faisant glisser OPEN (BATT) dans le sens de la flèche, ouvrez le couvercle du logement de la batterie. 2 Insérez la batterie rechargeable avec le symbole $ tourné vers le logement. 3 Fermez le couvercle jusqu’à ce qu’il s’encliquette.
- Страница 56 из 137
÷ Etape 2: Mise en place de la batterie Autonomie de la batterie/Nombre d’images pouvant être enregistrées ou lues MVC-FD5 Autonomie de la batterie (min.) Enregistrement continu Sans utilisation du flash* 95 (80) Avec utilisation du flash** 85 (75) Lecture continue*** 125 (110) Nombre d’images
- Страница 57 из 137
Etape 3: Réglage de la date et de l’heure Fonctions de la touche de commande Vous pouvez sélectionner un paramètre dans le menu qui apparaît sur l’écran LCD en appuyant sur le côté supérieur, inférieur, gauche ou droit de la touche de commande. Quand un paramètre est sélectionné, la couleur du
- Страница 58 из 137
÷ Etape 3: Réglage de la date et de l’heure 2 Sélectionnez “MENU” avec la touche de commande, puis appuyez sur la touche. Le menu apparaît sur l’écran LCD. Pour quitter le menu, sélectionnez “ RETURN” avec la touche de commande, puis appuyez sur la touche. –EV MENU +EV 3 Sélectionnez “CLOCK SET”
- Страница 59 из 137
5 Sélectionnez la date et l’heure avec la touche de commande, puis appuyez sur la touche. Le paramètre à régler est indiqué avec CLOCK SET 4/$. Sélectionnez les chiffres en appuyant sur le côté supérieur ou Y/M/D inférieur de la touche de commande, 1997 1 8 10: 20AM puis appuyez sur la touche pour
- Страница 60 из 137
Enregistrement d’images Une disquette 3,5 pouces, 2HD (1,44 MB), de format MS-DOS est nécessaire pour l’enregistrement. 7,8 1 Touche BRIGHT +/– (luminosité de l’écran LCD) Témoin ACCESS 5,6 Commutateur macro (MVC-FD5 seulement) 4 (MVC-FD5) 3 2 Touche DISPLAY 1 Retirez le capuchon d’objectif.
- Страница 61 из 137
5 Insérez la disquette jusqu’à ce qu’elle s’encliquette. Avant d’insérer la disquette, vérifiez si l’onglet de protection à l’écriture est bien en position d’enregistrement. 6 Fermez le couvercle. L’image apparaît sur l’écran LCD. Indicateur de qualité de l’image W –EV MENU 7 T STD 11 +EV 120min
- Страница 62 из 137
÷ Enregistrement d’images Remarque Quand le témoin ACCESS clignote, ne jamais secouer ni heurter l’appareil. Ne pas ouvrir non plus le couvercle du logement de la disquette, ne pas éteindre l’appareil et ne pas retirer la batterie rechargeable. Autrement, les données d’image pourraient être
- Страница 63 из 137
Les indicateurs pendant l’enregistrement Les indicateurs sur l’écran LCD ne sont pas enregistrés. Indicateur de flash Indicateur de mise au point manuelle (MVC-FD7 seulement) Indicateur de réglage d’exposition automatique (MVC-FD7 seulement)/ Indicateur de prise de vues macro (MVC-FD5 seulement) f
- Страница 64 из 137
÷ Enregistrement d’images Réglage de la luminosité de l’écran LCD Utilisez la touche BRIGHT +/–. Flash/Zoom/Retardateur Zoom (MVC-FD7) Côté “T”: téléobjectif (le sujet paraît plus proche) Côté “W”: grand angle (le sujet paraît plus éloigné) Témoin FLASH CHARGE Flash Appuyez sur FLASH. Quand le
- Страница 65 из 137
Réglage de l’exposition Sélectionnez “+EV” ou “–EV” avec la touche de commande, puis appuyez sur la touche pour sélectionner la valeur souhaitée. Pour augmenter la valeur d’exposition (rendre l’image plus claire): +EV Pour diminuer la valeur d’exposition (rendre l’image plus sombre): –EV Valeur
- Страница 66 из 137
Visionnage des images sur l’écran LCD Témoin ACCESS 3 2 4 1 1 Poussez POWER vers le bas pour mettre l’appareil sous tension. 2 Poussez OPEN dans le sens de la flèche et ouvrez le couvercle du logement de la disquette. 3 Insérez la disquette jusqu’à ce qu’elle s’encliquette, puis fermez le
- Страница 67 из 137
Remarque Quand le témoin ACCESS clignote, ne jamais secouer ni heurter l’appareil. Ne pas ouvrir non plus le couvercle du logement de la disquette, ne pas éteindre l’appareil et ne pas retirer la batterie rechargeable. Les indicateurs pendant la lecture Numéro de l’image STD 11/11 MVC-011S MENU
- Страница 68 из 137
÷ Visionnage des images sur l’écran LCD Lecture simultanée de 6 images enregistrées (écran INDEX) Sélectionnez “INDEX” avec la touche de commande, puis appuyez sur la touche. Le symbole ” apparaît sur l’image qui est affichée avant le passage en mode d’écran INDEX. STD 11/11 ÷ MVC-011S MENU INDEX
- Страница 69 из 137
Protection des images Vous pouvez protéger une image contre un effacement accidentel. En mode d’écran SINGLE 1 2 Affichez l’image que vous souhaitez protéger. Sélectionnez “MENU” avec la touche de commande, puis appuyez sur la touche. Le menu apparaît sur l’écran LCD. Pour quitter le menu,
- Страница 70 из 137
÷ Visionnage des images sur l’écran LCD Pour annuler la protection de l’image Sélectionnez “OFF” à l’étape 4 avec la touche de commande, puis appuyez sur la touche. Remarque Quand vous formatez la disquette, le contenu de la disquette entière, y compris les données de l’image protégée, est effacé.
- Страница 71 из 137
4 Protection de toutes les images 1 Sélectionnez “ALL” avec la touche de commande, puis appuyez sur la touche. 2 Sélectionnez “OK” avec la touche de commande, puis appuyez sur la touche. PROTECT ALL ? OK CANCEL L’écran INDEX est affiché de nouveau. Quand vous avez quitté le menu, H apparaît dans le
- Страница 72 из 137
÷ Visionnage des images sur l’écran LCD Pour annuler la protection de l’image en mode d’écran INDEX Suivez la procédure de “Protection des images sélectionnées”. A l’étape 2, sélectionnez les images dont vous souhaitez annuler la protection avec la touche de commande, puis appuyez sur la touche.
- Страница 73 из 137
3 Sélectionnez “DELETE” avec la touche de commande, puis appuyez sur la touche. CLOCK SET BEEP FORMAT DISK DELETE PROTECT RETURN 4 ÷ DELETE ? OK CANCEL Sélectionnez “OK” avec la touche de commande, puis appuyez sur la touche. Pour annuler l’effacement de l’image Sélectionnez “CANCEL” à l’étape 4
- Страница 74 из 137
÷ Visionnage des images sur l’écran LCD En mode d’écran INDEX—Effacement de toutes les images ou des images sélectionnées 1 Sélectionnez “INDEX” avec la touche de commande, puis appuyez sur la touche pour entrer en mode d’écran INDEX. 7 8 10 11 MVC-011S MENU 1997 7 4 12:30PM 11/11 120min 2
- Страница 75 из 137
Effacement des images sélectionnées 1 Sélectionnez “SELECT” avec la touche de commande, puis appuyez sur la touche. “DELETE” apparaît sur l’écran LCD. 7 8 10 11 9 DELETE ENTER CANCEL 7-11 2 Utilisez la touche de commande pour afficher le symbole rouge ” sur l’image que vous souhaitez effacer. La
- Страница 76 из 137
Visionnage d’images avec un ordinateur personnel Les données d’image enregistrées avec cet appareil sont compressées dans le format JPEG. Ces données peuvent être visualisées à l’aide d’un ordinateur personnel équipé d’un logiciel de visualisation JPEG tel que Internet Explorer de Microsoft. Pour
- Страница 77 из 137
Changement des réglages de mode 1 Sélectionnez “MENU” avec la touche de commande, puis appuyez sur la touche. Le menu apparaît sur l’écran LCD. Mode CAMERA (enregistrement) CLOCK SET BEEP FIELD/FRAME QUALITY RETURN 2 Mode PLAY (lecture) CLOCK SET BEEP FORMAT DISK DELETE PROTECT RETURN Sélectionnez
- Страница 78 из 137
÷ Changement des réglages de mode Réglage de chaque paramètre ou fonction Réglages en mode CAMERA QUALITY <STANDARD*/FINE> •Sélectionnez STANDARD comme qualité d’image normale. (Environ 30 - 40 images peuvent être enregistrées sur 1 disquette.) •Sélectionnez FINE pour donner la priorité à la
- Страница 79 из 137
Réglages pour les modes CAMERA et PLAY à la fois BEEP <ON*/OFF> Normalement, sélectionnez ON. Sélectionnez OFF pour ne pas entendre le signal sonore. CLOCK SET Sélectionnez cette fonction pour régler la date et l’heure. Voir page 11. * Réglage en usine. ** Réglage en usine de FIELD/FRAME. MVC-FD5:
- Страница 80 из 137
Utilisation de diverses fonctions pour l’enregistrement (MVC-FD7 seulement) FOCUS AUTO/ MANUAL PROGRAM AE PICTURE EFFECT FOCUS NEAR/ FAR Mise au point manuelle 1 Réglez AUTO/MANUAL sur MANUAL f apparaît sur l’écran LCD. 2 Tournez la molette NEAR/FAR pour obtenir une image nette. Pour réactiver
- Страница 81 из 137
Utilisation de la fonction PROGRAM AE Vous pouvez sélectionner un des cinq modes de réglage d’exposition automatique (PROGRAM AE) en fonction des conditions de prise de vues et en vous référant aux indications suivantes. Appuyez de façon répétée sur PROGRAM AE pour sélectionner le mode d’exposition
- Страница 82 из 137
Remplacement de la pile au lithium dans l’appareil Quand la pile au lithium faiblit ou est épuisée, l’indicateur “I” clignote sur l’écran LCD. Vous devez alors remplacer la pile par une pile au lithium neuve, Sony CR2025 ou Duracell DL-2025. L’utilisation de tout autre type de pile présente un
- Страница 83 из 137
Précautions Nettoyage Nettoyage de l’écran LCD Essuyez la surface de l’écran avec une trousse de nettoyage pour écran LCD (non fournie) afin d’éliminer les traces de doigts, la poussière, etc. Nettoyage de la surface de l’appareil Nettoyez la surface de l’appareil avec un chiffon doux légèrement
- Страница 84 из 137
÷ Précautions Température de fonctionnement conseillée La température de fonctionnement de cet appareil est comprise entre 0°C et 40°C (32°F et 104°F). Ne pas utiliser cet appareil sous des climats extrêmes comme sur une plage chaude ou dans une station de sports d’hiver. Condensation d’humidité Si
- Страница 85 из 137
Guide de dépannage Si un problème persiste après que vous avez effectué les vérifications suivantes, contactez votre revendeur Sony le plus proche. Si “C: ππ: ππ” apparaît sur l’écran LCD, l’autodiagnostic a fonctionné. Voir page 41. Symptôme Causes et/ou solutions L’appareil ne fonctionne pas. •
- Страница 86 из 137
÷ Guide de dépannage Symptôme Causes et/ou solutions L’image est trop sombre. • Le sujet est photographié à contre-jour ou la lumière est insuffisante. n Ajustez la luminosité de l’image. (p.19) • L’écran LCD est trop sombre. n Réglez sa luminosité. (p.18, 21) La date et l’heure enregistrées ne
- Страница 87 из 137
Afficheur d’autodiagnostic L’appareil est équipé d’un afficheur d’autodiagnostic. La fonction d’autodiagnostic permet l’affichage d’un code à cinq caractères (combinaison d’une lettre de l’alphabet et de chiffres) sur l’écran LCD pour décrire l’état de l’appareil. Si le code à cinq caractères est
- Страница 88 из 137
Spécifications Système Dispositif d’image Objectif MVC-FD5 MVC-FD7 Contrôle de l’exposition Balance des blancs Compression des données Capacité d’images Format de l’image Mémoire Flash CCD (dispositif à transfert de charge) 1/4 pouce f=4,8 mm (47 mm, converti en focale d’appareil photo 24 x 36)
- Страница 89 из 137
Nomenclature Voir les pages entre parenthèses ( ) pour plus de détails. Déclencheur d’obturateur (14) Flash (18) Témoin de retardateur (18) Commutateur macro (MVC-FD5 seulement) (19) Témoin ACCESS (15) Touche BRIGHT +/– (18, 21) Touche OPEN (14) Touche FLASH (18) Commutateur PLAY/ CAMERA (14,20)
- Страница 90 из 137
÷ Nomenclature Fixation de la bandoulière Fixez la bandoulière fournie aux crochets prévus à cet effet. ÷ ÷ Messages d’avertissement Des messages variés apparaissent sur l’écran LCD. Vérifiez leur signification dans la liste suivante. Message Signification DRIVE ERROR Le problème vient du lecteur
- Страница 91 из 137
Index A Afficheur d’autodiagnostic ... 41 B Batterie rechargeable ............ 4, 7 Batterie rechargeable InfoLITHIUM ......................... 4 C, D Chargeur de batterie ................ 8 Condensation d’humidité ..... 38 Disquette .................................... 5 E, F Effacement
- Страница 92 из 137
Español Manual de instrucciones Antes de utilizar la unidad, lea detenidamente este manual, y consérvelo para futuras referencias. ADVERTENCIA Para evitar incendios o el riesgo de electrocución, no exponga la unidad a la lluvia ni a la humedad. Para evitar descargas eléctricas, no abra la unidad.
- Страница 93 из 137
Índice Cerciórese de leer esto antes de utilizar su cámara 4 Antes de utilizar su cámara 5 Preparativos Preparativos 7 Paso 1: Carga de la batería 8 Paso 2: Instalación de la batería 9 Paso 3: Ajuste de la fecha y la hora 11 Operaciones básicas Grabación de imágenes 14 Indicadores durante la
- Страница 94 из 137
Cerciórese de leer esto antes de utilizar su cámara Comprobación de los accesorios suministrados (consulte la página 7) Cámara digital (1) Cable de alimentación (1 juego) Bandolera (1) Cargador de baterías (1) Batería NP-F530 (1) Tapa para el objetivo (1) (MVC-FD7 solamente) Formato de grabación de
- Страница 95 из 137
Antes de utilizar su cámara Esta cámara digital utiliza disquetes (discos floppy) como medio de grabación. Utilice el tipo de disquete siguiente: • Tamaño: 3,5 pulgadas • Tipo: 2HD • Capacidad: 1,44 MB • Formato: MS-DOS (512 bytes x 18 sectores) Para utilizar un disquete de 3,5 pulgadas, 2HD, que
- Страница 96 из 137
÷ Antes de utilizar su cámara •Las instrucciones de este manual son para los dos modelos indicados a continuación. Antes de comenzar a leer este manual y a utilizar la cámara, compruebe el número de modelo indicado en su base. •En las ilustraciones se muestra el modelo MVC-FD7. En caso contrario,
- Страница 97 из 137
Preparativos Componentes necesarios Cámara digital Batería (NP-F530) Cargador de baterías (BC-V615) (MVC-FD7) Disquete (no suministrado) 3,5 pulgadas, 2HD (1,44 MB) Cable de alimentación Bandolera Tapa para el objectivo (MVC-FD7 solamente) Descripción de los preparativos El reloj no ha sido
- Страница 98 из 137
Paso 1: Carga de la batería Para cargar la batería, utilice el cargador de baterías. Con respecto a los detalles, consulte el manual de instrucciones del cargador de baterías. 1 Batería 2 a un tomacorriente de CA Lámpara CHARGE (anaranjada) Cargador de baterías 1 Conecte el cable de alimentación a
- Страница 99 из 137
Paso 2: Instalación de la batería 1 2 (Base) 3 2 1 1 Deslizando OPEN (BATT) en el sentido de la flecha, abra la cubierta de la batería. 2 Inserte la batería con la marca $ encarada hacia el compartimiento de la batería. 3 Close the cover until it clicks. Para extraer la batería Abra la cubierta de
- Страница 100 из 137
÷ Paso 2: Instalación de la batería Duración de la batería/Número de imágenes que podrán grabar/reproducirse MVC-FD5 Duración de la pila (min.) Grabación continua Sin utilizar el flash* 95 (80) Utilizando el flash** 85 (75) Reproducción continua*** 125 (110) Núm. de imágenes
- Страница 101 из 137
Paso 3: Ajuste de la fecha y la hora Función del mando de control Usted podrá seleccionar un ítem del menú que aparece en la pantalla de cristal líquido presionando la parte superior, inferior, izquierda, o derecha del mando de control. Cuando seleccione un ítem, el color del mismo cambiará de azul
- Страница 102 из 137
÷ Paso 3: Ajuste de la fecha y la hora 2 Seleccione “MENU” con el mando de control, y después presiónelo. En la pantalla de cristal líquido aparecerá el menú. Para cancelar la pantalla del menú, seleccione “ RETURN” con el mando de control, y después presiónelo. –EV MENU +EV 3 Seleccione “CLOCK
- Страница 103 из 137
5 Seleccione la fecha y la hora con el mando de control, y después presiónelo. El ítem a cambiarse se indicará con 4/ $. Seleccione el número presionando la parte superior o inferior del mando de control, y después introduzca el número. Después de haber introducido el número, 4/$ se moverá al ítem
- Страница 104 из 137
Grabación de imágenes Para grabar necesitará un disquete de 3,5 pulgadas, 2HD (1,44 MB), de formato MS-DOS. 7,8 1 lámpara ACCESS Tecla BRIGHT +/– (brillo de la pantalla de cristal líquido) 5,6 Interruptor de macro (MVC-FD5 solamente) 4 3 2 Tecla DISPLAY (MVC-FD5) 1 Quite la tapa del objetivo.
- Страница 105 из 137
5 Inserte el disquete hasta que chasquee. Antes de insertarlo, compruebe que la lengüeta de protección contra escritura esté en posición de posibilidad de grabación. 6 Cierre la cubierta. La imagen aparecerá en la pantalla de cristal líquido. Indicador de calidad de la imagen W T STD 11 Indicador
- Страница 106 из 137
÷ Grabación de imágenes Nota Cuando la lámpara ACCESS esté parpadeando, no sacuda ni golpee la cámara. Tampoco abra la cubierta del disquete, desconecte la alimentación, ni extraiga la batería. Si lo hiciese, los datos de la imagen se dañarían. Número de imágenes que podrá grabar en un disquete El
- Страница 107 из 137
Indicadores durante la grabación Los indicadores de la pantalla de cristal líquido no se grabarán. Indicador del flash Indicador del autodisparador Indicador de enfoque manual (MVC-FD 7 solamente) Indicador de exposición automática programada (MVC-FD7 solamente)/ Indicador de grabación en macro
- Страница 108 из 137
÷ Grabación de imágenes Ajuste del brillo de la pantalla de cristal líquido Utilice la tecla BRIGHT +/– Flash/Zoom/Autodisparador Zoom (NVC-FD7 solamente) Lado “T”: para telefoto (el motivo aparece más cercano) Lado “W”: para gran angular (el motivo aparece más lejano) Lámpara FLASH CHARRGE Flash
- Страница 109 из 137
Ajuste de la exposición Seleccione “+EV” o “–EV” con el mando de control, y después presiónelo para seleccionar el valor deseado. Para aumentar el valor de la exposición (aumentar el brillo de la imagen): +EV Para reducir el valor de la exposición (reducir el brillo de la imagen): –EV Valor
- Страница 110 из 137
Contemplación de imágenes en la pantalla de cristal líquido Lámpara ACCESS 3 2 4 1 1 Deslice POWER hacia abajo para conectar la alimentación. 2 Deslice OPEN en el sentido de la flecha y abra la cubierta del disquete. 3 Inserte el disquete hasta que chasquee, y después cierre la cubierta. 4 Ponga
- Страница 111 из 137
Cuando no haya indicadores visualizados en la pantalla de cristal líquido, presione la parte izquierda o derecha del mando de control para hacer que se visualice la imagen anterior o la siguiente. Nota Cuando esté parpadeando la lámpara ACCESS, no sacuda ni golpee la cámara. Tampoco abra la
- Страница 112 из 137
÷ Contemplación de imágenes en la pantalla de cristal líquido Reproducción simultánea de 6 imágenes grabadas (Pantalla INDEX) Seleccione “INDEX” con el mando de control, y después presiónelo. La marca ” aparecerá en la imagen que estaba visualizándose antes de cambiar al modo de pantalla INDEX. STD
- Страница 113 из 137
Protección de imágenes Para evitar el borrado accidental, usted podrá proteger las imágenes. En el modo de pantalla SINGLE 1 Haga que se visualice la imagen que desee proteger. 2 Seleccione “MENU” con el mando de control, y después presiónelo. En la pantalla de cristal líquido Para cancelar la
- Страница 114 из 137
÷ Contemplación de imágenes en la pantalla de cristal líquido Para cancelar la protección de una imagen Seleccione “OFF” en el paso 4 con el mando de control, y después presiónelo. Nota Cuando formatee un disco, se borrará el contenido del mismo, incluyendo los datos de una imagen protegida. En el
- Страница 115 из 137
4 Protección de todas las imágenes 1 Seleccione “ALL” con el mando de control, y después presiónelo. 2 Seleccione “OK” con el mando de control, y después presiónelo. PROTECT ALL ? OK CANCEL La pantalla volverá a la del índice. Cuando cancele la pantalla del menú, en la parte superior izquierda de
- Страница 116 из 137
÷ Contemplación de imágenes en la pantalla de cristal líquido Para cancelar la protección de imágenes en el modo de pantalla INDEX Siga los procedimientos de “Protección de las imágenes seleccionadas”. En el paso 2, seleccione las imágenes cuya protección desee cancelar con el mando de control, y
- Страница 117 из 137
3 Seleccione “DELETE” con el mando de control, y después presiónelo. CLOCK SET BEEP FORMAT DISK DELETE PROTECT RETURN 4 ÷ DELETE ? OK CANCEL Seleccione “OK” con el mando de control, y después presiónelo. Para cancelar el modo de borrado de imágenes Seleccione “CANCEL” en el paso 4 con el mando de
- Страница 118 из 137
÷ Contemplación de imágenes en la pantalla de cristal líquido En el modo de pantalla INDEX—Borrado de todas las imágenes o de las seleccionadas 1 Seleccione “INDEX” con el mando de control, y después presiónelo para entrar en el modo de pantalla INDEX. 7 8 10 11 MVC-011S MENU 1997 7 4 12:30PM 11/11
- Страница 119 из 137
Borrado de las imágenes seleccionadas 1 Seleccione “SELECT” con el mando de control, y después presiónelo. En la pantalla de cristal líquido aparecerá “DELETE”. 7 8 10 11 9 DELETE ENTER CANCEL 7-11 2 Utilice el mando de control para hacer que se visualice la marca roja ” en la imagen que desee
- Страница 120 из 137
Contemplación de imágenes utilizando un ordenador personal Los datos de las imágenes grabadas con esta cámara se comprimen en formato JPEG. Estos datos podrán verse utilizando un ordenador personal con una aplicación para ver JPEG instalada, como Microsoft Internet Explorer. Con respecto a los
- Страница 121 из 137
Cambio de los ajustes de los modos 1 Seleccione “MENU” con el mando de control, y después presiónelo. En la pantalla de cristal líquido aparecerá el menú. Modo CAMERA CLOCK SET BEEP FIELD/FRAME QUALITY RETURN 2 Modo PLAY CLOCK SET BEEP FORMAT DISK DELETE PROTECT RETURN Seleccione el ítem deseado
- Страница 122 из 137
÷ Cambio de los ajustes de los modos Ajuste del modo de cada ítem Ítemes del modo CAMERA QUALITY <STANDARD*/FINE> •Seleccione STANDARD para calidad estándar de imagen. (En 1 disquete podrá grabar 30 - 40 imágenes.) •Seleccione FINE para dar prioridad a la calidad de las imágenes. (En 1 disquete
- Страница 123 из 137
Ítemes para ambos modos, CAMERA y PLAY BEEP <ON*/OFF> Normalmente seleccione ON. Seleccione OFF para silenciar los pitidos. CLOCK SET Seleccione este ítem para ajustar la fecha y la hora. Consulte la página 11. * es el ajuste de fábrica. ** es el ajuste de FIELD/FRAME de fábrica MVC-FD5: FRAME
- Страница 124 из 137
Utilización de varias funciones para grabación (MVC-FD7 solamente) FOCUS AUTO/ MANUAL PROGRAM AE PICTURE EFFECT FOCUS NEAR/ FAR Enfoque manual 1 Ponga AUTO/MANUAL en MANUAL. En la pantalla de cristal líquido aparecerá f. 2 Gire el dial NEAR/FAR hasta enfocar nítidamente. Para reactivar el enfoque
- Страница 125 из 137
Utilización de la función PROGRAM AE (exposicion automática programada) Usted podrá seleccionar uno de siete modos de PROGRAM AE de acuerdo con la situación, refiriéndose a lo siguiente. Presione repetidamente PROGRAM AE para seleccionar el modo de PROGRAM AE deseado. a Modo de retrato suave Crea
- Страница 126 из 137
Cambio de la pila de litio de la cámara Cuando la pila de litio se debilite o se agote, en la pantalla de cristal líquido parpadeará el indicador “I”. En tal caso, reemplace la pila por otra de litio CR2025 Sony o DL-2025 Duracell. La utilización de otra pila podría suponer el riesgo de incendio o
- Страница 127 из 137
Precauciones Sobre la limpieza Limpieza de la pantalla de cristal líquido Frote la superficie de la pantalla de cristal líquido con un juego de limpieza para pantallas de cristal líquido (no suministrado) para eliminar las huellas dactilares, el polvo, etc. Limpieza de la superficie de la cámara
- Страница 128 из 137
÷ Precauciones Temperatura de funcionamiento recomendada Esta cámara ha sido diseñada para utilizarse a temperaturas comprendidas entre 0 y 40°C. no la utilice en climas extremados, como una playa cálida o una estación de esquí. Condensación de humedad Si traslada directamente la cámara de un lugar
- Страница 129 из 137
Solución de problemas Si después de haber realizado estas comprobaciones persiste cualquier problema, consulte a su proveedor Sony. Si en la pantalla de cristal líquido aparece “C:ππ: ππ”, se habrá activado la función de autodiagnóstico. Consulte la página 41. Síntoma Causa y/o solución La cámara
- Страница 130 из 137
÷ Solución de problemas Síntoma Causa y/o solución La imagen es demasiado obscura. • Está fotografiando un motivo con la fuente de iluminación detrás de él, o la iluminación es insuficiente. n Ajuste el brillo de la imagen. (p. 19) •La pantalla de cristal líquido está ajustada a un nivel demasiado
- Страница 131 из 137
Visualización de autodiagnóstico La cámara posee una visualización de autodiagnóstico. Esta función visualizará la condición de la cámara con cinco dígitos (combinación de una letra y cuatro números) en la pantalla de cristal líquido. Cuando ocurra esto, compruebe la tabla de códigos siguiente. La
- Страница 132 из 137
Especificaciones Sistema Dispositivo de imagen Objetivo MVC-FD5 MVC-FD7 Control de exposición Equilibrio del blanco Compresión de datos Capacidad de imágenes Tamaño de imagen Memoria Flash Pantalla de cristal líquido de 1/4 pulgadas f=4,8 mm (47 mm, convertida a una cámara fotográfica de 35 mm)
- Страница 133 из 137
Identificación de partes Para más detalles, consulte las páginas de ( ). Botón del disparador (14) Emisor del flash (18) Lámpara del autodisparador (18) Interruptor de macro (MVC-FD5 solamente) (19) Lámpara de acceso (ACCESS) (15) Tecla de brillo (BRIGHT +/–) (18, 21) Tecla de apertura (OPEN) (14)
- Страница 134 из 137
÷ Identificación de partes Fijación de la bandolera Fije la bandolera suministrada a los ganchos para la misma. ÷ ÷ Mensajes de aviso En la pantalla de cristal líquido pueden aparecer varios mensajes. Compruébelos de acuerdo con la lista siguiente. Mensaje Significado DRIVE ERROR Existe una avería
- Страница 135 из 137
Índice alfabético A AE (Exposición automática) .. 15 Ajuste de la fecha y la hora ... 11 Ajuste del brillo Imagen ................................... 14 Pantalla de cristal líquido .......................................... 18, 21 Autodisparador ...................... 18 B Batería
- Страница 136 из 137
Sony Corporation Printed in Japan
- Страница 137 из 137