Инструкция для Sony DCR-TRV10E
 1
1 2
2 3
3 4
4 5
5 6
6 7
7 8
8 9
9 10
10 11
11 12
12 13
13 14
14 15
15 16
16 17
17 18
18 19
19 20
20 21
21 22
22 23
23 24
24 25
25 26
26 27
27 28
28 29
29 30
30 31
31 32
32 33
33 34
34 35
35 36
36 37
37 38
38 39
39 40
40 41
41 42
42 43
43 44
44 45
45 46
46 47
47 48
48 49
49 50
50 51
51 52
52 53
53 54
54 55
55 56
56 57
57 58
58 59
59 60
60 61
61 62
62 63
63 64
64 65
65 66
66 67
67 68
68 69
69 70
70 71
71 72
72 73
73 74
74 75
75 76
76 77
77 78
78 79
79 80
80 81
81 82
82 83
83 84
84 85
85 86
86 87
87 88
88 89
89 90
90 91
91 92
92 93
93 94
94 95
95 96
96 97
97 98
98 99
99 100
100 101
101 102
102 103
103 104
104 105
105 106
106 107
107 108
108 109
109 110
110 111
111 112
112 113
113 114
114 115
115 116
116 117
117 118
118 119
119 120
120 121
121 122
122 123
123 124
124 125
125 126
126 127
127 128
128 129
129 130
130 131
131 132
132 133
133 134
134 135
135 136
136 137
137 138
138 139
139 140
140 141
141 142
142 143
143 144
144 145
145 146
146 147
147 148
148 149
149 150
150 151
151 152
152 153
153 154
154 155
155 156
156 157
157 158
158 159
159 160
160 161
161 162
162 163
163 164
164 165
165 166
166 167
167 168
168 169
169 170
170 171
171 172
172 173
173 174
174 175
175 176
176 177
177 178
178 179
179 180
180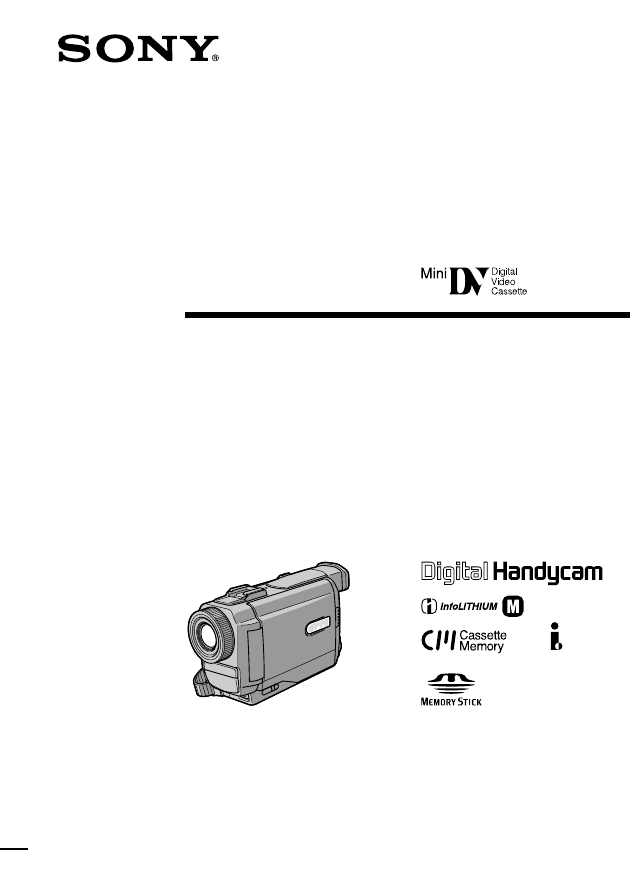
3-866-812-13 (1)
©1999 by Sony Corporation
Operating Instructions
Before operating the unit, please read this manual thoroughly,
and retain it for future reference.
ИНСТРУКЦИЯ ПО ЭКСПЛУАТАЦИИ
Перед эксплуатацией аппарата внимательно прочтите,
пожалуйста, данное руководство и сохраняйте его для
дальнейших справок.
DCR-TRV8E/TRV10E
Digital
Video Camera
Recorder
DCR-TRV10E
Оглавление инструкции
- Страница 1 из 181
3-866-812-13 (1) Digital Video Camera Recorder Operating Instructions Before operating the unit, please read this manual thoroughly, and retain it for future reference. ИНСТРУКЦИЯ ПО ЭКСПЛУАТАЦИИ Перед эксплуатацией аппарата внимательно прочтите, пожалуйста, данное руководство и сохраняйте его для
- Страница 2 из 181
English Русский Welcome! Добро пожаловать! Congratulations on your purchase of this Sony Digital Handycam camcorder. With your Digital Handycam, you can capture life’s precious moments with superior picture and sound quality. Your Digital Handycam is loaded with advanced features, but at the same
- Страница 3 из 181
English Table of contents Checking supplied accessories .............................. 5 Quick Start Guide ................................................... 6 Getting started Using this manual .................................................. 10 Step 1 Preparing the power supply
- Страница 4 из 181
Русский Оглавление Проверка прилагаемых принадлежностей .... 5 Руководство по быстрому запуску ............ 8 Подготовка к эксплуатации Использование данного руководства .......... 10 Пункт 1 Подготовка источника питания ..... 12 Установка батарейного блока ................... 12 Зарядка
- Страница 5 из 181
Checking supplied accessories Проверка прилагаемых принадлежностей Make sure that the following accessories are supplied with your camcorder. Убедитесь, что следующие принадлежности прилагаются к Вашей видеокамере. 1 2 Getting started or/или RMT-811 RMT-808 4 5 6 7 8 0 1 Wireless Remote Commander
- Страница 6 из 181
English Quick Start Guide This chapter introduces you to the basic features of your camcorder. See the page in parentheses “( )” for more information. Connecting the mains lead (p. 18) Use the battery pack when using your camcorder outdoors (p. 12). Open the DC IN jack cover. Quick Start Guide
- Страница 7 из 181
Recording a picture (p. 20) 1 Remove the lens cap. 2 Set the POWER switch to CAMERA while pressing VTR POWE R OFF the small green button.The picture appears on the LCD screen. MEMORY CAMERA 4 Press START/STOP. Your camcorder starts recording. To stop recording, press START/STOP again. 3 Slide OPEN
- Страница 8 из 181
Русский Руководство по быстрому запуску В данной главе приведены основные функции Вашей видеокамеры. Подробные сведения приведены на странице в круглых скобках “( )”. Подсоединение провода электропитания (стр. 18) При пользовании видеокамерой вне помещения используйте батарейный блок (стр. 12).
- Страница 9 из 181
Запись изображения (стр. 20) 1 Снимите крышку объектива. 2 Установите переключатель POWER в VTR положение CAMERA, нажав маленькую зеленую кнопку. На экране ЖКД появится изображение. R OFF POWE MEMORY CAMERA 4 Нажмите кнопку START/STOP. Ваша видеокамера начнет запись. Для остановки записи нажмите
- Страница 10 из 181
— Getting started — — Подготовка к эксплуатации — Using this manual Использование данного руководства The instructions in this manual are for the two models listed in the table below. Before you start reading this manual and operating your camcorder, check the model number by looking at the bottom
- Страница 11 из 181
Использование данного руководства Using this manual Note on TV colour systems Copyright precautions Precautions on camcorder care •The LCD screen and/or the colour viewfinder are manufactured using high-precision technology. However, there may be some tiny black spots and/or bright spots (red, blue
- Страница 12 из 181
Step 1 Preparing the power supply Пункт 1 Подготовка источника питания Installing the battery pack Установка батарейного блока Установите батарейный блок для того, чтобы использовать Вашу видеокамеру вне помещения. Install the battery pack to use your camcorder outdoors. (1) Lift up the viewfinder.
- Страница 13 из 181
Step 1 Preparing the power supply Пункт 1 Подготовка источника питания Charging the battery pack Зарядка батарейного блока Используйте батарейный блок для Вашей видеокамеры после его зарядки. Ваша видеокамера работает только с батарейным блоком “InfoLITHIUM” (серии M). “InfoLITHIUM” is a trademark
- Страница 14 из 181
Step 1 Preparing the power supply Пункт 1 Подготовка источника питания Note Prevent metallic objects from coming into contact with the metal parts of the DC plug of the AC power adaptor. This may cause a short-circuit, damaging the AC power adaptor. Примечание Не допускайте контакта металлических
- Страница 15 из 181
Step 1 Preparing the power supply Пункт 1 Подготовка источника питания Charging time/Время зарядки NP-FM50 (supplied)/(прилагается) NP-FM70 NP-FM90 150 (90) 240 (180) 330 (270) Приблизительное время в минутах для зарядки полностью разряженного батарейного блока Recording time/Время записи DCR-TRV8E
- Страница 16 из 181
Step 1 Preparing the power supply Пункт 1 Подготовка источника питания Playing time/Время воспроизведения DCR-TRV8E Battery pack/ Батарейный блок Playing time Playing time on LCD screen/ with LCD closed/ Время воспроизведения Время воспроизведения на экране ЖКД при закрытом ЖКД NP-FM50
- Страница 17 из 181
After charging the battery pack Disconnect the AC power adaptor from the DC IN jack on your camcorder. После зарядки батарейного блока Отсоедините сетевой адаптер переменного тока от гнезда DC IN на Вашей видеокамере. Note on the remaining battery time indicator during recording The indicator may
- Страница 18 из 181
Step 1 Preparing the power supply Connecting to the mains When you use your camcorder for a long time, we recommend that you power it from the mains using the AC power adaptor. (1) Open the DC IN jack cover, pulling the cover out a little and rotating it. Connect the AC power adaptor to the DC IN
- Страница 19 из 181
(1) Slide Z OPEN/EJECT in the direction of the arrow and open the lid. The cassette compartment automatically lifts up and opens. (2) Push the middle portion of the back of the cassette to insert. Insert the cassette in a straight line deeply into the cassette compartment with the window facing
- Страница 20 из 181
— Recording – Basics — — Запись - Основные положения — Recording a picture Запись изображения Your camcorder automatically focuses for you. (1) Remove the lens cap by pressing both knobs on its sides and attatch the lens cap to the grip strap. (2) Install the power source and insert a cassette. See
- Страница 21 из 181
Note Fasten the grip strap firmly. Do not touch the built-in microphone during recording. Примечания Плотно пристегните ремень для захвата видеокамеры. Не прикасайтесь к встроенному микрофону во время записи. Note on Recording mode Your camcorder records and plays back in the SP (standard play)
- Страница 22 из 181
Recording a picture Adjusting the LCD screen To adjust the brightness of the LCD screen, press either of the two buttons on LCD BRIGHT. The LCD panel moves about 90 degrees to the viewfinder side and about 180 degrees to the lens side. If you turn the LCD panel over so that it faces the indicator
- Страница 23 из 181
Recording a picture To record pictures with the viewfinder – adjusting the viewfinder Lift up the viewfinder and move the viewfinder lens adjustment lever. Для записи изображений с помощью видоискателя регулировка видоискателя Если Вы будете записывать изображения при закрытой панели ЖКД, проверьте
- Страница 24 из 181
Recording a picture Запись изображения Using the zoom feature Move the power zoom lever a little for a slower zoom. Move it further for a faster zoom. Using the zoom function sparingly results in better-looking recordings. “T” side: for telephoto (subject appears closer) “W” side: for wide-angle
- Страница 25 из 181
Recording a picture START/STOP MODE setting : Установка START/STOP MODE : 5SEC START/STOP MODE ANT I GROUND SHOOTING Notes •You cannot use the fader function in the 5SEC or mode. •The time code does not appear in the 5SEC mode. Примечания • Вы не можете использовать функцию фейдера в режиме 5SEC
- Страница 26 из 181
Recording a picture Запись изображения Indicators displayed in the recording mode Индикаторы, отображаемые в режиме записи The indicators are not recorded on tape. Индикаторы не записываются на ленту. Cassette memory indicator/Индикатор кассетной памяти This appears when using a tape with cassette
- Страница 27 из 181
Recording a picture Shooting backlit subjects (BACK LIGHT) When you shoot a subject with the light source behind the subject or a subject with a light background, use the backlight function. Съемка объектов с задней подсветкой (BACK LIGHT) Если Вы выполняете съемку объекта с источником света позади
- Страница 28 из 181
Recording a picture Запись изображения Shooting in the dark (NightShot) Съемка в темноте (Ночная съемка) The NightShot function enables you to shoot a subject in a dark place. For example, you can satisfactorily record the environment of nocturnal animals for observation when you use this function.
- Страница 29 из 181
Запись изображения Notes •Do not use the NightShot function in bright places (ex. outdoors in the daytime). This may cause your camcorder to malfunction. •When you keep NIGHTSHOT set to ON in normal recording, the picture may be recorded in incorrect or unnatural colours. •If focusing is difficult
- Страница 30 из 181
Recording a picture Self-timer recording You can make a recording with the self-timer. This mode is useful when you want to record yourself. (1) Press SELFTIMER in the standby mode. The (self-timer) indicator appears on the LCD screen or in the viewfinder. (2) Press START/STOP. Self-timer starts
- Страница 31 из 181
Checking the recording Проверка записи – END SEARCH / EDITSEARCH / Rec Review – END SEARCH/EDITSEARCH/ Просмотр записи You can use these buttons to check the recorded picture or shoot so that the transition between the last recorded scene and the next scene you record is smooth. Вы можете
- Страница 32 из 181
Checking the recording – END SEARCH / EDITSEARCH / Rec Review Rec Review You can check the last recorded section. Press the – side of EDITSEARCH momentarily in the standby mode. The last few seconds of the recorded section are played back. You can monitor the sound from the speaker or headphones.
- Страница 33 из 181
Playing back a tape Воспроизведение ленты You can monitor the playback picture on the LCD screen. If you close the LCD panel, you can monitor the playback picture in the viewfinder. You can control playback using the Remote Commander supplied with your camcorder. (1) Install the power source and
- Страница 34 из 181
Playing back a tape To display the screen indicators – Display function Press DISPLAY on your camcorder or the Remote Commander supplied with your camcorder. The indicators appear on the LCD screen. To make the indicators disappear, press DISPLAY again. Воспроизведение ленты Для отображения
- Страница 35 из 181
Воспроизведение ленты Note The pictures taken on the Memory Stick are not recorded with various settings. Примечание На изображениях, записанных на Memory Stick, различные установки не записываются. Recording data Recording data is your camcorder’s information when you have recorded. In the
- Страница 36 из 181
Playing back a tape Various playback modes To operate control buttons, set the POWER switch to VTR. To view a still picture (playback pause) Press X during playback. To resume playback, press X or N. To advance the tape Press M in the stop mode. To resume normal playback, press N. To rewind the
- Страница 37 из 181
Playing back a tape Воспроизведение ленты To view the picture at double speed Для просмотра воспроизведения изображения на удвоенной скорости Press ×2 on the Remote Commander during playback. For double speed playback in the reverse direction, press , then press ×2 on the Remote Commander. To
- Страница 38 из 181
Viewing the recording on TV Просмотр записи на экране телевизора Connect your camcorder to your TV or VCR with the A/V connecting cable supplied with your camcorder to watch the playback picture on the TV screen. You can operate the playback control buttons in the same way as when you monitor
- Страница 39 из 181
Просмотр записи на экране телевизора If your TV or VCR has an S video jack Connect using an S video cable (not supplied) to obtain high-quality pictures. With this connection, you do not need to connect the yellow (video) plug of the A/V connecting cable. Connect the S video cable (not supplied) to
- Страница 40 из 181
Viewing the recording on TV If you turn the power off Laser link turns off automatically. If you use a Sony TV •You can turn on the TV automatically when you press LASER LINK or N. To do so, set AUTO TV ON to ON in the MENU settings and turn the TV’s main switch on, then do either of the following:
- Страница 41 из 181
Photo recording Фотосъемка You can record a still picture like a photograph. This mode is useful when you want to record a picture such as a photograph or when you print a picture using a video printer (not supplied). You can record about 510 pictures in the SP mode and about 765 pictures in the LP
- Страница 42 из 181
Photo recording Фотосъемка Notes •During photo recording, you cannot change the mode or setting. •During photo recording, you cannot turn your camcorder off or press the PHOTO button. •When recording a still picture, do not shake your camcorder. The picture may fluctuate. •The photo recording
- Страница 43 из 181
Photo recording Фотосъемка Printing the still picture You can print a still picture by using the video printer (not supplied). Connect the video printer using the A/V connecting cable supplied with your camcorder. Connect it to the AUDIO/VIDEO jack and connect the yellow plug of the cable to the
- Страница 44 из 181
Using the wide mode You can record a 16:9 wide picture to watch on the 16:9 wide-screen TV (16:9WIDE). Black bands appear on the screen during recording in 16:9WIDE mode [a]. The picture during playing back on a normal TV [b] or a wide -screen TV [c] are compressed in the widthwise direction. If
- Страница 45 из 181
Using the wide mode In the wide mode You cannot select the old movie function with DIGITAL EFFECT and the bounce function with FADER. During recording You cannot select or cancel the wide mode. When you cancel the wide mode, set your camcorder to the standby mode and then set 16:9WIDE to OFF.
- Страница 46 из 181
Using the fader function Использование функции фейдера You can fade in or out to give your recording a professional appearance. Вы можете выполнять плавное введение и выведение изображения, чтобы придать Вашей съемке профессиональный вид. [a] STBY REC FADER M.FADER (mosaic) (mosaic)/ (мозаика)
- Страница 47 из 181
Использование функции фейдера (1) When fading in [a] In the standby mode, press FADER until the desired fader indicator flashes. When fading out [b] In the recording mode, press FADER until the desired fader indicator flashes. The indicator changes as follows: FADER t M.FADER t BOUNCE t MONOTONE t
- Страница 48 из 181
Использование функции фейдера Using the Fader function Note You cannot use the following functions while using the fader function. Also, you cannot use the fader function while using the following functions. – Digital effect – Low lux mode of PROGRAM AE (Overlap function only) – NightShot +Slow
- Страница 49 из 181
Using special effects – Picture effect Использование специальных эффектов – Эффект изображения You can digitally process images to obtain special effects like those in films or on the TV. Вы можете выполнять обработку изображения цифровым методом для получения специальных эффектов, как в
- Страница 50 из 181
Using special effects – Picture effect Использование специальных эффектов – Эффект изображения Select the desired picture effect mode in the MENU settings (p. 93). Выберите желаемый режим эффекта изображения в установках MENU (стр. 93). MENU MANUAL SET P EFFECT WHT BAL AUTO SHTR RETURN [MENU] : END
- Страница 51 из 181
Using special effects – Digital effect Использование специальных эффектов – Цифровой эффект You can add special effects to recorded pictures using the various digital functions. The sound is recorded normally. Вы можете добавлять специальные эффекты к записываемому изображению с помощью разных
- Страница 52 из 181
Using special effects – Digital effect Использование специальных эффектов – Цифровой эффект (1) While your camcorder is in the standby or recording mode, press DIGITAL EFFECT. The digital effect indicator appears. (2) Turn the SEL/PUSH EXEC dial to select the desired digital effect mode. The
- Страница 53 из 181
Использование специальных эффектов –Цифровой эффект To cancel the digital effect Для отмены цифрового эффекта Press DIGITAL EFFECT. The digital effect indicator disappears. Нажмите кнопку DIGITAL EFFECT. Индикатор цифрового эффекта исчезнет. Notes •The following functions do not work during digital
- Страница 54 из 181
Adjusting the white balance manually Регулировка баланса белого вручную You can manually adjust and set the white balance. This adjustment makes white subjects look white and allows more natural colour balance. Normally white balance is automatically adjusted. Вы можете отрегулировать и установить
- Страница 55 из 181
Регулировка баланса белого вручную If the picture is being taken in a studio lit by TV lighting We recommend you to record in the indoor mode. В случае фотографирования изображения в студии при телевизионном освещении. Рекомендуется использовать для записи режим “в помещении”. When you record under
- Страница 56 из 181
Using the PROGRAM AE function Использование функции PROGRAM AE You can select PROGRAM AE (Auto Exposure) mode to suit your specific shooting requirements. Вы можете выбрать режим PROGRAM AE (автоматическая экспозиция) в соответствии со специфическими требованиями к съемке. Spotlight mode This mode
- Страница 57 из 181
(1) Press PROGRAM AE in the standby mode. The PROGRAM AE indicator appears. (2) Turn the SEL/PUSH EXEC dial to select the desired PROGRAM AE mode. The indicator changes as follows: y y y y y y Использование функции PROGRAM AE (1) Нажмите кнопку PROGRAM AE в режиме ожидания. Появится индикатор
- Страница 58 из 181
Using the PROGRAM AE function Notes •In the spotlight, sports lesson and beach & ski modes, you cannot take close-ups. This is because your camcorder is set to focus only on subjects in the middle to far distance. •In the sunset & moon and landscape modes, your camcorder is set to focus only on
- Страница 59 из 181
Adjusting the exposure manually Регулировка экспозиции вручную You can manually adjust and set the exposure. Adjust the exposure manually in the following cases: •The subject is backlit •Bright subject and dark background •To record dark pictures (e.g. night scenes) faithfully Вы можете
- Страница 60 из 181
Focusing manually Фокусировка вручную You can gain better results by manually adjusting the focus in the following cases: •The autofocus mode is not effective when shooting – subjects through glass coated with water droplets – horizontal stripes – subjects with little contrast with backgrounds such
- Страница 61 из 181
Focusing manually Фокусировка вручную To return to the autofocus mode Set FOCUS to AUTO. Для возвращения в режим автоматической фокусировки To record distant subjects Установите переключатель FOCUS в положение AUTO. When you press FOCUS down to INFINITY. The lens focuses on and indicator appears.
- Страница 62 из 181
— Advanced Playback Operations — — Усовершенствованные операции воспроизведения — Playing back a tape with picture effects Воспроизведение ленты с эффектами изображения During playback, you can process a scene using the picture effect functions: NEG.ART, SOLARIZE, SEPIA and B&W. Во время
- Страница 63 из 181
Воспроизведение ленты с цифровыми эффектами During playback, you can process a scene using the digital effect functions: STILL, FLASH, LUMI. and TRAIL. (1) During playback, press DIGITAL EFFECT and turn the SEL/PUSH EXEC dial until the desired digital effect indicator (STILL, FLASH, LUMI. or TRAIL)
- Страница 64 из 181
Playing back a tape with digital effects Воспроизведение ленты с цифровыми эффектами Notes •You cannot process externally input scenes using the digital effect function. •To record pictures that you have processed using the digital effect, record the pictures on the VCR using your camcorder as a
- Страница 65 из 181
Быстрое отыскание эпизода с помощью функции памяти нулевой отметки Your camcorder goes forward or backward to automatically stop at a desired scene having a tape counter value of “0:00:00”. You can do this with the Remote Commander. Use this function, for example, to view a desired scene later on
- Страница 66 из 181
Searching a recording by date – Date search Поиск записи по дате – Поиск даты You can automatically search for the point where the recording date changes and start playback from that point (Date search). Use a tape with cassette memory for convenience. You can do this with the Remote Commander. Use
- Страница 67 из 181
Searching a recording by date Поиск записи по дате To stop searching Для остановки поиска Press x. Нажмите кнопку x. Searching for the date without using cassette memory To stop searching Press x. If a tape has a blank portion between recorded portions The date search function may not work
- Страница 68 из 181
Searching the boundaries of recorded tape by title – Title search If you use a tape with cassette memory, you can search for the boundaries of recorded tape by title (Title search). Use the Remote Commander for this operation. (1) Set the POWER switch to VTR. to ON in the MENU (2) Set CM SEARCH in
- Страница 69 из 181
Searching for a photo Поиск фото – Фотопоиск/ – Photo search/Photo scan Фотосканирование You can search for a still picture you have recorded on a mini DV tape (photo search). You can also search for still pictures one after another and display each picture for five seconds automatically regardless
- Страница 70 из 181
Searching for a photo – Photo search/Photo scan Searching for a photo without using cassette memory (1) Set the POWER switch to VTR. (2) Set CM SEARCH in to OFF in the MENU settings (p. 93). (3) Press SEARCH MODE repeatedly, until the photo search indicator appears. (4) Press . or > to select the
- Страница 71 из 181
— Editing — — Монтаж — Dubbing a tape Перезапись ленты Using the A/V connecting cable Использование соединительного кабеля аудио/видео Connect your camcorder to the VCR using the A/V connecting cable supplied with your camcorder. Set the input selector on the VCR to LINE, if available. (1)Insert a
- Страница 72 из 181
Dubbing a tape Перезапись ленты If you have displayed the screen indicators on the TV Make the indicators disappear by pressing SEARCH MODE or DATA CODE on the Remote Commander or DISPLAY so that they will not be superimposed on the edited tape. При отображении экранных индикаторов на экране
- Страница 73 из 181
Перезапись ленты Using the i.LINK cable (DV connecting cable) Использование кабеля i.LINK (соединительный кабель DV) Simply connect the VMC-IL4435/2DV/4DV i.LINK cable (DV connecting cable) (not supplied) to DV IN/OUT and to DV IN/OUT of the DV products. With digital-to-digital connection, video
- Страница 74 из 181
74 Editing partially on a DV tape – DV synchro-editing (DCR-TRV10E only) Монтаж по частям на ленту DV – Синхронный монтаж DV (только модель DCR-TRV10E) By simply selecting the scenes to edit, you can duplicate the desired portion on a tape, using other equipment connected with an i.LINK cable (DV
- Страница 75 из 181
Editing partially on a DV tape – DV synchro-editing (DCR-TRV10E only) Монтаж по частям на ленту DV – Синхронный монтаж DV (только модель DCR-TRV10E) MARK 7,9 STOP REW PLAY FF PAUSE 7,9 OTHERS BEEP COMMANDER DISPLAY DV EDITING OTHERS BEEP COMMANDER DISPLAY DV EDITING READY RETURN 8,10 DV ED I T I NG
- Страница 76 из 181
Recording video or TV programmes Запись видео или телевизионных программ You can record a tape from another VCR or a TV programme from a TV that has video/audio outputs. Use your camcorder as a recorder. Turn down the volume of your camcorder. Otherwise, the picture may be distorted. (1) Insert a
- Страница 77 из 181
Recording video or TV programmes Запись видео или телевизионных программ Note If you fast-forward or slow-playback on the other equipment, the image being recorded may turn black and white. When recording from other equipment, be sure to play back the original tape at normal speed. Примечание В
- Страница 78 из 181
Inserting a scene from a VCR Replacing recording on a tape – Insert Editing You can insert a new scene from a VCR onto your originally recorded tape by specifying the insert start and end points. Use the Remote Commander for this operation. Connections are the same as on page 71 or 73. Insert a
- Страница 79 из 181
(1) Set the POWER switch to VTR. (2) On the VCR, locate just before the insert start point [a], then press X to set the VCR to the playback pause mode. (3) On your camcorder, locate the insert end point [c] by pressing m or M. Then press X to set it to the playback pause mode. (4) Press ZERO SET
- Страница 80 из 181
Inserting a scene from a VCR Введение эпизода с КВМ Note The picture and sound recorded on the section between the insert start and end points will be erased when you insert the new scene. Примечание Изображение и звук, записанные на участке между местом начала и конца вставки, могут быть стерты,
- Страница 81 из 181
Audio dubbing Аудиоперезапись You can record an audio sound to add to the original sound on a tape by connecting audio equipment or a microphone. If you connect the audio equipment, you can add sound to your recorded tape by specifying starting and ending points. The original sound will not be
- Страница 82 из 181
Audio dubbing Аудиоперезапись Dubbing with the AUDIO/VIDEO jack Перезапись через гнездо AUDIO/ VIDEO Audio equipment/ Аудиоаппарат LINE OUT L R AUDIO L AUDIO/ VIDEO AUDIO R A/V connecting cable/ Соединительный кабель аудио/видео : Signal flow/Передача сигнала Note The picture is not output from the
- Страница 83 из 181
Audio dubbing Аудиоперезапись Adding an audio sound on a recorded tape Добавление звукового сигнала на записанную ленту Монтаж (1) Вставьте Вашу записанную ленту в Вашу видеокамеру (2) Установите переключатель POWER на Вашей видеокамере в положение VTR. (3) Найдите место начала записи, нажимая
- Страница 84 из 181
Audio dubbing Аудиоперезапись Notes •New sound cannot be recorded on a tape already recorded in the 16-bit mode (32 kHz, 44.1 kHz or 48 kHz) (p. 97). •When an external microphone is not connected, the recording will be made through the built-in microphone of your camcorder. •New sound cannot be
- Страница 85 из 181
Superimposing a title Наложение титра If you use a tape with cassette memory, you can superimpose the title while recording or after recording. When you play back the tape, the title is displayed for five seconds from the point where you superimposed it. You can select one of eight preset titles
- Страница 86 из 181
Superimposing a title 1 Наложение титра PRESET TITLE HELLO! HAPPY BIRTHDAY HAPPY HOLIDAYS CONGRATULATIONS! OUR SWEET BABY WEDDING VACATION THE END T I TLE [T I TLE] : END 2 PRESET TITLE HELLO! HAPPY BIRTHDAY HAPPY HOLIDAYS CONGRATULATIONS! OUR SWEET BABY WEDDING VACATION THE END [T I TLE] : END 3 4
- Страница 87 из 181
Superimposing a title Наложение титра If you use a cassette set to prevent accidental erasure You cannot superimpose or erase the title. Slide the write-protect tab so that the red portion is not visible. При использовании кассеты с установкой для предотвращения случайного стирания Вы не сможете
- Страница 88 из 181
Superimposing a title Наложение титра Erasing a title Стирание титра (1) Set the POWER switch to VTR. (2) Press MENU to display the menu. , (3) Turn the SEL/PUSH EXEC dial to select then press the dial. (4) Turn the SEL/PUSH EXEC dial to select TITLEERASE, then press the dial. Title erase display
- Страница 89 из 181
Making your own titles Создание Ваших собственных титров Вы можете составить до двух титров и сохранить их в кассетной памяти. Каждый титр может содержать до 20 символов. You can make up to two titles and store them in the cassette memory. Each title can have up to 20 characters. 2 TITLE SET
- Страница 90 из 181
Making your own titles To change a title you have stored In step 3, select CUSTOM1 or CUSTOM2, depending on which title you want to change, then press the SEL/PUSH EXEC dial. Turn the SEL/PUSH EXEC dial to select [C], then press the dial to delete the title. The last character is erased. Enter the
- Страница 91 из 181
If you use a tape with cassette memory, you can label a cassette. The label can consist of up to 10 characters and is stored in cassette memory. When you insert the labeled cassette and turn the power on, the label is displayed on the LCD screen, in the viewfinder, or on the TV screen. (1) Insert
- Страница 92 из 181
Labeling a cassette Маркировка кассеты To erase a character Для стирания символа In step 6 turn the SEL/PUSH EXEC dial to select [C], then press the dial. The last character is erased. В пункте 6 поверните диск SEL/PUSH EXEC для выбора установки [C], а затем нажмите диск. Последний символ будет
- Страница 93 из 181
— Customizing Your Camcorder — — Выполнение индивидуальных установок на видеокамере — Changing the MENU settings Изменение установок MENU To change the mode settings in the MENU settings, select the menu items with the SEL/ PUSH EXEC dial. The factory settings can be partially changed. First,
- Страница 94 из 181
Changing the MENU settings Изменение установок MENU To make the MENU display disappear Для того, чтобы исчезла индикация MENU Press MENU. Нажмите кнопку MENU. Menu items are displayed as the following icons: MANUAL SET CAMERA SET VTR SET LCD/VF SET MEMORY SET (DCR-TRV10E only) CM SET TAPE SET SETUP
- Страница 95 из 181
Changing the MENU settings Icon/item HiFi SOUND Meaning z STEREO To play back a stereo tape or dual sound track tape with main and sub sound 1 To play back a stereo tape with the left sound or a dual sound tape with main sound 2 To play back a stereo tape with the right sound or a dual sound track
- Страница 96 из 181
Changing the MENU settings Icon/item Mode Meaning CONTINUOUS (DCR-TRV10E only) z OFF Not to record continuously QUALITY (DCR-TRV10E only) z FINE FLD./FRAME (DCR-TRV10E only) z FIELD FRAME To record stopping subjects in high quality PRINT MARK (DCR-TRV10E only) ON To write a print mark on the
- Страница 97 из 181
Changing the MENU settings Icon/item REC MODE AUDIO MODE Mode Meaning z SP To record in the SP (Standard Play) mode LP To inrease the recording time to 1.5 times the SP mode z 12BIT To record in the 12-bit mode (two stereo sounds) 16BIT z AUTO DATA CODE z DATE/CAM ON DATE VTR CAMERA VTR CAMERA To
- Страница 98 из 181
Changing the MENU settings Icon/item Mode CLOCK SET AUTO TV ON z OFF ON TV INPUT z VIDEO1 VIDEO2 VIDEO3 LTR SIZE z NORMAL OFF COMMANDER VTR CAMERA To automatically turn on the Sony TV when using the laser link function To switch the video input on a Sony TV when using the laser link function (p.
- Страница 99 из 181
Изменение установок MENU Русский Выбор установок режима по каждому пункту z заводская установка. Пункты меню отличаются в зависимости от положения переключателя POWER. Пиктограмма/пункт Режим Предназначение Переключатель POWER P EFFECT Для добавления специальных эффектов, подобно изображениям в
- Страница 100 из 181
Изменение установок MENU Пиктограмма/пункт Режим HiFi SOUND z STEREO Для воспроизведения стереофонической ленты или же ленты с дорожкой двойного звучания с основным и вспомогательным звуком 1 Для воспроизведения стереофонической ленты со звуком левого канала или же ленты двойного звучания с
- Страница 101 из 181
Изменение установок MENU Пиктограмма/пункт Режим CONTINUOUS z OFF (Только модель ON DCR-TRV10E) MULTI SCRN z FINE QUALITY (Только модель DCR-TRV10E) STANDARD z FIELD FLD./FRAME (Только модель FRAME DCR-TRV10E) ON Чтобы не выполнять запись непрерывно Переключатель POWER MEMORY Для записи 3 или 4
- Страница 102 из 181
Изменение установок MENU Пиктограмма/пункт Режим REC MODE z SP LP AUDIO MODE z 12BIT 16BIT q REMAIN z AUTO ON DATA CODE z DATE/CAM DATE Предназначение Для записи в режиме SP (стандартное воспроизведение) Переключатель POWER VTR CAMERA Для увеличения времени записи в 1,5 раза по сравнению с режимом
- Страница 103 из 181
Изменение установок MENU Пиктограмма/пункт Режим CLOCK SET AUTO TV ON z OFF ON TV INPUT z VIDEO1 VIDEO2 VIDEO3 LTR SIZE z NORMAL OFF 2× DEMO MODE z ON WORLD TIME BEEP COMMANDER DISPLAY z MELODY — VTR CAMERA Для автоматического включения телевизора фирмы Sony при использовании функции лазерного
- Страница 104 из 181
Resetting the date and time Переустановка даты и времени The clock is set at the factory to Sydney time for Australia and New Zealand models, to Tokyo time for the models sold in Japan, and to Hong Kong time for other models. If you do not use your camcorder for about a half year, the date and time
- Страница 105 из 181
Resetting the date and time Переустановка даты и времени The year changes as follows: Год изменяется следующим образом: 1999 ˜ 2000 N · · · · n 2029 If you do not set the date and time “– –:– –:– –” is recorded on the tape and the Memory Stick (DCR-TRV10E only). Note on the time indicator The
- Страница 106 из 181
— Memory Stick operations — — Операции с Memory Stick — Using a Memory Stick–introduction Использование Memory Stick Введение – DCR-TRV10E only – Только модель DCR-TRV10E You can record and play back still images on a Memory Stick supplied with your camcorder. You can carry out easily playback,
- Страница 107 из 181
Using a Memory Stick– introduction Использование Memory Stick Введение On file format (JPEG) Your camcorder compresses image data in JPEG format (extension .jpg). О формате файлов (JPEG) Typical image data file name DSC00001.jpg. Ваша видеокамера сжимает данные изображения в формат JPEG (с
- Страница 108 из 181
Using a Memory Stick– introduction Inserting a Memory Stick (1) Slide MEMORY OPEN in the direction of the arrow. The Memory Stick compartment opens. (2) Insert a Memory Stick in as far as it can go with its rounded corner facing up. Then, close the Memory Stick compartment. 1 ACCESS lamp/ MEMORY
- Страница 109 из 181
Using a Memory Stick– introduction Использование Memory Stick Введение Selecting image quality mode You can select image quality mode in still picture recording. If you do not make any selection, the unit automatically records in FINE mode. (1) Set the POWER switch to MEMORY. Make sure that the
- Страница 110 из 181
Using a Memory Stick– introduction Использование Memory Stick Введение Image quality settings Установки качества изображения Setting Meaning Установка Значение FINE (FINE) Use this mode when you want to record high quality images. The image is compressed to about 1/6. FINE (FINE) Используйте этот
- Страница 111 из 181
Using a Memory Stick– introduction Использование Memory Stick Введение Your camcorder can format (initialize) a Memory Stick. If you format a Memory Stick, all data stored in the Memory Stick will be deleted. This function is convenient when you want to delete all data including protected images.
- Страница 112 из 181
Recording still images on Memory Sticks – Memory photo recording Запиcь неподвижных изображений на Memory Sticks – Фотозапись с сохранением в памяти – DCR-TRV10E only – Только модель DCR-TRV10E You can select the FIELD or FRAME mode in still picture recording. Your camcorder compensates for
- Страница 113 из 181
Recording still images on Memory Sticks – Memory photo recording Запиcь неподвижных изображений на Memory Sticks – Фотозапись с сохранением в памяти Notes •When recording fast-moving subjects in the FRAME mode, the recorded image blurry. •When recording in the FRAME mode, your camcorder may not
- Страница 114 из 181
Recording still images on Memory Sticks – Memory photo recording Запиcь неподвижных изображений на Memory Sticks – Фотозапись с сохранением в памяти (1) Set the POWER switch to MEMORY. Make sure that the lock is set to the left (unlock) position. (2) Press MENU to make the MENU display appear. (3)
- Страница 115 из 181
Запиcь неподвижных изображений на Memory Sticks – Фотозапись с сохранением в памяти Continuous shooting settings Установки непрерывной съемки Setting Meaning (indicator on the screen) Установка Значение (индикатор на экране) OFF Your camcorder shoots one image at a time. (no indicator) OFF ON Your
- Страница 116 из 181
Recording an image from a mini DV tape as a still image Запись изображения с ленты мини DV как неподвижного изображения – DCR-TRV10E only – Только модель DCR-TRV10E Your camcorder can read moving picture data recorded on a mini DV tape and record it as a still image on a Memory Stick. Your
- Страница 117 из 181
Recording an image from a mini DV tape as a still image Запись изображения с ленты мини DV как неподвижного изображения When the ACCESS lamp is lit or flashing Never shake or strike the unit. As well do not turn the power off , eject a Memory Stick or remove the battery pack. Otherwise, the image
- Страница 118 из 181
Recording an image from a mini DV tape as a still image Запись изображения с ленты мини DV как неподвижного изображения When recording the image through the AUDIO/VIDEO jack При записи изображения через гнездо AUDIO/VIDEO OUT S VIDEO TV S VIDEO VIDEO AUDIO/VIDEO A/V connecting cable/ Соединительный
- Страница 119 из 181
Copying still images from a mini DV tape – Photo save Копирование неподвижных изображений с ленты мини DV – Сохранение в памяти фотоснимков – DCR-TRV10E only – Только модель DCR-TRV10E Using the search function, you can automatically take in only still images from mini DV tapes and record them on a
- Страница 120 из 181
Copying still images from a mini DV tape – Photo save Копирование неподвижных изображений с ленты мини DV – Сохранение в памяти фотоснимков To stop copying Для остановки копирования Press MENU to stop copying. Нажмите кнопку MENU для остановки копирования. When the memory of the Memory Stick is
- Страница 121 из 181
Viewing a still picture – Memory photo playback Просмотр неподвижного изображения – Воспроизведение фотоснимков из памяти – DCR-TRV10E only – Только модель DCR-TRV10E You can play back still images recorded on a Memory Stick. You can also play back 6 images at a time by selecting the index screen.
- Страница 122 из 181
Viewing a still picture – Memory photo playback Просмотр неподвижного изображения – Воспроизведение фотоснимков из памяти To play back recorded images on a TV screen •Connect your camcorder to the TV with the A/V connecting cable supplied with your camcorder before the operation. •When operating
- Страница 123 из 181
Viewing a still picture – Memory photo playback Просмотр неподвижного изображения – Воспроизведение фотоснимков из памяти 1 2 3 4 5 6 B mark/B метка DSC00006 •To display the following 6 images, keep pressing MEMORY +. •To display the previous 6 images, keep pressing MEMORY –. To return to the
- Страница 124 из 181
Viewing a still picture – Memory photo playback Viewing the recorded images using a personal computer The image data recorded with your camcorder is compressed in the JPEG format. If you use the application software, “PictureGear 3.2Lite” supplied with your camcorder, you can see images recorded on
- Страница 125 из 181
Superimposing a still picture in a Memory Stick on a moving picture – M. CHROM/M. LUMI/C. CHROM Наложение неподвижного изображения из Memory Stick на подвижное изображение – M. CHROM/M. LUMI/C. CHROM – DCR-TRV10E only – Только модель DCR-TRV10E You can superimpose a still picture you have recorded
- Страница 126 из 181
Superimposing a still picture in a Memory Stick on a moving picture – M. CHROM/M. LUMI/C. CHROM Наложение неподвижного изображения из Memory Stick на подвижное изображение – M. CHROM/M. LUMI/C. CHROM Before operation Insert a recorded Memory Stick on your camcorder. Перед началом работы Вставьте
- Страница 127 из 181
Superimposing a still picture in a Memory Stick on a moving picture – M. CHROM/M. LUMI/C. CHROM Наложение неподвижного изображения из Memory Stick на подвижное изображение – M. CHROM/M. LUMI/C. CHROM Items to adust M. CHROM The colour (blue) scheme of the area in the still picture which is to be
- Страница 128 из 181
Preventing accidental erasure – Image protection Предотвращение случайного стирания – Защита изображения – DCR-TRV10E only – Только модель DCR-TRV10E To prevent accidental erasure of important images, you can protect selected images. Для предотвращения случайного стирания важных изображений Вы
- Страница 129 из 181
Preventing accidental erasure – Image protection Предотвращение случайного стирания – Защита изображения Note Formatting erases all information on the Memory Stick, including the protected image data. Check the contents of the Memory Stick before formatting. Примечание Форматирование стирает всю
- Страница 130 из 181
Writing a print mark – PRINT MARK Запись печатных знаков – PRINT MARK – DCR-TRV10E only – Только модель DCR-TRV10E You can specify the recorded still image to print out. This function is useful for printing out still images later. Your camcorder conforms with the DPOF (Digital Print Order Format)
- Страница 131 из 181
Deleting images Удаление изображений – DCR-TRV10E only – Только модель DCR-TRV10E Deleting selected images Удаление выбранных изображений Before operation Insert a Memory Stick into your camcorder. Перед началом работы Вставьте Memory Stick в Вашу видеокамеру. (1) Play back the image you want to
- Страница 132 из 181
Deleting images Удаление изображений Before operation Insert a Memory Stick into your camcorder. Перед началом работы Вставьте Memory Stick в Вашу видеокамеру. (1) Установите переключатель POWER в положение MEMORY. Убедитесь, что фиксатор установлен в левом (незафиксированном) положении. (2)
- Страница 133 из 181
Deleting images Удаление изображений To cancel deleting all the images in the Memory Stick Для отмены удаления всех изображений на Memory Stick Select RETURN in step 4, then press the SEL/ PUSH EXEC. Выберите установку RETURN в пункте 4, а затем нажмите кнопку SEL/PUSH EXEC While “DELETING” appears
- Страница 134 из 181
Copying the image recorded on Memory Sticks to mini DV tapes Копирование изображений, записанных на Memory Sticks, на ленты мини DV – DCR-TRV10E only – Только модель DCR-TRV10E You can copy still images or titles recorded on Memory Stick and record them to a mini DV tape. Вы можете копировать
- Страница 135 из 181
Copying the image recorded on Memory Sticks to mini DV tapes Копирование изображений, записанных на Memory Sticks, на ленты мини DV During copying You cannot operate the following buttons: MEMORY PLAY, MEMORY INDEX, MEMORY DELETE, MEMORY +, and MEMORY –. Во время копирования Вы не можете управлять
- Страница 136 из 181
Playing back images in a continuous loop – SLIDE SHOW Воспроизведение изображений в непрерывной последовательности по замкнутому циклу – SLIDE SHOW – DCR-TRV10E only – Только модель DCR-TRV10E You can automatically play back images in sequence. This function is useful especially when checking
- Страница 137 из 181
Playing back images in a continuous loop – SLIDE SHOW To stop the slide show Press MENU. Воспроизведение изображений в непрерывной последовательности по замкнутому циклу – SLIDE SHOW Для остановки демонстрации слайдов Нажмите кнопку MENU. To pause during a slide show Press MEMORY PLAY. Для паузы во
- Страница 138 из 181
— Additional Information — — Дополнительная информация — Usable cassettes Используемые кассеты Selecting cassette types You can use the mini DV cassette only*. You Hi8, cannot use any other 8 mm, Digital8, VHS, VHSC, S-VHS, S-VHSC, Betamax or DV cassette. * There are two types of mini DV cassettes:
- Страница 139 из 181
Usable cassettes When you play back Используемые кассеты При воспроизведении Copyright signal Сигнал авторского права When playing back Using any other video camera recorder, you cannot record on a tape that has recorded a copyright control signals for copyright protection of software which is
- Страница 140 из 181
Usable cassettes Используемые кассеты Notes on the mini DV cassette Примечания по кассете мини DV When affixing a label on the mini DV cassette При прикреплении этикетки на кассету мини DV Be sure to affix a label only on the locations as illustrated below [a] so as not to cause malfunction of your
- Страница 141 из 181
English Troubleshooting If you run into any problem using your camcorder, use the following table to troubleshoot the problem. If the problem persists, disconnect the power source and contact your Sony dealer or local authorized Sony service facility. If “C:ss:ss” appears on the LCD screen or in
- Страница 142 из 181
Troubleshooting Symptom A vertical band appears when you shoot a subject such as lights or a candle flame against a dark background. Cause and/or Corrective Actions • The contrast between the subject and background is too high. Your camcorder is not a malfunction. A vertical band appears when you
- Страница 143 из 181
Troubleshooting Symptom The title search function does not work. The new sound added to the recorded tape is not heard. The title is not displayed. The date search or title search does not work correctly. Cause and/or Corrective Actions • The tape has no cassette memory. c Use a tape with cassette
- Страница 144 из 181
Troubleshooting When operating using the Memory Stick – DCR-TRV10E only Symptom The Memory Stick does not function. Recording does not function. The image cannot be deleted. You cannot format the Memory Stick. Deleting all the images cannot be carried out. You cannot protect the image. You cannot
- Страница 145 из 181
Troubleshooting Symptom Cause and/or Corrective Actions • The tape has no cassette memory. c Use a tape with cassette memory. (p. 138) • The cassette memory is full. c Erase some titles. (p. 88) • The tape is set to prevent accidental erasure. c Slide the write-protect tab so that red portion is
- Страница 146 из 181
English Self-diagnosis display Your camcorder has a self-diagnosis display function. This function displays the current condition of your camcorder as a 5-digit code (a combination of a letter and figures) in the viewfinder, on the LCD screen or in the display window. If a 5-digit code is
- Страница 147 из 181
English Warning indicators and messages If indicators and messages appear in the viewfinder, on the LCD screen or in the display window, check the following: See the page in parentheses “( )” for more information. •The warning messages do not appear in the mirror mode. •The indicators and messages
- Страница 148 из 181
Warning indicators and messages Warning messages •CLOCK SET Reset the date and time (p. 104). •For “InfoLITHIUM” Use an “InfoLIHIUM” battery pack (p. 17). BATTERY ONLY • • CLEANING CASSETTE The video heads are dirty (p. 159). FULL The tape cassette memory is full. • 16BIT AUDIO MODE is set to 16BIT
- Страница 149 из 181
Русский Поиск и устранение неисправностей Если у Вас возникла какая-либо проблема при использовании видеокамеры, воспользуйтесь следующей таблицей для отыскания и устранения проблемы. Если проблема не устраняется, то следует отсоединить источник питания и обратиться в сервисный центр Sony или в
- Страница 150 из 181
Поиск и устранение неисправностей Возможная причина Появляется вертикальная черная полоса при съемке объектов, типа лампы или пламени свечи на темном фоне. Появляется вертикальная черная полоса при съемке очень ярких объектов. В видоискателе или на экране ЖКД появляются маленькие белые точки. В
- Страница 151 из 181
Поиск и устранение неисправностей Возможная причина Вероятная причина и/или метод устранения • На ленте нет кассетной памяти. c Используйте ленту с кассетной памятью. (стр.138) • Команда CM SEARCH установлена в положение OFF в установках MENU. c Установите ее в положение ON. (стр. 93) • На ленте
- Страница 152 из 181
Поиск и устранение неисправностей При эксплуатации с Memory Stick – Только модель DCR-TRV10E Возможная причина Не функционирует Memory Stick. Не функционирует запись. Не удаляется изображение. Вы не можете отформатировать Memory Stick. Не может быть выполнено удаление всех изображений. Вы не можете
- Страница 153 из 181
Поиск и устранение неисправностей Прочее Возможная причина Не выполняется маркировка кассеты. Во время монтажа с использованием кабеля i.LINK (соединительный кабель DV), записываемое изображение не контролируется. Не функционирует синхронный монтаж DV. (только модель DCRTRV10E) Во время зарядки
- Страница 154 из 181
Русский Индикация самодиагностики В Вашей видеокамере имеется функция самодиагностики. Эта функция отображает текущее состояние Вашей видеокамеры в виде 5-значного кода (комбинация из одной буквы и цифр) в видоискателе, на экране ЖКД или в окошке дисплея. В случае отображения 5-значного кода,
- Страница 155 из 181
Русский Предупреждающие индикаторы и сообщения Если в видоискателе, на экране ЖКД или в окошке дисплея появятся индикаторы и сообщения, проверьте следующее: См. страницу в круглых скобках “( )” для более подробной информации. •Предупреждающие сообщения не будут появляться в зеркальном режиме.
- Страница 156 из 181
Предупреждающий индикаторы и сообщения Предупреждающие сообщения •CLOCK SET •For “InfoLITHIUM” BATTERY ONLY • • Повторно установите дату и время (стр. 104) Используйте батарейный блок “InfoLITHIUM” (стр. 17) CLEANING CASSETTE Загрязнились видеоголовки. (стр. 159) FULL Кассетная память память
- Страница 157 из 181
Using your camcorder abroad Using your camcorder abroad You can use your camcorder in any country or area with the AC power adaptor supplied with your camcorder within 100 V to 240 V AC, 50/60 Hz. Your camcorder is a PAL system based camcorder. If you want to view the playback picture on a TV, it
- Страница 158 из 181
Maintenance information and precautions Moisture condensation If your camcorder is brought directly from a cold place to a warm place, moisture may condense inside your camcorder, on the surface of the tape, or on the lens. In this condition, the tape may stick to the head drum and be damaged or
- Страница 159 из 181
Maintenance information and precautions Информация по уходу за аппаратом и меры предосторожности Maintenance information Информация по уходу Cleaning the video head Чистка видеоголовок To ensure normal recording and clear pictures, clean the video heads. The video head may be dirty when:
- Страница 160 из 181
Maintenance information and precautions Precautions Информация по уходу за аппаратом и меры предосторожности Меры предосторожности Camcorder operation Эксплуатация видеокамеры •Operate your camcorder on 7.2 V (battery pack) or 8.4 V (AC power adaptor). •For DC or AC operation, use the accessories
- Страница 161 из 181
AC power adaptor Сетевой адаптер переменного тока •Unplug the unit from the mains when you are not using the unit for a long time. To disconnect the mains lead, pull it out by the plug. Never pull the mains lead itself. •Do not operate the unit with a damaged cord or if the unit has been dropped or
- Страница 162 из 181
Maintenance information and precautions Информация по уходу за аппаратом и меры предосторожности Notes on dry batteries Примечания к сухим батарейкам To avoid possible damage from battery leakage or corrosion, observe the following: •Be sure to insert the batteries with the + – polarities matched
- Страница 163 из 181
English Specifications Video camera recorder System General Power requirements 7.2 V (battery pack) 8.4 V (AC power adaptor) Average power consumption (when using the battery pack) During camera recording using LCD DCR-TRV8E: 3.6 W DCR-TRV10E: 3.7W Viewfinder 2.9 W Operating temperature 0 °C to 40
- Страница 164 из 181
Русский Технические характеристики Видеокамера Система Система видеозаписи 2 вращающиеся головки Система наклонной механической развертки Система аудиозаписи Вращающиеся головки, система ИКМ Дискретизация: 12 битов (Сдвиг частоты 32 кГц, стерео 1, стерео 2), 16 битов (Сдвиг частоты 48 кГц, стерео)
- Страница 165 из 181
— Quick Reference — — Оперативный справочник — Identifying the parts and controls Обозначение частей и регуляторов Camcorder Видеокамера 1 4 5 2 6 3 7 2 OPEN button (p. 20) 4 PHOTO button (p. 41, 112) 5 BATT release lever (p. 12) 6 PROGRAM AE button (p. 56) 7 EXPOSURE button (p. 59) 2 Кнопка OPEN
- Страница 166 из 181
Identifying the parts and controls Обозначение частей и регуляторов qd 8 qf 9 qg 0 qh qa qs qj 8 Focus ring (p. 60) 8 Кольцо фокусировки (стр. 60) 9 Camera recording lamp (p. 20) 9 Лампа записи видеокамеры (стр. 20) 0 Infrared rays emitter (p. 28, 39) 0 Излучатель инфракрасных лучей (стр. 28, 39)
- Страница 167 из 181
Identifying the parts and controls Обозначение частей и регуляторов ws qk wd ql wf w; wg wa wh qk Экран ЖКД (стр. 22) ql LCD BRIGHT buttons (p. 22) ql Кнопки LCD BRIGHT (стр. 22) w; Кнопки VOLUME (стр. 33) wa Кнопка RESET (стр. 153) ws MEMORY PLAY button (p. 121, 126) (DCR-TRV10E only) ws Кнопка
- Страница 168 из 181
Identifying the parts and controls Обозначение частей и регуляторов wj ea wk es wl ed e; ef wj SELFTIMER button (p. 30) wj Кнопка SELFTIMER (стр. 30) wk END SEARCH button (p. 31) wk Кнопка END SEARCH (стр. 31) wl DISPLAY button (p. 34) wl Кнопка DISPLAY (стр. 34) e; START/STOP MODE switch (p. 25)
- Страница 169 из 181
Identifying the parts and controls Обозначение частей и регуляторов eg el eh r; ej ra rs ek eg Power zoom lever (p. 24) eh ACCESS lamp (DCR-TRV10E only) (p. 108) eg Рычаг приводного вариообъектива (стр. 24) ek START/STOP button (p. 20) ej Крючок для плечевого ремня el LASER LINK button (p. 39) ek
- Страница 170 из 181
Identifying the parts and controls Обозначение частей и регуляторов rh rd rj rk rf rg rl rd Video control buttons (p. 36, 76) x STOP (stop) m REW (rewind) N PLAY (playback) M FF (fastforward) X PAUSE (pause) z REC (recording) The control buttons light up when you set the POWER switch to VTR. rd
- Страница 171 из 181
Identifying the parts and controls Обозначение частей и регуляторов t; tg ta th ts tj td tf tk The DV IN/OUT jack is i.LINK compatible. ta i (headphones) jack When you use headphones, the speaker on your camcorder is silent. td Z OPEN/EJECT lever (p. 19) tf Tripod receptacle Make sure that the
- Страница 172 из 181
Identifying the parts and controls Обозначение частей и регуляторов Note on the Carl Zeiss lens Your camcorder is equipped with a Carl Zeiss lens which can reproduce a fine image. The lens for your camcorder was developed jointly by Carl Zeiss, in Germany, and Sony Corporation. It adopts the MTF*
- Страница 173 из 181
Identifying the parts and controls Remote Commander The buttons that have the same name on the Remote Commander as on your camcorder function identically to the buttons on your camcorder. Обозначение частей и регуляторов Пульт дистанционного управления Кнопки пульта дистанционного управления,
- Страница 174 из 181
Identifying the parts and controls Обозначение частей и регуляторов To prepare the Remote Commander Для подготовки пульта дистанционного управления Insert 2 R6 (Size AA) batteries by matching the + and – polarities on the batteries to the + – marks inside the battery compartment. Notes on the
- Страница 175 из 181
Identifying the parts and controls Operation indicators 1 2 3 4 5 6 7 Обозначение частей и регуляторов Рабочие индикаторы 1 2 0 min – ST I LL 1 6 : 9W I DE NEG . ART STBY + AUTO 5 0 AWB F11 8 0:1 2:3 4 1 2 min Z ERO S E T M E MO R Y END SEARCH 16B I T DSC0 0 0 0 1 qd qf qg qh qj qk ql w; wa ws 1
- Страница 176 из 181
Identifying the parts and controls Обозначение частей и регуляторов qg NIGHTSHOT indicator (p. 28) qg Индикатор NIGHTSHOT (стр. 28) qh Warning indicators (p. 147) qh Предупреждающие индикаторы (стр. 155) qj Tape counter indicator (p. 65)/5SEC mode indicator (p. 25)/Time code indicator (p. 26)/
- Страница 177 из 181
English Quick Function Guide Functions to adjust exposure (in the recording mode) •In a dark place •In insufficient light •In dark environments such as sunset, fireworks, or general night views •Shooting backlit subjects •In spotlight, such as at the theatre or a formal event •In strong light or
- Страница 178 из 181
Русский Руководство по быстрым функциям Функции для регулировки экспозиции (в режиме записи) •В темном месте •При недостаточном освещении •В темных окружающих условиях, например, заход солнца, фейерверки или общие ночные виды •Съемка объектов с задней подсветкой •При прожекторном освещении,
- Страница 179 из 181
English Index A, B I, J, K, L R AC power adaptor ..................... 13 Adjusting viewfinder ................ 23 ANTI GROUND SHOOTING ................................................... 25 Audio dubbing ........................... 81 AUDIO MIX ............................... 83 Audio mode
- Страница 180 из 181
Русский Алфавитный указатель А, Б, В, Г Адаптер последовательного порта ................................. 124 Аудиоперезапись .................. 81 Аудиорежим .......................... 97 Батарейный блок .................. 12 Батарейный блок “InfoLITHIUM” ...................... 17 Вариообъектив
- Страница 181 из 181