Инструкция для Sony CCD-TRV56E
 1
1 2
2 3
3 4
4 5
5 6
6 7
7 8
8 9
9 10
10 11
11 12
12 13
13 14
14 15
15 16
16 17
17 18
18 19
19 20
20 21
21 22
22 23
23 24
24 25
25 26
26 27
27 28
28 29
29 30
30 31
31 32
32 33
33 34
34 35
35 36
36 37
37 38
38 39
39 40
40 41
41 42
42 43
43 44
44 45
45 46
46 47
47 48
48 49
49 50
50 51
51 52
52 53
53 54
54 55
55 56
56 57
57 58
58 59
59 60
60 61
61 62
62 63
63 64
64 65
65 66
66 67
67 68
68 69
69 70
70 71
71 72
72 73
73 74
74 75
75 76
76 77
77 78
78 79
79 80
80 81
81 82
82 83
83 84
84 85
85 86
86 87
87 88
88 89
89 90
90 91
91 92
92 93
93 94
94 95
95 96
96 97
97 98
98 99
99 100
100 101
101 102
102 103
103 104
104 105
105 106
106 107
107 108
108 109
109 110
110 111
111 112
112 113
113 114
114 115
115 116
116 117
117 118
118 119
119 120
120 121
121 122
122 123
123 124
124 125
125 126
126 127
127 128
128
3-859-617-13 (1)
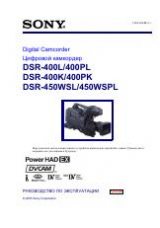
Video Camera
Recorder
Operating Instructions
Before operating the unit, please read this manual thoroughly,
and retain it for future reference.
Инструкция по эксплуатации
©1997 by Sony Corporation
Перед эксплуатацией аппарата внимательно прочтите,
пожалуйста, данное руководство и сохраняйте его для
дальнейших справок.
CCD-TRV94E
CCD-TRV54E/TRV56E
Оглавление инструкции
- Страница 1 из 129
3-859-617-13 (1) Video Camera Recorder Operating Instructions Before operating the unit, please read this manual thoroughly, and retain it for future reference. Инструкция по эксплуатации Перед эксплуатацией аппарата внимательно прочтите, пожалуйста, данное руководство и сохраняйте его для
- Страница 2 из 129
English Русский Welcome! Добро пожаловать! Congratulations on your purchase of this Sony Handycam Vision™ camcorder. With your Handycam Vision you can capture life’s precious moments with superior picture and sound quality. Your Handycam Vision is loaded with advanced features, but at the same time
- Страница 3 из 129
English Table of contents Before you begin Using this manual ................................................... 5 Checking supplied accessories ............................. 7 Getting started Charging and installing the battery pack ............ 8 Inserting a cassette
- Страница 4 из 129
Руский Оглавление Перед началом эксплуатации Использование данного руководства ........... 5 Проверка прилагаемых принадлежностей ... 7 Подготовка к эксплуатации Зарядка и установка баратейного блока ..... 8 Вставка кассеты ........................................... 12 Основные операции Запись с
- Страница 5 из 129
Перед началом эксплуатации Before you begin Использование данного руководства Using this manual CCDSystem TRV54E TRV56E TRV94E h h H B/W B/W colour S VIDEO input/output – – r Photo mode r – r Видоискатель Черно-белый Черно-белый Digital effect functions r – r Вход/выход S VIDEO – – r Overlap
- Страница 6 из 129
Using this manual Note on TV colour systems TV colour systems differ from country to country. To view your recordings on a TV, you need a PAL system-based TV. Precaution on copyright Television programmes, films, video tapes, and other materials may be copyrighted. Unauthorized recording of such
- Страница 7 из 129
Checking supplied accessories Check that the following accessories are supplied with your camcorder. 2 3 6 7 Перед началом эксплуатации RMT-708 Проверьте наличие следующих принадлежностей, прилагаемых к Вашей видеокамере. Before you begin 1 RMT-717* Проверка прилагаемых принадлежностей or/или 4 5 1
- Страница 8 из 129
Getting started Charging and installing the battery pack Зарядка и установка батарейного блока Before using your camcorder, you first need to charge and install the battery pack. To charge the battery pack, use the supplied AC power adaptor. This camcorder operates with the “InfoLITHIUM“ battery.
- Страница 9 из 129
Charging and installing the battery pack Charging time Battery pack Зарядка и установка батарейного блока Время зарядки Charging time* (min.) Батарейный блок 170 (110) NP-F530 (прилагается) 170 (110) NP-F730 250 (190) NP-F730 250 (190) NP-F930 330 (270) NP-F930 330 (270) NP-F530 (supplied) Время
- Страница 10 из 129
Charging and installing the battery pack Numbers in parentheses indicate the time when you use a normally charged battery. Battery life will be shorter if you use the camcorder in a cold environment. ∗ Approximate continuous recording time indoors. ∗∗ Approximate minutes when recording while you
- Страница 11 из 129
Charging and installing the battery pack Зарядка и установка батарейного блока Installing the battery pack Зарядка и установка батарейного блока Note on installing the NP-F930 battery pack Use the camcorder while lifting up the viewfinder slightly. Note on the battery pack Do not carry the
- Страница 12 из 129
Inserting a cassette Make sure that the power source is installed. When you want to record in the Hi8 system, use Hi8 video cassette H (CCD-TRV94E only). (1) While pressing the small blue button on the EJECT switch, slide it in the direction of the arrow. The cassette compartment automatically
- Страница 13 из 129
Basic operations Camera recording Запись с помощью видеокамеры Основные операции Убедитесь, что источник питания установлен, кассета вставлена и, что переключатель START/STOP MODE на панели ЖКД установлен на . Перед тем как Вы начнете запись одноразовых событий, Вы можете захотеть сделать пробную
- Страница 14 из 129
Запись с помощью видеокамеры Camera recording To stop recording momentarily [a] Для временной остановки записи [а] Press START/STOP again. The “STBY” indicator appears in the viewfinder (Standby mode). Снова нажмите START/STOP. Индикатор “STBY” появится в видоискателе (режим готовности). To finish
- Страница 15 из 129
Camera recording Запись с помощью видеокамеры Notes on recording mode •This camcorder records and plays back in SP (standard play) mode and in LP (long play) mode. The playback quality in LP mode, however, will not be as good as that in SP mode. •When a tape recorded on this camcorder in LP mode is
- Страница 16 из 129
Запись с помощью видеокамеры Camera recording Note on the AUTO DATE feature – CCD-TRV54E/TRV56E only The clock is set at the factory to Sydney time for Australia and New Zealand models, to Tokyo time for the models sold in Japan, and to Hong Kong time for other models. You can reset the clock in
- Страница 17 из 129
Запись с помощью видеокамеры Camera recording Скорость наезда видеокамеры (наезд с различной скоростью) Zooming speed (Variable speed zooming) Move the power zoom lever a little for a slower zoom, move it further for a faster zoom. W T [b] Примечания к цифровому трансфокатору • Трансфокатор более,
- Страница 18 из 129
Camera recording Запись с помощью видеокамеры Selecting the START/STOP mode Выбор режима START/STOP START/STOP MODE ANTI GROUND SHOOTING CK LO CK LO PH TA O T O NDB Y S PH TA O T O NDB Y S 5SEC 3 STANDBY 2 Ваша видеокамера имеет еще два режима кроме обычного режима пуска/останова. Эти режимы
- Страница 19 из 129
Camera recording Запись с помощью видеокамеры Shooting with the LCD screen Съемка с помощью экрана ЖКД Основные операции 2 1 Вы также можете осуществлять запись изображения, просматривая его на экране ЖКД. При использовании экрана ЖКД видоискатель выключится автоматически. Вы не можете прослушивать
- Страница 20 из 129
Запись с помощью видеокамеры Camera recording Notes on the LCD panel •When closing the LCD panel, turn it vertically until it clicks [a]. •When turning the LCD panel, turn it always vertically; otherwise, the camcorder body may be damaged or the LCD panel may not close properly [b]. •Close the LCD
- Страница 21 из 129
Letting the subject monitor the shot Основные операции [a] Примечания к зеркальному режиму • Если Вы повернете панель ЖКД приблизительно до диапазона от 135 градусов до 200 градусов, то видеокамера войдет в зеркальный режим. • Используя зеркальный режим, Вы можете записывать себя на ленту,
- Страница 22 из 129
Hints for better shooting Советы для лучшей съемки For hand-held shots, you’ll get better results by holding the camcorder according to the following suggestions: • Hold the camcorder firmly and secure it with the grip strap so that you can easily manipulate the controls with your thumb. Для кадров
- Страница 23 из 129
Hints for better shooting [c] Предостережения к видоискателю и ЖКД • Не поднимайте видеокамеру за видоискатель или панель ЖКД [c]. • Не располагайте видеокамеру так, чтобы видоискатель или экран ЖКД были направлены прямо на солнце. Внутренние части видоискателя могут быть повреждены. Будьте
- Страница 24 из 129
Checking the recorded picture Using EDITSEARCH, you can review the last recorded scene or check the recorded picture in the viewfinder or on the LCD screen. (1) While pressing the small green button on the POWER switch, set it to CAMERA. (2) Turn STANDBY up to STANDBY. (3) Press the – (Œ) side of
- Страница 25 из 129
Checking the recorded picture Проверка записанного изображения To stop playback Для останова воспроизведения Release EDITSEARCH. Нажмите EDITSEARCH. To go back to the last recorded point after edit search Для возврата к последнему записанному месту после монтажного поиска To begin re-recording Для
- Страница 26 из 129
Playing back a tape You can monitor the playback picture on the LCD screen. (1) While pressing the small green button on the POWER switch, set it to VTR. The video control buttons light up. (2) Insert the recorded tape with the window facing out. (3) While pressing OPEN, open the LCD panel. Adjust
- Страница 27 из 129
Playing back a tape Воспроизведение ленты When monitoring on the LCD screen При просмотре на экране ЖКД You can turn the LCD panel over and move back to the camcorder with the LCD screen facing out [a]. You can adjust the angle of the LCD screen by turning the LCD screen up to 15 degrees [b]. Вы
- Страница 28 из 129
Playing back a tape Воспроизведение ленты Various playback modes Различные режимы воспроизведения With CCD-TRV54E/TRV94E, you can enjoy clear pictures during still, slow and picture search. With CCD-TRV56E, you can enjoy clear pictures on the LCD screen during still, slow and picture search.
- Страница 29 из 129
Playing back a tape To view the picture frame-by-frame – CCD-TRV94E only Press '/< or >/7 on the Remote Commander in playback pause mode. If you keep pressing the button, you can view the picture at 1/25 speed. To resume normal playback, press (. – CCD-TRV94E only Press '/< on the Remote Commander
- Страница 30 из 129
Playing back a tape Воспроизведение ленты To display the date or time when you recorded Press DATE or TIME on the camcorder. To make the date or time disappear, press it again. To display the date and time when you recorded, press TIME (or DATE) after pressing DATE (or TIME). To make the date and
- Страница 31 из 129
Searching for the end of the picture If you start recording after using END SEARCH Occasionally, the transition between the last scene you recorded and the next scene may not be smooth. 2 END SEARCH Основные операции 1 Вы можете перейти к концу записанной части после записи и воспроизведения ленты
- Страница 32 из 129
Advanced operations Усовершенствованные операции Using alternative power sources You can choose any of the following power sources for your camcorder: battery pack, the mains, and 12/24 V car battery. Choose the appropriate power source depending on where you want to use your camcorder.
- Страница 33 из 129
Using alternative power sources WARNING The mains lead must only be changed at a qualified service shop. PRECAUTION The set is not disconnected from the AC power source (mains) as long as it is connected to the mains, even if the set itself has been turned off. Using a car battery To remove the car
- Страница 34 из 129
Changing the mode settings Изменение установок режимов You can change the mode settings in the menu system to further enjoy the features and functions of the camcorder. (1) Press MENU to display the menu. (2) Turn the control dial to select the desired item, then press the dial. (3) Turn the
- Страница 35 из 129
Changing the mode settings Изменение установок режимов Selecting the mode setting of each item Выбор режима каждой установки Установки для режимов и CAMERA и VTR COMMANDER <ON/OFF> •Select ON when using the supplied Remote Commander for the camcorder. •Select OFF when not using the Remote
- Страница 36 из 129
Changing the mode settings VF PW-SAVE* <ON/OFF> (CCD-TRV94E only) •Select ON to turn off the viewfinder when you move your face away from it, saving battery power. •Select OFF to have the viewfinder always turn on. Изменение установок режимов VF PW-SAVE* <ON/OFF> (Только CCDTRV94E) • Выберите ON
- Страница 37 из 129
Changing the mode settings Изменение установок режимов AUTO DATE* <ON/OFF> (Только CCDTRV54E/TRV56E) •Выберите ON для записи даты в течение 10 секунд после начала записи. •Выберите OFF, чтобы не записывать дату. CLOCK SET* Reset the date or time. CLOCK SET* Повторная установка даты или времени.
- Страница 38 из 129
Changing the mode settings Изменение установок режимов Items for VTR mode only Установки только для режима VTR EDIT <ON/OFF> •Select ON to minimize picture deterioration when editing. •Normally select OFF. EDIT <ON/OFF> • Выберите ON для сведения к минимуму ухудшение качества при монтаже. • Обычно
- Страница 39 из 129
Fade-in and fade-out You can fade in or out to give your recording a professional appearance. When fading in, the picture gradually fades in from black or mosaic while the sound increases. When fading out, the picture gradually fades to black or mosaic while the sound decreases. When fading in [a]
- Страница 40 из 129
Fade-in and fade-out When the date or time indicator is displayed The date or time indicator does not fade in or fade out. When the START/STOP MODE switch is set to 5SEC or You cannot use the overlap function. Notes on the fader function You cannot use the following functions while using the fader
- Страница 41 из 129
Overlapping two pictures Наложение двух изображений OVERLAP 1 2 CK LO S PH TA O T O NDB Y START/STOP Наложение двух изображений Before pressing START/STOP, press FADER until the indicator disappears. Для отмены функции наложения Перед тем, как нажать переключатель START/STOP, нажимайте кнопку
- Страница 42 из 129
Wiping away a still picture Вытеснение шторкой неподвижного изображения – CCD-TRV54E/TRV94E only – Только CCD-TRV54E/TRV94E When using the wipe function, the picture gradually wipes away the still picture of the last scene recorded. (1) While the camcorder is in Standby mode, press FADER repeatedly
- Страница 43 из 129
Wiping away a still picture Усовершенствованные операции Примечания относительно функции вытеснения шторкой • Во время использования функции вытеснения шторкой Вы не сможете задействовать следующих функций. Также при использовании следующих функций Вы не сможете задействовать функцию вытеснения
- Страница 44 из 129
Using the wide mode function Использование функции широкоформатного режима Selecting the desired mode Выбор желаемого режима You can record a cinemalike picture (CINEMA) or a 16:9 wide picture to watch on the 16:9 widescreen TV (16:9 FULL). Вы можете записывать изображение как в кинотеатре (CINEMA)
- Страница 45 из 129
Using the wide mode function Using the wide mode function While the camcorder is in Standby mode, press 16:9 WIDE repeatedly so that the desired mode indicator appears in the viewfinder or on the LCD screen. Использование функции широкоформатного режима Использование функции широкоформатного режима
- Страница 46 из 129
Photo recording Фотосъемка – CCD-TRV54E/TRV94E only – Только CCD-TRV54E/TRV94E You can record a still picture like a photograph for about seven seconds. This mode is useful when you want to enjoy a picture such as you would a photograph or when you print a picture using a video printer (not
- Страница 47 из 129
Enjoying picture effect Наслаждение эффектами изображения Selecting picture effect Выбор эффекта изображения You can make pictures like those of television with the Picture Effect function. [a] [b] [c] SEPIA The picture is sepia. B&W The picture is monochrome (black and white). SOLARIZE [c] The
- Страница 48 из 129
Наслаждение эффектами изображения Enjoying picture effect Using picture effect function Использование функции эффектов изображения (1) Press PICTURE EFFECT. (2) Turn the control dial to select the desired picture effect mode. 1 PICTURE EFFECT (1) Нажмите PICTURE EFFECT. (2) Поверните ругулировочный
- Страница 49 из 129
Superimposing a still picture on a moving picture Haлoжeние неподвижного изображения на подвижное изображение Используя функцию неподвижного изображения, Вы можете записать неподвижное изображение с наложением на подвижное изображение. Звук при этом записывается нормально. (1) В то время, когда
- Страница 50 из 129
Recording still pictures successively Запись последовательности неподвижных изображений – CCD-TRV54E/TRV94E only – Только CCD-TRV54E/TRV94E Using the flash motion function, you can record still pictures successively at constant intervals. The sound is recorded normally. (1) While the camcorder is
- Страница 51 из 129
Recording still pictures successively Запись последовательности неподвижных изображений Для отмены мелькающего движения Press DIGITAL EFFECT. Нажмите кнопку DIGITAL EFFECT. Notes on the flash motion function •You cannot use the following functions during the flash motion recording – Functions using
- Страница 52 из 129
Replacing a brighter portion of a still picture with a moving picture (1) While the camcorder is in Standby mode or recording mode, press DIGITAL EFFECT and turn the control dial until the LUMI. indicator flashes. (2) Press the control dial. The LUMI. indicator lights up and the luminancekey bars
- Страница 53 из 129
Adding an incidental image to pictures Присоединение побочного изображения к основному Используя функцию запаздывания, Вы сможете записать изображение, которое оставляет побочное изображение, например, след. Звук записывается нормально. Вы можете отрегулировать время действия побочного изображения
- Страница 54 из 129
Using slow shutter – CCD-TRV54E/TRV94E only – Только CCD-TRV54E/TRV94E If you want to record a dark picture more brightly, or make the movement of the subject seem lively, set the shutter speed to 1/25, 1/12, 1/6 or 1/3 (slow shutter). (1) While the camcorder is in Standby mode or recording mode,
- Страница 55 из 129
Adding an old movie type atmosphere to pictures Придание изображению оттенка старинного кино – Только CCD-TRV54E/TRV94E Using the old movie function, you can record the picture such as an old movie. The camcorder automatically sets the wide mode to CINEMA, picture effect to SEPIA, and the
- Страница 56 из 129
Focusing manually Ручная фокусировка When to use manual focus При использовании ручной фокусировки In the following cases you should obtain better results by adjusting the focus manually. [a] [b] •Insufficient light [a] •Subjects with little contrast - walls, sky, etc. [b] •Too much brightness
- Страница 57 из 129
Focusing manually Ручная фокусировка Focusing manually Ручная фокусировка 1 При ручной фокусировке сперва перед записью выполнить фокусировку в режиме телефото, а затем установить расстояние для съемки. (1) Установите FOCUS на MANUAL . Индикатор f появится в видомскателе. (2) Двигайте рычаг
- Страница 58 из 129
Using the PROGRAM AE function Использование функции PROGRAM AE Selecting the best mode Выбор наилучшего режима You can select one of seven PROGRAM AE (Auto Exposure) modes to suit your shooting situation, referring to the following. a Вы можете выбрать один из семи режимов PROGRAM AE(автоматической
- Страница 59 из 129
Using the PROGRAM AE function Использоавние функции PROGRAM AE Using the PROGRAM AE function Использование функции PROGRAM AE (1) Press PROGRAM AE. (2) Turn the control dial to select the desired PROGRAM AE mode. (1) Нажмите PROGRAM AE. (2) Вращайте регулировочный диск для выбора желаемого режима
- Страница 60 из 129
Shooting with backlighting Съемка с задней подсветкой When you shoot a subject with the light source behind the subject or a subject with a light background, use the BACK LIGHT function. Если Вы снимаете объект с источником света позади объекта или объект на светлом фоне, используйте функцию BACK
- Страница 61 из 129
Adjusting the exposure Регулировка экспозиции When to adjust the exposure Во время регулировки экспозиции Adjust the exposure manually under the following cases. В следующих случаях следует отрегулировать экспозицию вручную. [a] Adjusting the exposure [b] • Яркий объект на темном фоне • Для
- Страница 62 из 129
Adjusting the exposure Shooting with the sun behind you If the light source is behind your subject, or in the following situations, the subject will be recorded too dark. •The subject is indoors and there is a window behind the subject. •Bright light sources are included in the scene. •When
- Страница 63 из 129
Releasing the STEADY SHOT function Отключение функции STEADY SHOT Для активизации функции устойчивой съемки снова Set STEADY SHOT to ON. Установите STEADY SHOT на ON. Notes on the Steady Shot function •The Steady Shot function will not correct excessive camera-shake. •When you switch the STEADY
- Страница 64 из 129
Superimposing a title Наложение надписи To add the title while you are recording Для наложения надписи во время записи (1) While the camcorder is in Standby mode, press TITLE repeatedly until the desired title appears. Each time a new title appears, it is flashing. (2) When the desired title
- Страница 65 из 129
Superimposing a title Наложение надписи Для выбора цвета надписи (1) While the camcorder is in Standby mode, press MENU to display the menu. (2) Turn the control dial to select TITLE COL, then press the dial. (3) Turn the control dial to select the desired colour, then press the dial. You can chose
- Страница 66 из 129
Making your own titles Создание Ваших собственных надписей You can make up to two titles and store them in the camcorder. We recommend to eject the cassette before you begin. Your title can have up to 22 characters. (1) While the camcorder is in Standby mode, press MENU to display the menu. (2)
- Страница 67 из 129
Making your own titles To edit a title you have stored In step 2, select TITLE1 SET or TITLE2 SET, depending on which title you want to edit, then change the title. To move the cursor to the character on the left side, select M. If you enter 22 characters in step 4 The title is stored immediately
- Страница 68 из 129
Re-recording a picture in the middle of a recorded tape Перезапись изображения в середине записанной ленты (1) While the camcorder is in Standby mode, keep pressing the + (forward playback) or – (reverse playback) side of EDITSEARCH, and release the button where you want to end the insertion [b].
- Страница 69 из 129
Re-recording a picture in the middle of a recorded tape Перезапись изображения в середине записанной ленты Notes on re-recording •The picture and the sound may be distorted at the end of the inserted portion when it is played back. •If you re-record on the portion which contains non-recorded
- Страница 70 из 129
Optimizing the recording condition Оптимизация состояния записи Use this feature to check the tape condition before recording, so that you can get the best possible picture (ORC). (1) While the camcorder is in Standby mode, press MENU to display the menu. (2) Turn the control dial to select ORC TO
- Страница 71 из 129
Watching on a TV screen Просмотр на экране телевизора Connect the camcorder to your VCR or TV to watch the playback picture on the TV screen. When monitoring the playback picture by connecting the camcorder to your TV, we recommend you to use mains for the power source. While playing back on a TV
- Страница 72 из 129
Watching on a TV screen –CCD-TRV94E only If your VCR or TV has an S video jack, connect using the S video cable (not supplied) [a] to obtain a high quality picture . If you are going to connect the camcorder using the S video cable (not supplied) [a], you do not need to connect the yellow (video)
- Страница 73 из 129
Enjoying digital effect during playback Наслаждение цифровыми эффектами во время воспроизведения Во время воспроизведения Вы можете видоизменять изображение, используя функции цифровых эффектов; неподвижное изображение, мелькающее изображение, яркостный манипулятор и функция запаздывания. Для
- Страница 74 из 129
Searching the boundaries of recorded date – CCD-TRV94E only – Только CCD-TRV94E You can search for the boundary between recording dates using the Data Code automatically recorded on the tape. There are two modes: •Searching for the beginning of a specific date, and playing back from there (Date
- Страница 75 из 129
Searching the boundaries of recorded date Поиск границ записанных дат To scan the beginning of all days Для сканирования начала всех дат (1) Set the POWER switch to VTR. (2) Press DATE on the Remote Commander twice. (3) Press 0 or ). Date Scan starts. (1) Установите выключатель POWER в положение
- Страница 76 из 129
Returning to a preregistered position – CCD-TRV94E only – Только CCD-TRV94E Using the Remote Commander, you can easily go back to the desired point on a tape after playback. Use the tape counter. If the RC time code appears, set COUNTER to NORMAL in the menu system to display the tape counter. (1)
- Страница 77 из 129
Returning to a pre-registered position Notes on ZERO MEM •When you press ZERO MEM, the counter’s zero point is memorized. Press ZERO MEM again before rewinding to cancel the memory. •This function is canceled automatically once the tape is rewound or advanced to the point you pre-registered. •ZERO
- Страница 78 из 129
Locating the marking position Нахождение отмеченного места When marking during recording or playback При отметке во время записи или воспроизведения Press INDEX MARK on the Remote Commander at the point you want to locate later. Нажмите INDEX MARK на пульте дистанционного управления или на
- Страница 79 из 129
Нахождение отмеченного места Scanning the beginning of each marking position – index scan Сканирование начала каждого отмеченного места - Индексное сканирование (1) Press INDEX on the Remote Commander during normal playback. (2) Press 0 or ). The tape rewinds or advances rapidly and plays back for
- Страница 80 из 129
Locating the marking position Нахождение отмеченного места Locating the desired marking position – index search Нахождение желаемого отмеченного места – индексный поиск (1) Press INDEX on the Remote Commander during stop or playback mode. (2) Press INDEX repeatedly until the index number of the
- Страница 81 из 129
Locating the marking position Нахождение отмеченного места Erasing an index signal Стирание индексного сигнала (1) Найдите индексный сигнал, подлежащий стиранию с использованием функции индексного сканирования или индексного поиска. (2) Нажмите ERASE на пульте дистанционного управления в пределах
- Страница 82 из 129
Запись временного кода RC на записанной ленте Writing the RC Time code on a recorded tape – CCD-TRV94E only – Только CCD-TRV94E You can write the RC time code on a recorded tape. Use the Remote Commander. Before you begin, we recommend to set COUNTER to TIME CODE in the menu system so that you can
- Страница 83 из 129
Writing the RC Time code on a recorded tape Запись временного кода RC на записанной ленте To write the RC time code from the end of the RC time code recorded portion Для записи временного кода RC от конца записанной части с временным кодом RC Rewind the tape to the portion on which the RC time code
- Страница 84 из 129
Editing onto another tape Монтаж на другую ленту Вы можете создать Вашу собственную видеопрограмму путем монтажа с помощью другого КВМ типа h 8 мм, H Hi8, j VHS, k S-VHS, VHSC, K S-VHSC или l Betamax, который имеет входы видео/ аудио. You can create your own video programme by editing with any
- Страница 85 из 129
Editing onto another tape Монтаж на другую ленту Starting editing Начало монтажа To edit more scenes Repeat steps 2 to 4. Press π on both the camcorder and the VCR. Note on Fine Synchro Edit If you connect a video deck that has the Fine Synchro Edit feature to the LANC l jack of the camcorder,
- Страница 86 из 129
Recording from a VCR or TV In recording and recording pause mode, S video and VIDEO/AUDIO jacks automatically work as input jacks. Запись с КВМ или телевизора В режиме записи и паузы записи гнездо S– видео и гнезда VIDEO/AUDIO будут автоматически работать как входные гнезда. CCD-TRV54E/TRV56E 1
- Страница 87 из 129
Recording from a VCR or TV If your VCR or TV is a monaural type, connect only the white plug for audio on both the camcorder and the VCR or TV. If your VCR or TV does not have an S VIDEO OUT jack, connect cable [b]. Do not connect the S video cable (not supplied) [a] to the camcorder. To stop
- Страница 88 из 129
Additional information Changing the lithium battery in the camcorder Your camcorder is supplied with a lithium battery installed. When the battery becomes weak or dead, the I indicator flashes in the viewfinder for about 5 seconds when you set the POWER switch to CAMERA. In this case, replace the
- Страница 89 из 129
Changing the lithium battery in the camcorder Замена литиевой батарейки в видеокамере Changing the lithium battery Замена литиевой батарейки При замене литиевой батарейки оставьте батарейный блок или другой источник питания подсоединенным. В противном случае Вам потребуется снова устанавливать
- Страница 90 из 129
Resetting the date and time Установка даты и времени You can reset the date and time in the menu system. (1) While the camcorder is in Standby mode, press MENU to display the menu. (2) Turn the control dial to select CLOCK SET, then press the dial. (3) Turn the control dial to adjust the desired
- Страница 91 из 129
Resetting the date and time Установка даты и времени To check the preset date and time Для проверки предварительно установленных даты и времени n n 1997 ˜ 1998 N · · · · n 2029 1997 ˜ 1998 N · · · · n 2029 Примечание к индикатору времени Встроенные часы этой видеокамеры работают в 24-часовом цикле.
- Страница 92 из 129
Usable cassettes and playback modes Используемые кассеты и режимы воспроизведения When you play back Режимы воспроизведения The playback mode (SP/LP) and system (Hi8/ standard 8 mm) are selected automatically according to the format in which the tape has been recorded. The quality of the recorded
- Страница 93 из 129
Tips for using the battery pack This section shows you how you can get the most out of your battery pack. Советы по использованию батарейного блока Данный раздел показывает Вам, как Вы можете получить наибольшую отдачу от Вашего батарейного блока. Preparing the battery pack Always carry additional
- Страница 94 из 129
Tips for using the battery pack Notes on the rechargeable battery pack Caution Never leave the battery pack in temperatures above 60°C (140°F), such as in a car parked in the sun or under direct sunlight. The battery pack heats up During charging or recording, the battery pack heats up. This is
- Страница 95 из 129
Tips for using the battery pack The life of the battery pack If the battery indicator flashes rapidly just after turning on the camcorder with a fully charged battery pack, the battery pack should be replaced with a new fully charged one. Charging temperature You should charge batteries at
- Страница 96 из 129
Советы по использованию батарейного блока Tips for using the battery pack To obtain more accurate remaining battery indication Set the camcorder to recording standby mode and point towards a stationary object. Do not move the camcorder for 30 seconds or more. •If the indication seems incorrect, use
- Страница 97 из 129
Tips for using the battery pack Советы по использованию батарейного блока Notes on charging Примечания к зарядке A brand-new battery pack A brand-new battery pack is not charged. Before using the battery pack, charge it completely. Recharge the battery pack whenever you like Notes on the terminals
- Страница 98 из 129
Maintenance information and precautions Информация по уходу за аппаратом и предосторожности Moisture condensation Конденсация влаги If the camcorder is brought directly from a cold place to a warm place, moisture may condense inside the camcorder, on the surface of the tape, or on the lens. In this
- Страница 99 из 129
Maintenance information and precautions Информация по уходу за аппаратом и предосторожности Video head cleaning Очистка видеоголовок To ensure normal recording and clear pictures, clean the video heads. When the v˚ indicator and “ CLEANING CASSETTE” message appear one after another or playback
- Страница 100 из 129
Maintenance information and precautions Информация по уходу за аппаратом и предосторожности Removing dust from inside the viewfinder Удаление пыли изнутри видоискателя – CCD-TRV54E/TRV56E only – Только CCD–TRV54E/TRV56E (1) Remove the screw with a screwdriver (not supplied). Then, while sliding the
- Страница 101 из 129
Maintenance information and precautions Информация по уходу за аппаратом и предосторожности Precautions Предосторожности • Эксплуатируйте видеокамеру от 7,2 В (батарейного блока) или 8,4 В (сетевого адаптера перем. тока). • Для эксплуатации от пост. тока или перем. тока используйте принадлежности,
- Страница 102 из 129
Maintenance information and precautions •Clean the lens with a soft brush to remove dust. If there are fingerprints on it, remove them with a soft cloth. •Clean the camcorder body with a dry soft cloth, or a soft cloth lightly moistened with a mild detergent solution. Do not use any type of solvent
- Страница 103 из 129
Информация по уходу за аппаратом и предосторожности •Do not apply mechanical shock or drop the unit. •While the unit is in use, particularly during charging, keep it away from AM receivers and video equipment because it will disturb AM reception and video operation. •The unit becomes warm while in
- Страница 104 из 129
Using your camcorder abroad Each country or area has its own electric and TV colour systems. Before using your camcorder abroad, check the following points. Power sources You can use your camcorder in any country or area with the supplied AC power adaptor within 110 V to 240 V AC, 50/60 Hz.
- Страница 105 из 129
English Trouble check If you run into any problem using the camcorder, use the following table to troubleshoot the problem. Should the difficulty persist, disconnect the power source and contact your Sony dealer or local authorized Sony service facility. Camcorder Power Symptom The power is not on.
- Страница 106 из 129
Trouble check Symptom Cause and/or Corrective Action Recording stops in a few seconds. • The START/STOP MODE switch is set to 5SEC or . . (p. 18) m Set it to The cassette cannot be removed • The battery is dead. from the holder. m Use a charged battery pack or the AC power adaptor. (p. 8, 32) { and
- Страница 107 из 129
Trouble check Additional information Дополнительная информация Symptom Cause and/or Corrective Action A vertical band appears when a • The contrast between the subject and background is too high. subject such as lights or a candle The camcorder is not malfunctioning. flame is shot against a dark m
- Страница 108 из 129
Trouble check Symptom Cause and/or Corrective Action The picture from a TV or VCR • DISPLAY is set to V-OUT/LCD in the menu system. does not appear even when the m Set it to LCD. (p. 35) camcorder is connected to outputs on the TV or VCR. AC power adaptor Symptom Corrective Actions The VTR/CAMERA
- Страница 109 из 129
Trouble check Self-diagnosis function If the self-diagnosis function works to prevent the camcorder from malfunctioning, a five-digit service number (combination of a letter and figures) flashes. In this case, check the following table. First three digits C21 C23 C32 E61 E62 Cause and/or Corrective
- Страница 110 из 129
Русский Проверка неисправностей Если у Вас возникла проблема при обращении с видеокамероой, воспользуйтесь следующей таблицей для отыскания и устранения проблемы. Если трудности все еще остаются, то отсоедините источник питания и обратитесь к Вашему дилеру Sony или местное уполномоченное
- Страница 111 из 129
Проверка неисправностей Признак Additional information Дополнительная информация Причина и/или действия по исправлению Кассета не может быть вынута • Батарейный блок полностью разрядился. m Используйте заряженный батарейный блок или сетевой из держателя. адаптер перем. тока. (стр. 8, 32) •
- Страница 112 из 129
Проверка неисправностей Признак Причина и/или действия по исправлению Вертикальная полоса появляется, если такие объекты, как источники света или плямя свечи, снимаются на темном фоне. Вертикальная полоса появляется при съемке очень ярких объектов. Воспроизводимое изображение является нечетким.
- Страница 113 из 129
Проверка неисправностей Признак Причина и/или действия по исправлению Изображение от телевизора или • В системе меню DISPLAY установлено в положение V-OUT/ КВМ не появляется даже, если LCD. видеокамера подсоединена к m Установите его в положение LCD. (стр. 35) выходным гнездам на телевизоре или
- Страница 114 из 129
Проверка неисправностей Функция самодиагностики Если срабатывает функция самодиагностики для предотвращения видеокамеры от неправильного срабатывания, то начнет мигать пятизначный предупреждающий код (комбинация из одной буквы и цифр). В этом случае следует выполнить прверку в соответствии со
- Страница 115 из 129
English Specifications Video camera recorder System General Power requirements 7.2 V (battery pack) 8.4 V (AC power adaptor) Average power consumption During camera recording using LCD CCD-TRV54E: 4.8 W CCD-TRV56E: 5.0 W CCD-TRV94E: 5.2 W Viewfinder CCD-TRV54E: 3.7 W CCD-TRV56E/TRV94E: 3.5 W AC
- Страница 116 из 129
Русский Технические характеристики Видеокамера Система Система видеозаписи Две вращающиеся головки, наклонная механическая развертка, система ЧМ Система аудиозаписи Вращающиеся головки, система ЧМ Видеосигнал Цветовой сигнал PAL, стандарт по CCIR Используемые кассеты Кассеты 8-мм видеоформата
- Страница 117 из 129
Identifying the parts 1 Обозначения частей !º !¡ 7 8 9 !£ !¢ !∞ !§ !¶ !• 1 Управляемый вывод для вспомогательного оборудования (стр. 120) 2 Выключатель POWER (стр. 13) 3 Кнопки LCD BRIGHT (стр. 19) 4 Окошко дисплея (стр. 124) 5 Диск NEAR/FAR (стр. 57) 6 Переключатель FOCUS (стр. 57) 7 Держатель
- Страница 118 из 129
Identifying the parts !ª @º @¡ @™ @£ @¢ @∞ !ª EJECT switch (p. 12) @º LANC l control jack l stands for Local Application Control Bus System. The l control jack is used for controlling the tape transport of video equipment and peripherals connected to it. This jack has the same function as the jack
- Страница 119 из 129
Identifying the Parts #£ #¢ Обозначения частей $º $¡ $™ #§ $£ #¶ #• #ª $¢ #£ START/STOP MODE switch (p. 18) #∞ Speaker (p. 27) #§ LCD screen (p. 19) #¶ Lithium battery compartment (p. 89) #• DIGITAL EFFECT button (CCD-TRV54E/ TRV94E only) (p. 49) #ª PICTURE EFFECT button (p. 47) $º Video control
- Страница 120 из 129
Identifying the Parts Обозначения частей %¡ $§ %™ $¶ %£ %¢ %∞ $• $ª %º %§ CCD-TRV54E $§ TIME button (p. 30, 69) $§ Кнопка TIME (стр. 30, 69) $¶ DATE button (p. 30, 69) $¶ Кнопка DATE (стр. 30, 69) $• DISPLAY button (p. 27) $• Кнопка DISPLAY (стр. 27) $ª TITLE button (p. 63) $ª Кнопка TITLE (стр.
- Страница 121 из 129
Identifying the Parts Обозначения частей Remote Commander Пульт дистанционного управления The buttons that have the same name on the Remote Commander as on the camcorder function identically. Кнопки, которые имеют одинаковое наименование с кнопками на видеокамере, функционируют идентично. RMT-717
- Страница 122 из 129
Identifying the parts To prepare the Remote Commander Insert two R6 (size AA) batteries by matching the + and – on the batteries to the diagram inside the battery compartment. Обозначения частей Для подготовки пульта дистанционного управления Вставьте две батарейки R6 (размером АА), согласовывая +
- Страница 123 из 129
Identifying the parts Обозначения частей Remote control direction Направление пульта дистанционного управления 5° 5m 20° 20° Attaching the shoulder strap Attach the supplied shoulder strap to the hooks for the shoulder strap . Примечания к пульту дистанционного управления • Держите дистанционный
- Страница 124 из 129
Identifying the parts Обозначения частей Operation indicators Рабочие индикаторы Viewfinder/Видоискатель Display window/Окошко дисплея 1 2 3 4 5 6 7 8 9 !º !¡ !™ A W FADER CINEMA MOSAIC TRAIL VOL III ....... 4 7 1997 !£ !¢ !∞ !™ !§ !¢ !¶ !∞ !• !ª @º @¡ @™ @£ @¢ STBY 00:00:00 LP T END SEARCH 40 min.
- Страница 125 из 129
Identifying the parts !ª Index indicator/Date search/Date scan indicator/TIME CODE WRITE indicator/ ZERO MEM indicator (CCD-TRV94E only) (p. 74, 76, 82) END SEARCH indicator (p. 25) PHOTO mode indicator (CCD-TRV54E/ TRV94E only) (p. 46) @º Exposure indicator (p. 61)/Zoom indicator (p. 16) @¡
- Страница 126 из 129
Предупреждающие индикаторы Warning indicators If indicators flash in the viewfinder or in the display window, check the following: ≥: you can hear the beep sound when the BEEP is set to ON. 1 2 Если индикаторы мигают в видоискателе или в окошке дисплея, проверьте следующее: ≥: Вы можете слышать
- Страница 127 из 129
Index A, B I, J, K, L S Adjusting viewfinder ................ 14 AFM HiFi Sound .................. 38, 92 ANTI GROUND SHOOTING . 18 Auto focus ................................... 56 Backlight ..................................... 60 Beach & Ski mode ...................... 58 Beep
- Страница 128 из 129
Алфавитный указатель А, Б, В П Т-Я Автоматическая фокусировка ...................... 56 Автомобильный аккумулятор ....................... 33 Алфавитный указатель .................... Задняя обложка Введение/выведение изображения ..................... 42 Временной код ................ 35, 83
- Страница 129 из 129