Инструкция для Sony CCD-TR820E, CCD-TR825E
 1
1 2
2 3
3 4
4 5
5 6
6 7
7 8
8 9
9 10
10 11
11 12
12 13
13 14
14 15
15 16
16 17
17 18
18 19
19 20
20 21
21 22
22 23
23 24
24 25
25 26
26 27
27 28
28 29
29 30
30 31
31 32
32 33
33 34
34 35
35 36
36 37
37 38
38 39
39 40
40 41
41 42
42 43
43 44
44 45
45 46
46 47
47 48
48 49
49 50
50 51
51 52
52 53
53 54
54 55
55 56
56 57
57 58
58 59
59 60
60 61
61 62
62 63
63 64
64 65
65 66
66 67
67 68
68 69
69 70
70 71
71 72
72 73
73 74
74 75
75 76
76 77
77 78
78 79
79 80
80 81
81 82
82 83
83 84
84 85
85 86
86 87
87 88
88 89
89 90
90 91
91 92
92 93
93 94
94 95
95 96
96 97
97 98
98 99
99 100
100 101
101 102
102 103
103 104
104 105
105 106
106 107
107 108
108 109
109 110
110 111
111 112
112
Sony Corporation
Printed in Japan
Алфавитный указатель
А
Авт. Фокусировка ................. 43
Автомобильная батарея ....... 31
Б, В
Батарейка InfoLITHIUM ........ 78
Ветер ...................................... 33
Видеозапись .......................... 13
Введение/выведение
видеоизображения ............ 36
Выключатель извлечения
кассеты ............................... 12
Г. Д
Гнездо LANC .......................... 69
Гнездо MIC (микрофона) .... 101
Гнездо дист. управления
(LANC) ................................. 69
Демонстрация ................ 34, 104
Дата/время ...................... 27, 53
З, И
Задание часов ....................... 72
Зарядка батарейного
источника .............................. 8
Звуковоспроизведение AFM
HiFi ....................................... 74
Зуммер ................................... 15
ИЗОБРАЗИТЕЛЬНЫЙ
ЭФФЕКТ .............................. 40
Источники питания ............... 28
Индекс ................................... 61
К, Л
Код времени .................... 34, 66
Код времени RC .................... 66
Код даты ................................ 26
Литиевая батарейка ............. 70
Н, О, П
Нанесение титра ................... 49
Очистка видеоголовок ......... 82
Память нуля ..................... 54, 60
Пауза при
воспроизведении ................ 25
Перемотка видеоленты
назад ................................... 24
Плечевой ремешок ............. 107
Поиск даты ............................ 58
ПРОГРАММНАЯ АВТ.
ЭКСПОЗИЦИЯ .................... 44
Проверка неисправностей ... 93
Проверка видеозаписи ......... 21
Р
Рег. уровня сигнала .............. 36
Регулировка видоискателя
............................................. 14
Редактирование .................... 68
РЕДАКТ .................................. 35
РЕДАКТ. ПОИСК ................... 21
Режим пуска/останова ......... 18
Режим готовности ................. 14
Режим записи ........................ 33
Режим широкого изображения
............................................. 38
Режимы воспроизведения
............................................. 25
Ручная фокусировка ............ 42
Рычаг трансфокации ............ 17
С
Сброс счетчика ......... 15, 54, 60
Система меню ....................... 32
Скип-сканирование .............. 25
Сканирование даты .............. 58
Соединения ........................... 22
Счетчик длины
ленты ..................... 15, 33, 104
Т, У, Ф
Трансфокация ....................... 16
Установка на штативе .......... 19
Фоновый свет ........................ 46
Функция самодиагностики ... 97
Фукция ANTI GROUND
SHOOTING .......................... 18
Функция AUTO DATE ............ 16
Функция ТВС ......................... 34
Функция ORC ........................ 56
Функция STEADY SHOT ....... 57
Ц, Ш
Цифровая трансфокация ..... 17
Шумоподавитель ................... 34
Э, Я
Электросеть .......................... 28
Экспозиция ............................ 45
Оглавление инструкции
- Страница 1 из 113
Алфавитный указатель А К, Л С Авт. Фокусировка ................. 43 Автомобильная батарея ....... 31 Код времени .................... 34, 66 Код времени RC .................... 66 Код даты ................................ 26 Литиевая батарейка ............. 70 Сброс счетчика ......... 15, 54, 60
- Страница 2 из 113
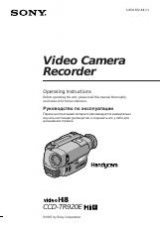
3-859-496-33 (1) Video Camera Recorder Operating Instructions Before operating the unit, please read this manual thoroughly, and retain it for future reference. Руководство по эксплуатации Перед эксплуатацией аппарата рекомендуется внимательно изучить настоящее руководство и сохранить его у себя
- Страница 3 из 113
English Русский Welcome! Congratulations on your purchase of this Sony Handycam® camcorder. With your Handycam you can capture life’s precious moments with superior picture and sound quality. Your Handycam is loaded with advanced features, but at the same time it is very easy to use. You will soon
- Страница 4 из 113
English Table of contents Before you begin Using this manual ................................................... 5 Checking supplied accessories ............................. 7 Basic operations Camera recording ................................................. 13 Using the zoom feature
- Страница 5 из 113
Русский язык Содержание Перед эксплуатацией аппарата О руководстве к аппарату ............................. 5 Проверка комплектности поставки .............. 7 Подготовка к эксплуатации аппарата Зарядка и установка батарейного источника
- Страница 6 из 113
Before you begin Перед эксплуатацией аппарата О руководстве к аппарату Using this manual Type of differences CCD- TR820E TR825E RC time code — r Data code — r Auto Date r — Zero memory — r Intelligent accessory shoe — r Note on TV colour systems TV colour systems differ from country to country. To
- Страница 7 из 113
Using this manual О руководстве к аппарату Precaution on copyright Об авторском праве Television programmes, films, video tapes, and other materials may be copyrighted. Unauthorized recording of such materials may be contrary to the provision of the copyright laws. Precautions on camcorder care •Do
- Страница 8 из 113
Checking supplied accessories Check that the following accessories are supplied with your camcorder. 1 RMT-717∗ Проверка комплектности поставки Проверить следующие принадлежности, поставляемые е Вашей видеокамерой. 2 3 4 5 6 7 8 9 or/или 1 Wireless Remote Commander (1) (p.105) ∗ for CCD-TR825E 2 AC
- Страница 9 из 113
Getting started Charging and installing the battery pack Before using your camcorder, you first need to charge and install the battery pack. To charge the battery pack, use the supplied AC power adaptor. This camcorder operates with the “InfoLITHIUM” battery. If you use any other battery to operate
- Страница 10 из 113
Charging and installing the battery pack Charging time Время зарядки Battery pack Charging time∗ (min.) NP-F330 (supplied) 160 (100) NP-F530 NP-F730 Батарейный источник Время зарядки∗ (мин) 170 (110) NP-F330 (поставляется) 160 (100) 250 (190) NP-F530 170 (110) 330 (270) NP-F730 250 (190) NP-F930
- Страница 11 из 113
Charging and installing the battery pack 10 Зарядка и установка батарейного источника Note on remaining battery time indication during recording Remaining battery time is displayed in the viewfinder. It may not be displayed properly, however, depending on the conditions and circumstances of use. Об
- Страница 12 из 113
Charging and installing the battery pack Зарядка и установка батарейного источника Installing the battery pack Установка батарейного источника Note on installing the NP-F930 battery pack Use the camcorder while lifting up the viewfinder slightly. Note on the battery pack Do not carry the camcorder
- Страница 13 из 113
Inserting a cassette Make sure that the power source is installed. When you want to record in the Hi8 system, use Hi8 video cassette H. (1) While pressing the small blue button on the EJECT switch, slide it in the direction of the arrow. The cassette compartment automatically lifts up and opens.
- Страница 14 из 113
Basic operations Camera recording Запись на видеокамере Перед съемкой надо убедиться, что аппарат заряжен источником питания и видеокассетой, а переключатель START/ STOP MODE (режим пуск/останов) поставлен . При записи одноразовых в положение эпизодов вы можете произвести пробную запись для того,
- Страница 15 из 113
Camera recording Запись на видеокамере To stop recording momentarily [a] Кратковременный останов записи [a] Press START/STOP again. The “STBY” indicator appears in the viewfinder (Standby mode). Снова нажать на START/STOP (Пуск/ останов). Индикация -STBY” появляется в видоискателе (режим
- Страница 16 из 113
Camera recording Notes on recording mode •This camcorder records and plays back in SP (standard play) mode and in LP (long play) mode. However, the playback quality in LP mode will not be as good as that in SP mode. •When a tape recorded on this camcorder in LP mode is played back on other types of
- Страница 17 из 113
Запись на видеокамере Camera recording Note on the AUTO DATE feature —CCD-TR820E only The clock is set at the factory to London time for United Kingdom and to Paris time for the other European countries. You can reset the clock in the menu system. You can change the AUTO DATE settings by selecting
- Страница 18 из 113
Запись на видеокамере Camera recording Zooming speed (Variable speed zooming) Move the power zoom lever a little for a slower zoom, move it further for a faster zoom. Notes on digital zoom •More than 15x zoom is performed digitally (x30), and the picture quality deteriorates as you go toward the
- Страница 19 из 113
Camera recording Запись на видеокамере Selecting the START/STOP mode Выбор режима START/STOP (пуска/останова) Your camcorder has two modes besides normal start/stop mode. These modes enable you to take a series of quick shots resulting in a lively video. (1) Set the START/STOP MODE switch to the
- Страница 20 из 113
Hints for better shooting For hand-held shots, you’ll get better results by holding the camcorder according to the following suggestions: [a] Советы по лучшей видеосъемке Для обеспечения лучшего качества изображения при съемке объектов нужно соблюдать следующие указания: [b] 1 2 •Hold the camcorder
- Страница 21 из 113
Hints for better shooting Cautions on the viewfinder •Do not pick up the camcorder by the viewfinder [c]. •Do not place the camcorder so as to point the viewfinder toward the sun. The inside of the viewfinder may be damaged. Be careful when placing the camcorder under sunlight or by a window [d].
- Страница 22 из 113
Checking the recorded picture Используя кнопку EDITSEARCH, (Редакт. поиск) Вы можете просмотреть последнюю запись или проверить качество записанного изображения через видоискатель. (1) Нажимая на зеленую кнопочку на выключателе POWER (Питание), переместить его в положение CAMERA (Видеокамера). (2)
- Страница 23 из 113
Connections for playback Соединения для воспроизведения Connect the camcorder to your VCR or TV to watch the playback picture on the TV screen. There are some ways to connect the camcorder to your TV. When monitoring the playback picture by connecting the camcorder to your TV, we recommend you to
- Страница 24 из 113
Connections for playback If your VCR or TV is a monaural type Connect only the white plug for audio on both the camcorder and the VCR or the TV. With this connection, the sound is monaural even stereo mode. If your TV/VCR has a 21-pin connector (EUROCONNECTOR) Соединения для воспроизведения При
- Страница 25 из 113
Воспроизведение видеозаписи Playing back a tape You can monitor the playback picture in the viewfinder. You can also monitor a picture on a TV screen, after connecting the camcorder to a TV or VCR. (1) While pressing the small green button on the POWER switch, set it to PLAYER. The video control
- Страница 26 из 113
Playing back a tape Воспроизведение видеозаписи Для отображения индикаторов видоискателья на экране телевизора Press DISPLAY on the Remote Commander. To erase the indicators, press DISPLAY again. Нажмите кнопку DISPLAY на пульте дистанционного управления. Для удаления индикаторов нажмите кнопку
- Страница 27 из 113
Playing back a tape To view the picture frame-by-frame —CCD-TR825E only Press '< or >7 on the Remote Commander in playback pause mode. If you keep pressing the button, you can view the picture at 1/25 speed. To resume normal playback, press (. To change the playback direction —CCD-TR825E only Press
- Страница 28 из 113
Playing back a tape Воспроизведение видеозаписи Для отображения даты или времени при записи Press DATE or TIME on the camcorder. To make the date or time disappear, press it again. To display the date and time when you recorded, press TIME (or DATE) after pressing DATE (or TIME). To make the date
- Страница 29 из 113
Advanced operations Using alternative power sources You can choose any of the following power sources for your camcorder: battery pack, the mains, alkaline battery and 12/24 V car battery. Choose the appropriate power source depending on where you want to use your camcorder. Place Power source
- Страница 30 из 113
Using alternative power sources Использование альтернативных источников питания Using the mains Питание от электросети To use the supplied AC power adaptor: (1) Connect the AC mains lead to the mains. (2) Slide the connecting plate down into the guides at the rear of the camcorder until it clicks.
- Страница 31 из 113
Using alternative power sources Using alkaline batteries Use the battery case (supplied) and six LR6 (size AA) Sony Alkaline batteries (not supplied). (1) Remove the battery holder from the battery case. (2) Insert six new alkaline batteries into the battery holder, following the marking on the
- Страница 32 из 113
Using alternative power sources Использование альтернативных источников питания Battery Life Срок службы батарейного блока Using alkaline batteries at 25°C (77°F). При применении щелочных батареек при температуре 25oC (77oF). Model Continuous recording time Typical recording time CCD-TR820E 95 min.
- Страница 33 из 113
Changing the mode settings You can change the mode settings in the menu system to further enjoy the features and functions of the camcorder. (1) Press MENU to display the menu. (2) Turn the control dial to select the desired item, then press the dial. (3) Turn the control dial to select the desired
- Страница 34 из 113
Changing the mode settings COUNTER∗ <NORMAL/TIME CODE> —CCD-TR825E only •Normally select NORMAL. •Select TIME CODE to display the RC time code in order to edit more precisely. Even if the battery is disconnected from the camcorder, the RC time code is not canceled. Items for CAMERA mode only WIND
- Страница 35 из 113
Changing the mode settings D ZOOM∗ <ON/OFF> •Select ON to activate digital zooming. •Select OFF not to use the digital zoom. The camera goes back to 15x zoom. REC LAMP∗ <ON/OFF> •Select OFF when you do not want the camera recording/battery lamp at the front of the unit to light up. •Normally select
- Страница 36 из 113
Changing the mode settings Items for PLAYER mode only EDIT <ON/OFF> •Select ON to minimize picture deterioration when editing. •Normally select OFF. HiFi SOUND <STEREO/1/2> •Normally select STEREO. •Select 1 or 2 to play back a dual sound track tape. TBC∗ <ON/OFF> •Select ON to correct for jitter.
- Страница 37 из 113
Fade-in and fade-out You can fade in or out to give your recording a professional appearance. When fading in, the picture gradually fades in from black or mosaic while the sound increases. When fading out, the picture gradually fades to black or mosaic while the sound decreases. When fading in [a]
- Страница 38 из 113
Fade-in and fade-out Плавный выход из затемнения и уход в него To cancel the fade-in/fade-out function Отмена функции выхода из затемнения/ухода в затемнение Before pressing START/STOP, press FADER until the fade indicator disappears. Перед нажатием на кнопку START/STOP (Пуск/Останов) нажать на
- Страница 39 из 113
Using the wide mode function Использование функции режима широкого изображения Selecting the desired mode Выбор требуемого режима You can record a cinemalike picture (CINEMA) or a 16:9 wide picture to watch on the 16:9 widescreen TV (16:9 FULL). Можно записывать изображение такое, как
- Страница 40 из 113
Использование функции режима широкого изображения Using the wide mode function Using the wide mode function While the camcorder is in Standby mode, press 16:9 WIDE repeatedly so that the desired mode indicator appears in viewfinder. While recording, you cannot change the mode. Использование функции
- Страница 41 из 113
Enjoying picture effect Наслаждение разными изобразительными эффектами Selecting picture effect Выбор вида изобразительных эффектов You can make pictures like those of television with the Picture Effect function. [a] [b] [c] PASTEL [a] Emphasize contrast and gives picture animationlike colours.
- Страница 42 из 113
Enjoying picture effect Using picture effect function (1) Press PICTURE EFFECT. (2) Turn the control dial to select the desired picture effect mode. 1 PICTURE EFFECT Наслаждение разными изобразительными эффектами Использование функции изобразительных эффектов (1) Нажать на кнопку PICTURE EFFECT
- Страница 43 из 113
Focusing manually Фокусировка в ручном режиме When to use manual focus Когда фокусировать вручную In the following cases you should obtain better results by adjusting the focus manually. [a] [b] •Insufficient light [a] •Subjects with little contrast — walls, sky, etc. [b] •Too much brightness
- Страница 44 из 113
Focusing manually Фокусировка в ручном режиме Focusing manually Фокусировка в ручном режиме 1 При ручной фокусировке сначала осуществить фокусировку с применением телеобъектива перед записью, а затем сбросить расстояние съемки. (1) Поставить переключатель FOCUS (Фоксировка) в положение MANUAL
- Страница 45 из 113
Using the PROGRAM AE function Использование функции PROGRAM AE (Программная автоматическая экспозиция) Selecting the best mode Выбор оптимального режима You can select one of six PROGRAM AE (Auto Exposure) modes to suit your shooting situation, referring to the following. a Можно выбрать один из
- Страница 46 из 113
Использование функции PROGRAM AE (Программная автоматическая экспозиция) Using the PROGRAM AE function Using the PROGRAM AE function (1) Press PROGRAM AE. (2) Turn the control dial to select the desired PROGRAM AE mode. 2 SEL/PUSH EXEC PROGRAM (1) Нажать на кнопку PROGRAM AE (Программная
- Страница 47 из 113
Shooting with backlighting When you shoot a subject with the light source behind the subject or a subject with a light background, use the BACK LIGHT function. Press BACK LIGHT. The c indicator appears in the viewfinder. Съемка при фоновом свете При съемке предмета с источником излучения за ним или
- Страница 48 из 113
Adjusting the exposure Регулировка экспозиции When to adjust the exposure Когда отрегулировать экспозицию Adjust the exposure manually under the following cases. Выполните регулировку экспозиции вручную в следующих случаях. [a] [b] •Bright subject and dark background •To record the darkness
- Страница 49 из 113
Adjusting the exposure Shooting with the sun behind you If the light source is behind your subject, or in the following situations, the subject will be recorded too dark. •The subject is indoors and there is a window behind the subject. •Bright light sources are included in the scene. •When
- Страница 50 из 113
Superimposing a title You can select one of eight preset titles. You can also select the language, position, and colour of titles in the menu system. Нанесение титра Можно выбирать любой из 8 предварительно установленных титров. Также можно выбирать язык, место нанесения и цвет титра при помощи
- Страница 51 из 113
Superimposing a title To add the title while you are recording (1) While the camcorder is in Standby mode, press TITLE repeatedly until the desired title appears. Each time a new title appears, it flashes. (2) When the desired title appears, wait for it to stop flashing, and press TITLE again to
- Страница 52 из 113
Нанесение титра Superimposing a title Выбор цвета титра (1) While the camcorder is in Standby mode, press MENU to display the menu. (2) Turn the control dial to select TITLE COL, then press the dial. (3) Turn the control dial to select the desired colour, then press the dial. You can choose from
- Страница 53 из 113
Making your own titles Составление оригинальных титров Вы можете составлять два титра и хранить их в видеокамере. Перед приступлением к составлению титров снять кассету. Ваш титр может иметь не более 22 букв. (1) Пока видеокамера находится в режиме Standby (Готовность), вызвать меню, нажав на
- Страница 54 из 113
Составление оригинальных титров Making your own titles To delete a title At the leftmost character position, select and press the control dial. Do not erase the title by selecting empty spaces. If you do so, a title full of empty spaces is stored. Исключение титра В положении крайнего левого знака
- Страница 55 из 113
Re-recording a picture in the middle of a recorded tape Перезапись изображения в середине ленты с записью —CCD-TR825E only You can insert a scene in the middle of a recorded tape by setting the starting and ending points. The previous recorded portion will be erased. If the RC time code appears in
- Страница 56 из 113
Re-recording a picture in the middle of a recorded tape Перезапись изображения в середине ленты с записью To change the end point Для изменения точки конца Press ZERO MEM to erase the ZERO MEM indicator, then repeat steps 2 to 5. Погасить индикацию ZERO MEM (Память нуля), нажав на кнопку ZERO MEM
- Страница 57 из 113
Optimizing the recording condition Проверка состояния ленты перед записью Use this feature to check the tape condition before recording, so that you can get the best possible picture (ORC). (1) While the camcorder is in Standby mode, press MENU to display the menu. (2) Turn the control dial to
- Страница 58 из 113
Releasing the STEADY SHOT function Выключение функции STEADY SHOT (Устойчивая съемка) When you shoot, the indicator appears in the viewfinder. This indicates that the Steady Shot function is working and the camcorder compensates for camera-shake. При съемке индикация появится в видоискателе. Это
- Страница 59 из 113
Searching the boundaries of recorded date Поиск границ даты записи —CCD-TR825E only – Только модель CCD-TR825E You can search for the boundary between recording dates using the Date Code automatically recorded on the tape. There are two modes: •Searching for the beginning of a specific date, and
- Страница 60 из 113
Searching the boundaries of recorded date Поиск границ даты записи To scan the beginning of all days Развертка начала всех дней (1) Set the POWER switch to PLAYER. (2) Press DATE on the Remote Commander twice. (3) Press 0 or ). Date Scan starts. (1) Установить выключатель POWER (Питание) в
- Страница 61 из 113
Returning to a preregistered position Возврат к предварительно зарегистрированному положению —CCD-TR825E only – Только модель CCD-TR825E Using the Remote Commander, you can easily go back to the desired point on a tape after playback. Use the tape counter. If the RC time code appears in the
- Страница 62 из 113
Returning to a pre-registered position Notes on ZERO MEM •When you press ZERO MEM, the counter’s zero point is memorized. Press ZERO MEM again before rewinding to cancel the memory. •This function is canceled automatically once the tape is rewound or advanced to the point you pre-registered. •ZERO
- Страница 63 из 113
Locating the marking position Обнаружение положения отметки When marking during recording or playback Отметка при записи или воспроизведении Press INDEX MARK on the Remote Commander at the point you want to locate later. Нажать на кнопку INDEX MARK (Отметка индекса) на пульте дистанционного
- Страница 64 из 113
Locating the marking position Scanning the beginning of each marking position — index scan 1 SEARCH DATE INDEX Развертка начала каждого положения отметки — развертка индекса Это осуществляется с пульта дистанционного управления. Для просмотра изображения на экране телевизора нажать на кнопку
- Страница 65 из 113
Locating the marking position Обнаружение положения отметки Locating the desired marking position — index search Обнаружение положения отметки — поиск индекс (1) Press INDEX on the Remote Commander during stop or playback mode. (2) Press INDEX repeatedly until the index number of the desired
- Страница 66 из 113
Locating the marking position Обнаружение положения отметки Erasing an index signal Стирание индексного сигнала 1 2 SEARCH DATE INDEX REW FF INDEX MARK ERASE Notes on erasing •Press INDEX ERASE more than 2 seconds after the playback of the desired programme begins. •You cannot erase the index
- Страница 67 из 113
Writing the RC Time code on a recorded tape Ввод временного кода RC в видеозапись —CCD-TR825E only —Только CCD-TR825E You can write the RC time code on a recorded tape. Use the Remote Commander. Before you begin, we recommend to set COUNTER to TIME CODE in the menu system so that you can view the
- Страница 68 из 113
Writing the RC Time code on a recorded tape To write the RC time code from the end of the RC time code recorded portion Rewind the tape to the portion on which the RC time code has been written and set the camcorder to playback pause mode. Then follow steps 3 and 4 above. The RC time code is
- Страница 69 из 113
Редактирование записи на другую ленту Editing onto another tape You can create your own video programme by editing with any other h 8 mm, H Hi8, j VHS, k S-VHS, VHSC, K S-VHSC or l Betamax VCR that has video/audio inputs. Before editing Connect the camcorder to the VCR using the supplied A/V
- Страница 70 из 113
Editing onto another tape Редактирование записи на другую ленту Starting editing Начало редактирования To edit more scenes Repeat steps 2 to 4. (1) Вставить незаписанную ленту (или ленту, на которую Вы хотите перезаписать) в видеомагнитофон, а Вашу записанную ленту — в видеокамеру. (2)
- Страница 71 из 113
Additional Information Дополнительная информация Changing the lithium battery in the camcorder Замена литиевой батарейки в видеокамере Your camcorder is supplied with a lithium battery installed. When the battery becomes weak or dead, the I indicator flashes in the viewfinder for about 5 seconds
- Страница 72 из 113
Changing the lithium battery in the camcorder Замена литиевой батарейки в видеокамере Changing the lithium battery Замена литиевой батарейки When replacing the lithium battery, keep the battery pack or other power source attached. Otherwise, you will need to reset the date, time and other items in
- Страница 73 из 113
Resetting the date and time Установка даты и времени Вы можете установить дату и время в системе меню. (1) Нажать на кнопку MENU (меню) для отображения меню в видоискателе. (2) Поверните диск управления, чтобы выбрать CLOCK SET, а затем нажмите диск. (3) Поверните диск управления, чтобы
- Страница 74 из 113
Resetting the date and time To check the preset date and time Press DATE to display the date indicator in the viewfinder. Press TIME to display the time indicator. Press DATE and TIME to display the date and time indicators. When you press the same button again, the indicator goes off. The year
- Страница 75 из 113
Usable cassettes and playback modes Применяемые кассеты и режимы воспроизведения When you play back При воспроизведении видеозаписи The playback mode (SP/LP) and system (Hi8/ standard 8 mm) are selected automatically according to the format in which the tape has been recorded. The quality of the
- Страница 76 из 113
Usable cassettes and playback modes •You cannot play back a tape recorded in NTSC video system with LP mode neither in the viewfinder nor on a TV screen. •If a tape has portions recorded in PAL and NTSC video systems, the tape counter reading is not correct. This discrepancy is due to the
- Страница 77 из 113
Tips for using the battery pack Рекомендации по применению батарейного источника When to replace the battery pack При замене батарейного источника While you are using your camcorder, the remaining battery indicator in the viewfinder decreases gradually as battery power is used up. Remaining time in
- Страница 78 из 113
Tips for using the battery pack Рекомендации по применению батарейного источника Battery pack care Уход за батарейным источником •Remove the battery pack from the camcorder after using it, and keep it in a cool place. When the battery pack is installed to the camcorder, a small amount of current
- Страница 79 из 113
Tips for using the battery pack Рекомендации по применению батарейного источника Notes on the “InfoLITHIUM” battery pack Примечания относительно батарейного блока “InfoLITHIUM” What is the “InfoLITHIUM” Что такое “InfoLITHIUM” The “InfoLITHIUM” is a lithium ion battery pack which can exchange data
- Страница 80 из 113
Рекомендации по применению батарейного источника Tips for using the battery pack •After you have used the “InfoLITHIUM” battery pack with an equipment not having the mark, make sure that you use up the battery pack on the equipment having the mark and then recharge fully. Why the remaining battery
- Страница 81 из 113
Tips for using the battery pack Рекомендации по применению батарейного источника Notes on the terminals Примечания по клеммам If the terminals (metal parts on the back) are not clean, the battery charge duration will be shortened. When the terminals are not clean or when the battery pack has not
- Страница 82 из 113
Tips for using the battery pack If battery leakage occurred •Wipe off the liquid in the battery case carefully before replacing the batteries. •If you touch the liquid, wash it off with water. •If the liquid get into your eyes, wash your eyes with a lot of water and then consult a doctor.
- Страница 83 из 113
Maintenance information and precautions On the lens На объективе If moisture condenses on the lens, no indicator appears, but the picture becomes dim. Turn off the power and do not use the camcorder for about 1 hour. При конденсации влаги на объективе никакая индикация не появится, а изображение
- Страница 84 из 113
Maintenance information and precautions Указания по техобслуживанию и предосторожности Caution Общие указания Do not use a commercially available wet-type cleaning cassette. It may damage the video heads. Не рекомендуется очистительная кассета мокрого типа, которая продается в видеомагазинах. Такая
- Страница 85 из 113
Maintenance information and precautions Указания по техобслуживанию и предосторожности Precautions Общие указания Camcorder operation По эксплуатации видеокамеры •Operate the camcorder on 7.2 V (battery pack) or 8.4 V (AC power adaptor). •For DC or AC operation, use the accessories recommended in
- Страница 86 из 113
Maintenance information and precautions Указания по техобслуживанию и предосторожности AC power adaptor Сетевой адаптер перем. тока Charging •Use only a lithium ion type battery pack. •Place the battery pack on a flat surface without vibration during charging. •The battery pack will get hot during
- Страница 87 из 113
Maintenance information and precautions Notes on dry batteries To avoid possible damage from battery leakage or corrosion, observe the following. •Be sure to insert the batteries in the correct direction. •Dry batteries are not rechargeable. •Do not use a combination of new and old batteries. •Do
- Страница 88 из 113
Using your camcorder abroad Each country or area has its own electric and TV colour systems. Before using your camcorder abroad, check the following points. Power sources You can use your camcorder in any country or area with the supplied AC power adaptor within 110 V to 240 V AC, 50/60 Hz.
- Страница 89 из 113
English Trouble check If you run into any problem using the camcorder, use the following table to troubleshoot the problem. Should the difficulty persist, disconnect the power source and contact your Sony dealer or local authorized Sony service facility. Camcorder Power Symptom Cause and/or
- Страница 90 из 113
Trouble check Cause and/or Corrective Action The cassette cannot be removed from the holder. •The battery is dead. m Use a charged battery pack or the AC power adaptor. (p.8, 28) { and 6 indicators flash and no function except for cassette ejection works. •Moisture condensation has occurred. m
- Страница 91 из 113
Trouble check Picture Symptom Cause and/or Corrective Action The image on the viewfinder screen is not clear. •The viewfinder lens is not adjusted. m Adjust the viewfinder lens. (p.14) A vertical band appears when a subject such as lights or a candle flame is shot against a dark background. •The
- Страница 92 из 113
Trouble check AC power adaptor Symptom Corrective Actions The VTR/CAMERA or CHARGE lamp does not light. • Disconnect the mains lead. After about 1 minute, reconnect the mains lead. The CHARGE lamp flashes. • See the following chart. When the CHARGE lamp flashes Check through the following chart. $
- Страница 93 из 113
Trouble check Self-diagnosis function If the self-diagnosis function is activated to prevent the camcorder from operating abnormally, the five digit service number (combination of an alphabet and figures) flashes in the viewfinder or display window. In this case, check the following table. C:21:00
- Страница 94 из 113
Русский Проверка неисправностей В случае возникновения какой-либо неисправности при использовании видеокамеры устранить ее согласно нижеприведенной таблице возможных неисправностей и способов их устранения. При невозможности устранения неисправности отсоединить видеокамеру от сети и обратиться к
- Страница 95 из 113
Проверка неисправностей Неисправность Причина и/или способ устранения Запись останавливается через несколько секунд. • Переключатель START/STOP MODE (Режим пуска/ останова) переведен в положение 5 sec (5 сек) или ANTI GROUND SHOOTING . m Перевести его в положение (Стр. 18) Кассета не может
- Страница 96 из 113
Проверка неисправностей Неисправность Причина и/или способ устранения Код данных имеет вид “--:--:--”. (Только модель CCD-TR825E) • Вы воспроизводите часть ленты, на которой Вы записали или стерли индексный сигнал. Это не является неисправностью. (стр. 67) Исчезает индикация даты или времени. •
- Страница 97 из 113
Проверка неисправностей Сетевой адаптер перем. тока Неисправность Cпособ устранения Сигнальная лампа VTR/CAMERA • Отсоединить главный вывод. Примерно через 1 мин. (Видеомагнитофон/ подсоединить его повторно. Видеокамера) или CHARGE (Зарядка) не загорается. Мигает сигнальная лампа CHARGE (Зарядка).
- Страница 98 из 113
Проверка неисправностей Функция самодиагностики Если сработала функция самодиагностики для предотвращения видеокамеры от неправильного функционирования, в видоискателе или окошке дисплея начнет мигать пятизначный номер обслуживания (комбинация из одной буквы и цифр). В этом случае следует проверить
- Страница 99 из 113
English Specifications Video camera recorder System Video recording system Two rotary heads, Helical scanning FM system Audio recording system Rotary heads, FM system Video signal PAL colour, CCIR standards Usable cassette 8mm video format cassette (Hi8 or standard 8mm) Recording / Playback time
- Страница 100 из 113
Русский Технические характеристики Видеокамера Система Выход видеосигнала S 4-штекерный, миниатюрный по DIN Сигнал яркости: 1 В по двойн. ампл., 75 Ом, несбаланс., убывающий синхросигнал Сигнал цветности: 0,3 В по двойн. ампл., 75 Ом, несбаланс. Выход видеосигнала Гнездо для подключения, 1 В по
- Страница 101 из 113
Identifying the parts Список деталей и узлов видеокамеры 1 2 3 9 !º !¡ !™ !£ 4 5 6 7 !¢ !∞ !§ 8 1 BACKLIGHT button (p.46) 2 FADER button (p.36) 3 POWER switch (p.13) 4 NEAR/FAR dial (p.42) 5 FOCUS switch (p.42) 6 STEADY SHOT switch (p.57) 7 PICTURE EFFECT button (p.40) 2 Кнопка FADER (Рег. уровня
- Страница 102 из 113
Identifying the parts Список деталей и узлов видеокамеры !¶ !• @£ !ª @º @¢ @∞ @¡ @§ !¶ Power zoom lever (p.16) !¶ Рычаг трансфокации (стр. 16) !• EJECT switch (p.12) !• Выключатель EJECT (Извлечение) (стр. 12) !ª LANC l control jack l stands for Local Application Control Bus System. The l control
- Страница 103 из 113
Список деталей и узлов видеокамеры Identifying the Parts @¶ STOP REW PLAY FF PAUSE #∞ @• @ª #º #¡ #§ #™ #£ #¶ #¢ #• #ª @¶ Viewfinder (p.14, 19, 83) @¶ Видоискатель (стр. 14, 19, 83) @• Eyecup (p.19) @• Глазная манжета (стр. 19) @ª Viewfinder lens adjustment ring (p.14) @ª Кольцо регулировки
- Страница 104 из 113
Identifying the Parts Список деталей и узлов видеокамеры $º $¢ $™ $£ $∞ $§ $º Intelligent accessory shoe (for CCD-TR825E only) The intelligent accessory shoe supplies power to optional accessories such as a video light. Accessory shoe (for CCD-TR820E only) $¡ Camera recording/battery lamp (p.13) $™
- Страница 105 из 113
Identifying the parts Note on the intelligent accessory shoe Supplies power to optional accessories such as a video light or microphone. The intelligent accessory shoe is linked to the STANDBY switch, allowing you to turn on and off the power supplied by the shoe. Refer to the instruction manual of
- Страница 106 из 113
Список деталей и узлов видеокамеры Identifying the parts Пульт дистанционного управления Remote Commander The buttons that have the same name on the Remote Commander as on the camcorder function identically. Органы управления, расположенные на пульте дистанционного управления, имеют одни и те же
- Страница 107 из 113
Список деталей и узлов видеокамеры Identifying the parts To prepare the Remote Commander Insert two R6 (size AA) batteries by matching the + and – on the batteries to the diagram inside the battery compartment. RMT-717 Для подготовки пульта дистанционного управления Вставьте две батарейки R6
- Страница 108 из 113
Список деталей и узлов видеокамеры Identifying the parts Remote control direction 15° 30° Направление пульта 5m (15 1/3 ft) 30° 15° Attaching the shoulder strap Attach the supplied shoulder strap to the hooks for the shoulder strap . Общие указания по обращению с пультом • На дистанционный датчик
- Страница 109 из 113
Identifying the parts Список деталей и узлов видеокамеры Operation indicator Функциональный индикатор Viewfinder / Видоискатель 1 2 3 4 5 6 7 8 9 0 !¡ Display window / Дисплейное окошко STBY 00:00:00 LP W T FADER CINEMA MOSAIC 40min 4 7 1996 AUTO DATE 12:00:00 ORC SP LP TC DC !ª @™ @£ @¢ @∞ 1 WIND
- Страница 110 из 113
Список деталей и узлов видеокамеры Identifying the parts !¶ Remaining tape indicator !¶ Индикация остатка длины ленты 5min 0min !• Date search/Date scan indicator (p.58)/TIME CODE WRITE indicator (p.66)/ZERO MEM indicator (p.54, 60)/Index indicator (p.62, 63, 64, 65) (CCD-TR825E only) !ª Remaining
- Страница 111 из 113
Предупредительные индикации Warning indicators If indicators flash in the viewfinder or in the display window, check the following: ≥: you can hear the beep sound when the BEEP is set to ON. Display window Viewfinder Дисплейное Видоискатель окошко 1 2 При мигании индикаций в видоискателе или
- Страница 112 из 113
Index A, B F, G, H Q, R Adjusting viewfinder ................ 14 AFM HiFi Sound ........................ 74 ANTI GROUND SHOOTING . 18 AUTO DATE .............................. 16 Auto focus ................................... 42 Backlight ..................................... 46 Beep
- Страница 113 из 113