Инструкция для Sony CCD-TR412E
 1
1 2
2 3
3 4
4 5
5 6
6 7
7 8
8 9
9 10
10 11
11 12
12 13
13 14
14 15
15 16
16 17
17 18
18 19
19 20
20 21
21 22
22 23
23 24
24 25
25 26
26 27
27 28
28 29
29 30
30 31
31 32
32 33
33 34
34 35
35 36
36 37
37 38
38 39
39 40
40 41
41 42
42 43
43 44
44 45
45 46
46 47
47 48
48 49
49 50
50 51
51 52
52 53
53 54
54 55
55 56
56 57
57 58
58 59
59 60
60 61
61 62
62 63
63 64
64 65
65 66
66 67
67 68
68 69
69 70
70 71
71 72
72 73
73 74
74 75
75 76
76 77
77 78
78 79
79 80
80 81
81 82
82 83
83 84
84 85
85 86
86 87
87 88
88 89
89 90
90 91
91 92
92 93
93 94
94 95
95 96
96 97
97 98
98 99
99 100
100 101
101 102
102 103
103 104
104 105
105 106
106 107
107 108
108 109
109 110
110 111
111 112
112 113
113 114
114 115
115 116
116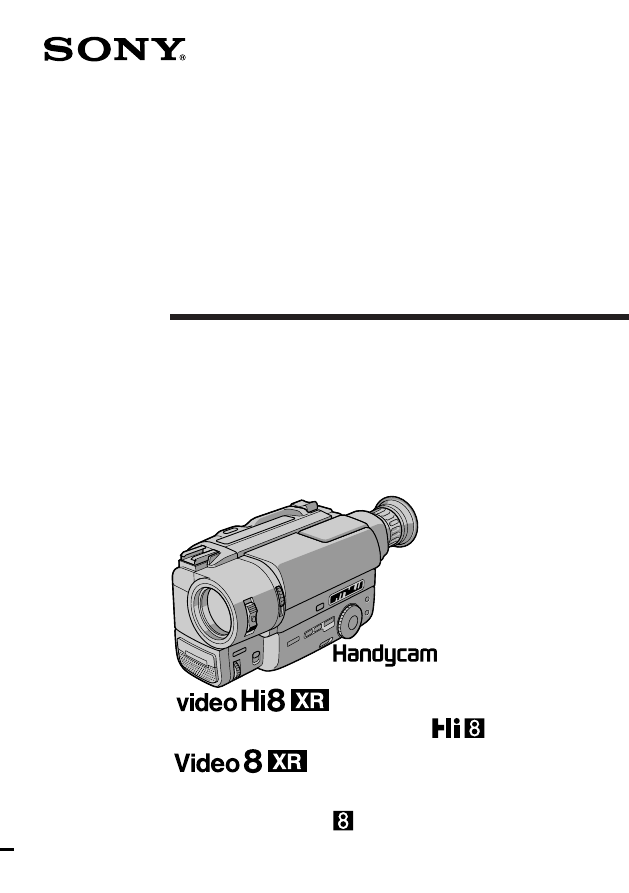
3-861-899-13 (1)
Video Camera
Recorder
Operating Instructions
Before operating the unit, please read this manual thoroughly,
and retain it for future reference.
Инструкция по эксплуатации
Перед эксплуатацией аппарата внимательно прочтите,
пожалуйста, данное руководство и сохраняйте его для
дальнейших справок.
©1998 by Sony Corporation
CCD-TR840E/TR845E
CCD-TR411E/TR412E/TR511E/
TR640E
CCD-TR845E
Оглавление инструкции
- Страница 1 из 117
3-861-899-13 (1) Video Camera Recorder Operating Instructions Before operating the unit, please read this manual thoroughly, and retain it for future reference. Инструкция по эксплуатации Перед эксплуатацией аппарата внимательно прочтите, пожалуйста, данное руководство и сохраняйте его для
- Страница 2 из 117
Русский English Welcome! Добро пожаловать! Congratulations on your purchase of this Sony HandycamR camcorder. With your Handycam you can capture life’s precious moments with superior picture and sound quality. Your Handycam is loaded with advanced features, but at the same time it is very easy to
- Страница 3 из 117
English Table of contents Before you begin Using this manual ................................................... 5 Checking supplied accessories ............................. 7 Getting started Installing and charging the battery pack ............ 8 Inserting a cassette
- Страница 4 из 117
Русский Оглавление Перед началом эксплуатации Использование данного руководства ........... 5 Проверка прилагаемых принадлежностей ... 7 Подготовка к эксплуатации Установка и зарядка батарейного блока ..... 8 Вставка кассеты ........................................... 13 Основные операции Запись с
- Страница 5 из 117
Before you begin Перед началом эксплуатации Использование данного руководства Using this manual Инструкции в данном руководстве изложены для шести нижеперечисленных моделей. Перед тем, как Вы начнете читать данное руководство и эксплуатировать аппарат, проверьте номер Вашей модели, посмотрев на
- Страница 6 из 117
Using this manual Note on TV colour systems TV colour systems differ from country to country. To view your recordings on a TV, you need a PAL system-based TV. Precaution on copyright Television programmes, films, video tapes, and other materials may be copyrighted. Unauthorized recording of such
- Страница 7 из 117
Checking supplied accessories Check that the following accessories are supplied with your camcorder. RMT-708 Проверьте, что следующие принадлежности прилагаются к Вашей видеокамере. 2 or/или 3 4 5 6 * or/или 7 8 Before you begin / Перед началом эксплуатации 1 RMT-717 Проверка прилагаемых
- Страница 8 из 117
Getting started Installing and charging the battery pack Before using your camcorder, you first need to install and charge the battery pack. This camcorder operates only with the “InfoLITHIUM” battery pack. “InfoLITHIUM” is a trademark of Sony corporation. Подготовка к эксплуатации Уcтaнoвка и
- Страница 9 из 117
Installing and charging the battery pack Уcтaнoвка и зарядка батарейного блока Charging the battery pack Зарядка батарейного блока Заряжайте батарейный блок на плоской поверхности, неподверженной вибрации. Батарейный блок заряжен немного на заводе. (1) Откройте крышку гнезда DC IN и подсоедините
- Страница 10 из 117
Installing and charging the battery pack Notes •The display shows “--- min” until the remaining battery time appears. •Remaining battery time indication in the display window roughly indicates the recording time. Use it as a guide. It may differ from the actual recording time. •If there is a slight
- Страница 11 из 117
Installing and charging the battery pack CCD-TR640E CCD-TR640E Continuous recording time* Typical recording time** NP-F330 (supplied) 125 (110) 65 (55) NP-F530 215 (190) 110 (100) NP-F550 250 (220) 130 (115) NP-F730 430 (385) 225 (200) NP-F750 510 (460) 270 (240) NP-F950 680 (610) 780 (700) 360
- Страница 12 из 117
Installing and charging the battery pack Note on remaining battery time indication during recording Remaining battery time is displayed in the viewfinder. However, the indication may not be displayed properly, depending on using conditions and circumstances. Уcтaнoвка и зарядка батарейного блока To
- Страница 13 из 117
Inserting a cassette 1 2 Убедитесь, что источник питания установлен. Если Вы хотите выполнить запись в системе Hi8, то используйте Hi8-видеокассету H (Только CCD-TR840E/TR845E). (1) Нажимая маленькую синюю кнопку на выключателе EJECT, сдвиньте его в направлении стрелки. Кассетный отсек
- Страница 14 из 117
Basic operations Camera recording Make sure that the power source is installed, a cassette is inserted and that the START/STOP MODE switch is set to . Before you record one-time events, you may want to make a trial recording to make sure that the camcorder is working correctly. When you use the
- Страница 15 из 117
Запись с помощью видеокамеры Camera recording To stop recording momentarily [a] Для временной остановки записи [a] Press START/STOP again. The “STBY” indicator appears in the viewfinder (Standby mode). Снова нажмите START/STOP. Индикатор “STBY” появляется в видоискателе (режим готовности). To
- Страница 16 из 117
Camera recording Note on Standby mode If you leave the camcorder in Standby mode for 5 minutes while the cassette is inserted, the camcorder turns off automatically for saving battery power as well as for preventing the battery and tape from wearing down. To resume Standby mode, turn STANDBY down
- Страница 17 из 117
Запись с помощью видеокамеры Camera recording Примечание к функции AUTO DATE – Только CCD-TR411E/TR412E/TR511E/ TR640E/TR840E Часы установлены на заводе на лондоское время для моделей Соединенного Королевства и на парижское время для моделей других европейских стран. Вы можете переустановить часы в
- Страница 18 из 117
Запись с помощью видеокамеры Camera recording Zooming speed (Variable speed zooming) Скорость наезда видеокамеры (наезд с различной скоростью) Move the power zoom lever a little for a slower zoom, move it further for a faster zoom. Передвиньте рычаг приводного трансфокатора немного для сравнительно
- Страница 19 из 117
Camera recording Запись с помощью видеокамеры Selecting the START/STOP mode Выбор режима START/STOP 1 5 SEC CK LO CK LO STA ANTI GRAUNO SHOOTING 2 STA START/STOP MODE Ваша видеокамера имеет три режима. Эти режимы позволяют Вам снять серию коротких кадров, создавая в результате оживленную
- Страница 20 из 117
Hints for better shooting For hand-held shots, you will get better results by holding the camcorder according to the following suggestions: •Hold the camcorder firmly and secure it with the grip strap so that you can easily manipulate the controls with your thumb [a]. •Place your right elbow
- Страница 21 из 117
Hints for better shooting Советы для лучшей съемки Располагайте видеокамеру на плоской поверхности или используйте треногу Постарайтесь расположить видеокамеру сверху на столе или любой другой плоской поверхности подходящей высоты. Если у Вас есть тренога для фотоаппарата, Вы также можете
- Страница 22 из 117
Checking the recorded picture Using EDITSEARCH, you can review the last recorded scene or check the recorded picture in the viewfinder. (1) While pressing the small green button on the POWER switch, set it to CAMERA. (2) Turn STANDBY up to STANDBY. (3) Press the – (Œ) side of EDITSEARCH
- Страница 23 из 117
Checking the recorded picture To stop playback Проверка записанного изображения Для остановки воспроизведения Отпустите EDITSEARCH. To begin re-recording Снова для начала записи Press START/STOP. Re-recording begins from the point you released EDITSEARCH. Provided you do not eject the cassette, the
- Страница 24 из 117
Connections for playback Connect the camcorder to your TV or VCR to watch the playback picture on the TV screen. There are some ways to connect the camcorder to your TV. When monitoring the playback picture by connecting the camcorder to your TV, we recommend you to use mains for the power source.
- Страница 25 из 117
Соединения для воспроизведения Connections for playback CCD-TR840E/TR845E (not supplied)/ (не прилагается) IN S VIDEO [a] (not supplied)/ S VIDEO VIDEO [b] AUDIO AUDIO : Signal flow/ Передача сигнала – CCD-TR840E/TR845E only If your TV or VCR has an S video jack, connect using the S video
- Страница 26 из 117
Playing back a tape You can monitor the playback picture in the viewfinder. You can also monitor the picture on a TV screen, after connecting the camcorder to a TV or VCR. (1) While pressing the small green button on the POWER switch, set it to PLAYER. The video control buttons light up
- Страница 27 из 117
Playing back a tape Using the remote commander – CCD-TR412E/TR511E/TR640E/TR840E/TR845E only You can control playback using the supplied Remote Commander. Before using the Remote Commander, insert the R6 (size AA) batteries. Press DISPLAY on the Remote Commander. To erase the indicators, press
- Страница 28 из 117
Playing back a tape Воспроизведение ленты Various playback modes Различные режимы воспроизведения To view a still picture (playback pause) Press P during playback. To resume playback, press P or (. To locate a scene (picture search) Keep pressing 0 or ) during playback. To resume normal playback,
- Страница 29 из 117
Playing back a tape Воспроизведение ленты To view the picture frame-by-frame Для покадрового просмотра изображения – CCD-TR845E only Press '/< or >/7 on the Remote Commander in playback pause mode. If you keep pressing the button, you can view the picture at 1/25 speed. To resume normal playback,
- Страница 30 из 117
Воспроизведение ленты Playing back a tape To display the date or time when you recorded Press DATE or TIME on the camcorder. To make the date or time disappear, press it again. To display the date and time when you recorded, press TIME (or DATE) after pressing DATE (or TIME). To make the date and
- Страница 31 из 117
Advanced operations Using alternative power sources You can choose any of the following power sources for your camcorder: battery pack, mains, alkaline batteries and 12/24 V car battery. Choose the appropriate power source depending on where you want to use your camcorder. Усовершенствованные
- Страница 32 из 117
Using alternative power sources Использование альтернативных источников питания Using the mains Использование электрической сети (1) Open the DC IN jack cover, and connect the AC power adaptor to the DC IN jack on the camcorder. (2) Connect the mains lead to the AC power adaptor. (3) Connect the
- Страница 33 из 117
Using alternative power sources Использование альтернативных источников питания Using a car battery Использование автомобильного аккумулятора Use Sony DC-V515A car battery charger (not supplied). Connect the car battery cord to the cigarette lighter socket of a car (12 V or 24 V). Refer to the
- Страница 34 из 117
Changing the mode settings You can change the mode settings in the menu system to further enjoy the features and functions of the camcorder. (1) Press MENU to display the menu. (2) Turn the control dial to select the desired icon in the left side of the menu, then press the dial. (3) Turn the
- Страница 35 из 117
Changing the mode settings Note on the menu display Depending on the model of your camcorder, the menu display may be different from that in this illustration. Note on changing the mode setting Menu items differ depending on the setting of the POWER switch to PLAYER or CAMERA. Items for both CAMERA
- Страница 36 из 117
Changing the mode settings Изменение установок режимов LTR SIZE* <NORMAL/2x> •Normally select NORMAL. •Select 2x to display selected menu item by twice size of normal. LTR SIZE* <NORMAL/2x> • Обычно выбирайте NORMAL. • Выберите 2х для отображения выбранной установки меню в два раз больше
- Страница 37 из 117
Changing the mode settings Изменение установок режимов N.S.LIGHT* <ON/OFF> (Только CCDTR511E/TR640E/TR840E/TR845E) • Обычно выбирайте ON. • Выберите OFF при неиспользовании функции освещения ночной съемки. WIND <ON/OFF> (CCD-TR840E/TR845E only) •Select ON to reduce wind noise when recording in
- Страница 38 из 117
Changing the mode settings DEMO MODE* <ON/OFF> •Select ON to make the demonstration appear. •Select OFF to deactivate the demonstration mode. Notes on DEMO MODE •DEMO MODE is set to STBY (Standby) at the factory and the demonstration starts about 10 minutes after you set the POWER switch to CAMERA
- Страница 39 из 117
Changing the mode settings Изменение установок режимов Items for PLAYER mode only Установки только для режима PLAYER HiFi SOUND <STEREO/1/2> (CCD-TR840E/ TR845E only) •Normally select STEREO. •Select 1 or 2 to play back a dual sound track tape. HiFi SOUND <STEREO/1/2> (Только CCDTR840E/TR845E) •
- Страница 40 из 117
Shooting with backlighting When you shoot a subject with the light source behind the subject or a subject with a light background, use the BACK LIGHT function. Press BACK LIGHT. The c indicator appears in the viewfinder. Съемка с задней подсветкой Когда Вы снимаете объект с источником света позади
- Страница 41 из 117
Using the FADER function – CCD-TR511E/TR640E/TR840E/TR845E only Selecting the fader function You can fade in or out to give your recording a professional appearance. When the picture fades in, the sound gradually increases. When the picture fades out, the sound gradually decreases. STBY – Только
- Страница 42 из 117
Using the FADER function Использование фунции FADER Using the fader function Использование функции введения/ выведения изображения When fading in [a] (1) While the camcorder is in Standby mode, press FADER until the desired fade indicator flashes. (2) Press START/STOP to start recording. The fade
- Страница 43 из 117
Using the FADER function To cancel the fader function Before pressing START/STOP, press FADER until the indicator disappears. When the date or time indicator and title are displayed The date or time indicator and title do not fade in or fade out. Note on the fader function While using the bounce
- Страница 44 из 117
Cъемка в темных условиях (ночная съемка) – CCD-TR511E/TR640E/TR840E/TR845E only – Только CCD-TR511E/TR640E/TR840E/ TR845E The NightShot function enables you to shoot a subject in a dark place. You can achieve a satisfactory recording of the ecology of nocturnal animals for observation with this
- Страница 45 из 117
Using the wide mode function Использование функции широкоформатного режима Selecting the desired mode Выбор желаемого режима You can record a cinemalike picture (CINEMA) or a 16:9 wide picture to watch on the 16:9 widescreen TV (16:9 FULL). Вы можете записывать изображение как в кинотеатре (CINEMA)
- Страница 46 из 117
Using the wide mode function Using the wide mode function You can select the wide mode (OFF, CINEMA, 16:9FULL) in the menu system (p. 34). To cancel wide mode Использование функции широкоформатного режима Использование функции широкоформатного режима Вы можете выбрать широкоформатный режим (OFF,
- Страница 47 из 117
Using the PROGRAM AE function Использование функции PROGRAM AE Selecting the best mode Выбор наилучшего режима You can select one of six PROGRAM AE (Auto Exposure) modes to suit your shooting situation, referring to the following. A Spotlight mode For subjects in spotlight, such as at the theatre
- Страница 48 из 117
Using the PROGRAM AE function Использование функции PROGRAM AE Using the PROGRAM AE function Использование функции PROGRAM AE Turn the PROGRAM AE dial to select the desired PROGRAM AE mode. Поверните диск PROGRAМ AE для выбора желаемого режима PROGRAМ AE. A a a A To turn off program AE Set the
- Страница 49 из 117
Focusing manually – CCD-TR511E/TR640E/TR840E/TR845E only When to use manual focus In the following cases you should obtain better results by adjusting the focus manually. [b] •Insufficient light [a] •Subjects with little contrast - walls, sky, etc. [b] •Too much brightness behind the subject [c]
- Страница 50 из 117
Focusing manually Ручная фокусировка Focusing manually Ручная фокусировка When focusing manually, first focus in telephoto before recording, and then reset the shot length. (1) Set FOCUS to MANUAL. The f indicator appears in the viewfinder. (2) Move the power zoom lever to the “T” side in the
- Страница 51 из 117
Enjoying picture effect Наслаждение эффектами изображений Selecting picture effect Выбор эффекта изображения You can make pictures like those of television with the Picture Effect function. [a] [b] [c] Вы можете сделать изображение похожим на те, что передают по телевидению с помощью функции
- Страница 52 из 117
Наслаждение эффектами изображений Enjoying picture effect Using picture effect function Использование функции эффектов изображения (1) Press PICTURE EFFECT. (2) Turn the control dial to select the desired picture effect mode. 1 PICTURE EFFECT (1) Нажмите PICTURE EFFECT. (2) Поверните регулировочный
- Страница 53 из 117
Adjusting the exposure – CCD-TR511E/TR640E/TR840E/TR845E only When to adjust the exposure Adjust the exposure manually under the following cases. Регулировка экспозиции – Только CCD-TR511E/TR640E/TR840E/ TR845E Когда требуется регулировать экспозицию Отрегулируйте экспозицию вручную в следующих
- Страница 54 из 117
Adjusting the exposure Shooting with the sun behind you If the light source is behind your subject, or in the following situations, the subject will be recorded too dark. •The subject is indoors and there is a window behind the subject. •Bright light sources are included in the scene. •When
- Страница 55 из 117
Superimposing a title Наложение надписи You can select one of eight preset titles and two custom titles. You can also select the language, colour, size and position of titles. Вы можете выбирать из восьми предварительно установленных надписей и двух совбственных надписей. Вы можете также выбирать
- Страница 56 из 117
Superimposing a title To superimpose the title from beginning After step 7, press START/STOP to start recording. To superimpose the title while you are recording After pressing START/STOP to start recording, start from step 1. In this case, beep is not heard. To select the language of preset title
- Страница 57 из 117
Making your own titles 1 TITLE 2 3 Вы можете создать две надписи и сохранить их в памяти видеокамеры. Мы рекомендуем установить выключатель POWER в положение PLAYER или вытолкнуть кассету перед началом. Ваша надпись может иметь до 20 знаков. (1) Нажмите TITLE для отображения меню надписей. (2)
- Страница 58 из 117
Making your own titles To edit a title you have stored In step 3, select CUSTOM1 or CUSTOM2, depending on which title you want to edit, then change the title. Note You can not enter over 20 characters title. If you take 5 minutes or longer to enter characters while a cassette is in the camcorder
- Страница 59 из 117
Re-recording a picture in the middle of a recorded tape Перезапись изображения в середине записанной ленты [a] 1 [b] 3 EDITSEARCH 4 (1) Когда видеокамера находится в режиме готовности, держите нажатой сторону + (воспроизведение вперед) или сторону – (обратное воспроизведение) кнопки EDITSEARCH и
- Страница 60 из 117
Re-recording a picture in the middle of a recorded tape Notes on re-recording •The picture and the sound may be distorted at the end of the inserted portion when it is played back. •If you re-record on the portion which contains non-recorded section, the zero memory function may not work correctly.
- Страница 61 из 117
Optimizing the recording condition 1 MENU 2 Используйте данную функцию для проверки состояния ленты перед записью, так, чтобы Вы могли получить наилучшее по возможности изображение (ORC). (1) Когда видеокамера будет находится в режиме готовности, нажмите MENU для отображения меню. (2) Нажмите
- Страница 62 из 117
Releasing the STEADYSHOT function – CCD-TR640E/TR840E/TR845E only – Только CCD-TR640E/TR840E/TR845E When the Steady Shot function is working, the camcorder compensates for camera-shake. Когда работает функция устойчивой съемки, видеокамера осуществляет компенсацию дрожания видеокамеры. You can
- Страница 63 из 117
Searching the boundaries of recorded date Поиск границ записанных дат – Только CCD-TR845E You can search for the boundary between recording dates using the Data Code automatically recorded on the tape. There are two modes: •Searching for the beginning of a specific date, and playing back from there
- Страница 64 из 117
Searching the boundaries of recorded date Поиск границ записанных дат To scan the beginning of all days Для сканирования начала всех дат (1) Set the POWER switch to PLAYER. (2) Press DATE on the Remote Commander twice. (3) Press 0 or ). Date Scan starts. (1) Установите выключатель POWER в положение
- Страница 65 из 117
Returning to a preregistered position Возврат к предварительно зарегистрированной позиции – Только CCD-TR845E Using the Remote Commander, you can easily go back to the desired point on a tape after playback. Use the tape counter. If the RC time code appears, set COUNTER to NORMAL in the menu system
- Страница 66 из 117
Returning to a pre-registered position Notes on the tape counter •Something must be recorded on the tape in order for the tape counter to function. Tape counter does not work on a blank tape. •There may be a discrepancy of several seconds from the actual time. Notes on ZERO MEM •When you press ZERO
- Страница 67 из 117
Locating the marking position When marking during recording or playback Press INDEX MARK on the Remote Commander at the point you want to locate later. Нахождение отмеченной позиции При отметке во время записи или воспроизведения Нажмите INDEX MARK на пульте дистанционного управления в точке,
- Страница 68 из 117
Locating the marking position Scanning the beginning of each marking position – index scan (1) Press INDEX on the Remote Commander during normal playback. (2) Press 0 or ). The tape rewinds or advances rapidly and plays back for approximately 10 seconds from the point on which the index signal was
- Страница 69 из 117
Locating the marking position Locating the desired marking position – index search (1) Press INDEX on the Remote Commander during stop or playback mode. (2) Press INDEX repeatedly until the index number of the desired programme is displayed in the viewfinder. (3) Press 0 or ). Playback starts from
- Страница 70 из 117
Locating the marking position Нахождение отмеченной позиции Erasing an index signal Стирание индексного сигнала (1) Locate the index signal to be erased using the index scan or index search function. (2) Press ERASE on the Remote Commander within 2 to 10 seconds while the desired programme plays
- Страница 71 из 117
Запись временного кода RC на записанной ленте Writing the RC time code on a recorded tape – Только CCD-TR845E You can write the RC time code on a recorded tape. Use the Remote Commander. Before you begin, we recommend to set COUNTER to TIME CODE in the menu system so that you can view the RC time
- Страница 72 из 117
Writing the RC time code on a recorded tape Запись временного кода RC на записанной ленте To write the RC time code from the end of the RC time code recorded portion Для записи временного кода RC от конца записанной части с временным кодом RC Rewind the tape to the portion on which the RC time code
- Страница 73 из 117
Editing onto another tape You can create your own video programme by editing with any other h 8 mm, H Hi8, j VHS, k S-VHS, VHSC, K S-VHSC or l Betamax VCR that has video/audio inputs. Before editing Вы можете создать Вашу собственную видеопрограмму путем монтажа с помощью другого КВМ типа h 8 мм,
- Страница 74 из 117
Additional information Changing the lithium battery in the camcorder Your camcorder is supplied with a lithium battery installed. When the battery becomes weak or dead, the I indicator flashes in the viewfinder for about 5 seconds when you set the POWER switch to CAMERA. In this case, replace the
- Страница 75 из 117
Changing the lithium battery in the camcorder Замена литиевой батарейки в видеокамере Changing the lithium battery Замена литиевой батарейки 1 2 При замене литиевой батарейки, оставьте подсоединенным батарейный блок или другой источник питания. В противном случае Вам понадобится снова устанавливать
- Страница 76 из 117
Resetting the date and time You can reset the date and time in the menu system. (1) While the camcorder is in Standby mode, press MENU to display the menu. (2) Turn the control dial to select , then press the dial. (3) Turn the control dial to select CLOCK SET, then press the dial. (4) Turn the
- Страница 77 из 117
Resetting the date and time To correct the date and time setting Repeat the above procedure. Установка даты и времени Для корректировки установки даты и времени Повторите вышеописанную процедуру. The year changes as follows: n Note on the time indicator The internal clock of this camcorder operates
- Страница 78 из 117
Simple setting of clock by time difference You can easily set the clock for a local time by a time difference in the menu system. (1) While the camcorder is the standby mode, press MENU to display the menu. (2) Turn the control dial to select , then press the dial. (3) Turn the control dial to
- Страница 79 из 117
Usable cassettes and playback modes Используемые кассеты и режимы воспроизведения Selecting cassette types Выбор типа кассеты What is Video 8 /video Hi8 “XR” is an abbreviation of “Extended Resolution”. The video Hi8 XR or video 8 XR camcorders is new type of 8mm camcorder with a picture quality
- Страница 80 из 117
Usable cassettes and playback modes Используемые кассеты и режимы воспроизведения When you play back Когда Вы осуществляете воспроизведение The playback mode (SP/LP) and system (Hi8/ standard 8 mm) are selected automatically according to the format in which the tape has been recorded. The quality
- Страница 81 из 117
Tips for using the battery pack This section shows you how you can get the most out of your battery pack. Preparing the battery pack Always carry additional batteries Советы по использованию батарейного блока Данный раздел показывает, как Вы можете получить наибольшую отдачу от Вашего батарейного
- Страница 82 из 117
Tips for using the battery pack Советы по использованию батарейного блока Notes on the rechargeable battery pack Примечания к перезаряжаемому батарейному блоку Caution Предостережение Never leave the battery pack in temperatures above 60°C (140°F), such as in a car parked in the sun or under direct
- Страница 83 из 117
Tips for using the battery pack Советы по использованию батарейного блока Notes on the “InfoLITHIUM” battery pack Примечания к батарейному блоку “InfoLITHIUM” Что такое “InfoLITHIUM” The “InfoLITHIUM” is a lithium ion battery pack which can exchange data with compatible video equipment about its
- Страница 84 из 117
Tips for using the battery pack To obtain more accurate remaining battery indication Set the camcorder to recording standby mode and point towards a stationary object. Do not move the camcorder for 30 seconds or more. •If the indication seems incorrect, recharge the battery pack fully (Full
- Страница 85 из 117
Maintenance information and precautions Информация по уходу за аппаратом и предосторожности Moisture condensation Конденсация влаги Inside the camcorder If there is moisture inside the camcorder, the beep sounds and the { indicator flashes. If this happens, none of the functions except cassette
- Страница 86 из 117
Maintenance information and precautions Информация по уходу за аппаратом и предосторожности Video head cleaning Очистка видеоголовок To ensure normal recording and clear pictures, clean the video heads. When the v˚ indicator and “ CLEANING CASSETTE” message appear one after another or playback
- Страница 87 из 117
Maintenance information and precautions Информация по уходу за аппаратом и предосторожности Removing dust from inside the viewfinder Удаление пыли из видоискателя (1) Remove the screw with a screwdriver (not supplied). Then, while sliding the RELEASE knob, turn the eyecup in the direction of the
- Страница 88 из 117
Maintenance information and precautions Информация по уходу за аппаратом и предосторожности Precautions Предосторожности Camcorder operation Эксплуатация видеокамеры •Operate the camcorder on 7.2 V (battery pack) or 8.4 V (AC power adaptor). •For DC or AC operation, use the accessories recommended
- Страница 89 из 117
Maintenance information and precautions •Do not let sand get into the camcorder. When you use the camcorder on a sandy beach or in a dusty place, protect it from the sand or dust. Sand or dust may cause the unit to malfunction, and sometimes this malfunction cannot be repaired. AC power adaptor •
- Страница 90 из 117
Maintenance information and precautions Информация по уходу за аппаратом и предосторожности Notes on dry batteries Примечания к сухим батарейкам To avoid possible damage from battery leakage or corrosion, observe the following. •Be sure to insert the batteries in the correct direction. •Dry
- Страница 91 из 117
Using your camcorder abroad Each country or area has its own electric and TV colour systems. Before using your camcorder abroad, check the following points. Power sources You can use your camcorder in any country or area with the supplied AC power adaptor within 100 V to 240 V AC, 50/60 Hz.
- Страница 92 из 117
English Trouble check If you run into any problem using the camcorder, use the following table to troubleshoot the problem. Should the difficulty persist, disconnect the power source and contact your Sony dealer or local authorized Sony service facility. Camcorder Power Symptom Cause and/or
- Страница 93 из 117
Trouble check Symptom Cause and/or Corrective Actions • The START/STOP MODE switch is set to 5SEC or . . (p. 19) m Set it to The cassette cannot be removed from • The battery is dead. the holder. m Use a charged battery pack or the AC power adaptor. (p. 9, 32) { and 6 indicators flash and no •
- Страница 94 из 117
Trouble check Picture Symptom The image on the viewfinder screen is not clear. A vertical band appears when a subject such as lights or a candle flame is shot against a dark background. Cause and/or Corrective Actions • The viewfinder lens is not adjusted. m Adjust the viewfinder lens. (p. 15) •
- Страница 95 из 117
Русский Проверка неисправностей Если у Вас возникла какая-либо проблема при использовании видеокамеры, воспользуйтесь следующей таблицей для отыскания и устранения проблемы. Если трудности все еще остаются, то отсоедините источник питания и обратитесь к Вашему дилеру Sony или на местное
- Страница 96 из 117
Проверка неисправностей Признак Причина и/или действия по устранению • Переключатель START/STOP MODE установлен в . положение 5SEC или m Установите его в положение . (стр. 19) • Батарейный блок полностью разряжен. Кассета не может быть вынута из держателя. m Используйте заряженный батарейный блок
- Страница 97 из 117
Проверка неисправностей Изображение Признак Причина и/или действия по устранению • Объектив видоискателя не отрегулирован m Отрегулируйте объектив видоискателя. (стр. 15) • Слишком высокий контраст между объектом и фоном. Вертикальная полоса появляется, если такие объекты, как источники Видеокамера
- Страница 98 из 117
Self-diagnosis display The camcorder has a self-diagnosis display. This function displays the camcorder‘s condition with five digits (a combination of a letter and figures) in the viewfinder or in the display window. If this occurs, check the following code chart. The five-digit display informs you
- Страница 99 из 117
Русский Дисплей самодиагностики Видеокамера имеет дисплей самодиагностики. Данная функция отображает состояние видеокамеры с помощью пяти знаков (комбинация буквы и цифр) в видоискателе или в окошке дисплея. Если это случится, проверьте следующую кодовую таблицу. Последние две цифры (указанных как
- Страница 100 из 117
English Specifications Video camera recorder System Video recording system 2 rotary heads Helical scanning FM system Audio recording system Rotary heads, FM system Video signal PAL colour, CCIR standards Usable cassette 8mm video format cassette CCD-TR411E/TR412E/TR511E/ TR640E: Standard 8
- Страница 101 из 117
Specifications General AC power adaptor Power requirements 7.2 V (battery pack) 8.4 V (AC power adaptor) Power requirements 100 - 240 V AC, 50/60 Hz Average power consumption (when using the battery pack) During camera recording CCD-TR411E/TR412E/TR511E: 2.5 W CCD-TR640E: 2.6 W CCD-TR840E/TR845E:
- Страница 102 из 117
Русский Технические характеристики Видеокамера Система Система видеозаписи 2 вращающиеся головки Система ЧМ наклонной механической развертки Система аудиозаписи Вращающиеся головки, система ЧМ Видеосигнал Цветовой сигнал PAL, стандарт CCIR Используемые кассеты Кассеты 8-мм видеоформата
- Страница 103 из 117
Технические характеристики Общее Сетевой адаптер перем. тока Требования к питанию 100 - 240 В перем. тока, 50/60 Гц Средняя потребляемая мощность Потребляемая мощность 23 Вт (При использовании батарейного блока) Во время записи видеокамерой с использованием CCD-TR411E/TR412E/TR511E: 2,5 Вт
- Страница 104 из 117
Identifying the parts Опознавание частей 1 7 8 2 9 !º 3 4 !¡ 5 !™ !£ 6 1 EDITSEARCH button (p. 22) 1 Кнопка EDITSEARCH (стр. 22) 2 Intelligent accessory shoe (CCD-TR840E/ TR845E only) (p. 111)/Accessory shoe (CCDTR511E/TR640E only) 2 Башмак для установки вспомогательного оборудования (только
- Страница 105 из 117
Опознавание частей Identifying the parts !¶ !• !¢ @™ !∞ @£ !§ !¢ Remote sensor (CCD-TR412E/TR511E/ TR640E/TR840E/TR845E only) (p. 109) Aim the Remote Commander here for remote control. !∞ Camera recording/battery lamp (p. 14) !§ Microphone !¶ Video control buttons (p. 26) p STOP (stop) 0 REW
- Страница 106 из 117
Identifying the Parts Опознавание частей #¡ #™ @¢ @∞ #£ @§ #¢ @¶ #∞ @• #§ #¶ @ª #º @¢ Viewfinder lens adjustment ring (p. 15) @∞ Viewfinder (p. 15) @§ Battery mounting surface @¶ EXPOSURE button (CCD-TR511E/TR640E/ TR840E/TR845E only) (p. 53) @¢ Кольцо регулировки объектива видоискателя (стр. 15)
- Страница 107 из 117
Identifying the Parts Опознавание частей #ª $º $¡ $∞ $§ $£ $¶ $¢ $• #ª EJECT switch (p. 13) #ª Выключатель EJECT (стр. 13) $º LANC l control jack l stands for Local Application Control Bus System. The l control jack is used for controlling the tape transport of video equipment and peripherals
- Страница 108 из 117
Identifying the Parts Опознавание частей Remote Commander Пульт дистанционного управления – CCD-TR412E/TR511E/TR640E/TR840E/TR845E only The buttons that have the same name on the Remote Commander as on the camcorder function identically. – Только TR412E/TR511E/TR640E/TR840E/ TR845E Кнопки пульта
- Страница 109 из 117
Identifying the parts To prepare the Remote Commander Insert two R6 (size AA) batteries by matching the + and – on the batteries to the diagram inside the battery compartment. Примечания к пульту дистанционного управления • Держите дистанционный датчик подальше от сильных источников света, как
- Страница 110 из 117
Identifying the parts Опознавание частей Attaching the shoulder strap Прикрепление плечевого ремня Attach the supplied shoulder strap to the hooks for the shoulder strap . 1 2 Прикрепите прилагаемый плечевой ремень к скобам для плечевого ремня. 3 To watch the demonstration Для просмотра
- Страница 111 из 117
Identifying the parts Примечание к башмаку для установки вспомогательного оборудования – Только CCD-TR840E/TR845E Подает питание на дополнительное вспомогательное оборудование, как например видеофонарь или микрофон. Башмак для установки вспомогательного оборудования связан с переключателем STANDBY,
- Страница 112 из 117
Identifying the parts Опознавание частей Operation indicators Рабочие индикаторы Viewfinder/Видоискатель 1 2 3 4 5 6 7 8 W 40min H SP STBY Display window/Окошко дисплея !£ @¡ @¢ !¢ 2 !¢ 0:00:00 !∞ INDEX MARK !§ @∞ T M.FADER CINEMA SEPIA c„ f AUTO DATE 12:00:00 9 !º !¡ !™ !¶ 1 !• @£ 3 !ª @º @¡ @™ 1
- Страница 113 из 117
Опознавание частей Identifying the parts !∞ Tape counter (p. 16)/RC time code indicator (CCD-TR845E only) (p. 71)/Self-diagnosis functions indicator (p. 98)/5SEC mode indicator (p. 19) !§ Remaining tape indicator !∞ Индикатор счетчика ленты (стр. 16)/ временного кода RC (только CCDTR845E) (стр.
- Страница 114 из 117
Предупреждающие индикаторы Warning indicators Если индикаторы мигают или предупреждающие сообщения появляются на экране ЖКД или в видоискателе, то проверьте следующее: ≥≥... :Вы можете слышать зуммерный звуковой сигнал, когда функция BEEP установлена на ON в системе меню. If indicators flash in the
- Страница 115 из 117
Index A, B F, G, H S Adjusting viewfinder ............ 15 AFM HiFi Sound .............. 39, 80 ANTI GROUND SHOOTING ............................................... 19 Auto focus ............................... 50 Backlight ................................. 40 Beep
- Страница 116 из 117
Алфавитный указатель А, Б, В П, Р A, B, C, D Автоматическая фокусировка ............................................... 50 Автомобильный аккумулятор .......................................... 32 Временной код ............ 35, 71 Временной код RC ............ 71 Пауза воспроизведения ... 28
- Страница 117 из 117